Kia Niro: Hybrid Control System / Hybrid Power Control Unit (HPCU) Repair procedures
| Removal |
|

Hybrid Power Control Unit (HPCU)
| 1. |
Shut off the high voltage circuit. (Refer to Hybrid Control System - “High Voltage Shutoff Procedure”) |
| 2. |
Remove the air cleaner assembly and air duct. (Refer to Engine Mechanical System - "Air Cleaner") |
| 3. |
Remove the ECM & TCM bracket assembly. (Refer to Engine Control/Fuel System - "Engine Control Module") |
| 4. |
Drain the coolant of hybrid motor cooling system. (Refer to Hybrid Motor Cooling System - "Coolant") |
| 5. |
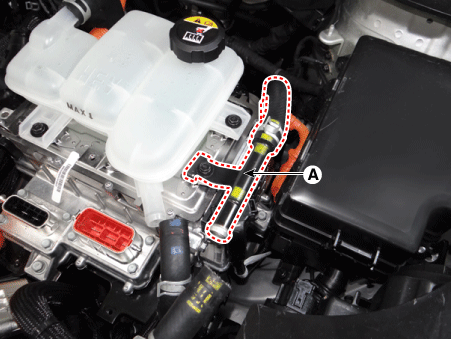
Remove the HPCU protector (A) after loosening the mounting bolts.
|

| 6. |
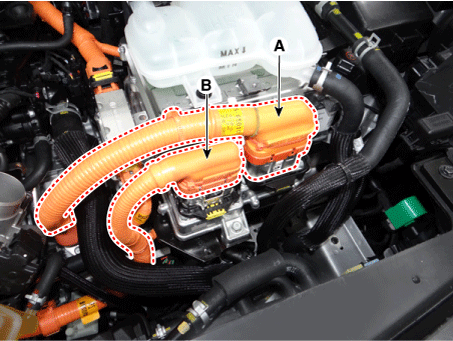
Disconnect the motor power cable connector (A) and HSG power cable connector (B).
|
| 7. |
Disconnect the power cable (A) [↔ High voltage battery system assembly] and power cable (B) [↔ HSG & Electric A/C compressor].
|
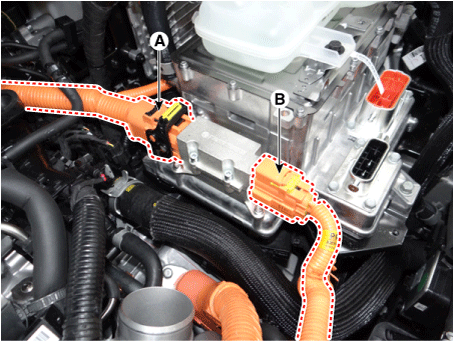

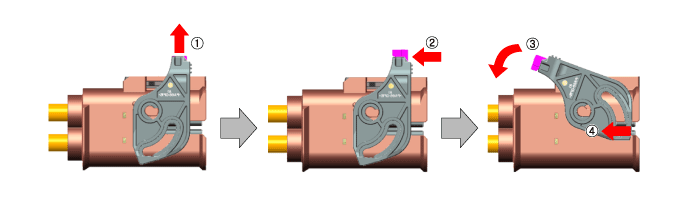
| 8. |
Disconnect the HCU & inverter (MCU) connector (A).
|

| 9. |
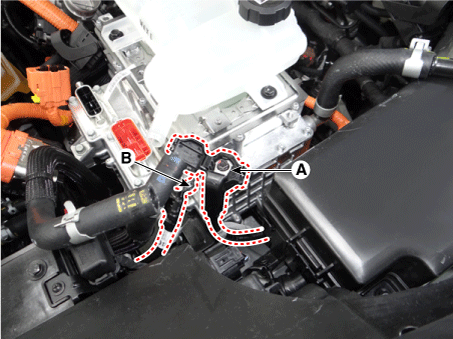
Disconnect the coolant outlet hose & pipe (A) after loosening the mounting bolt.
|
| 10. |
Disconnect the LDC power output cable (A) and LDC ground (-) cable (C) after loosening the mounting bolt and nut.
|
| 11. |
Remove the HPCU (B) after loosening the mounting bolts.
|

| 12. |
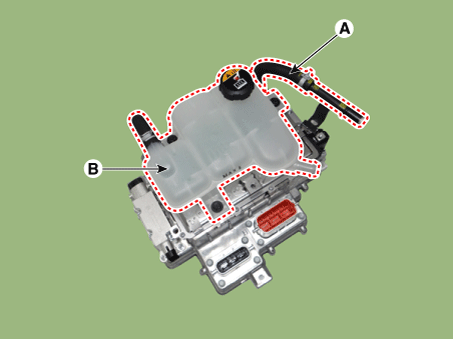
Remove the coolant hose & pipe (A) from the HPCU. |
| 13. |
Remove the reservoir (B) after loosening the mounting bolts.
|
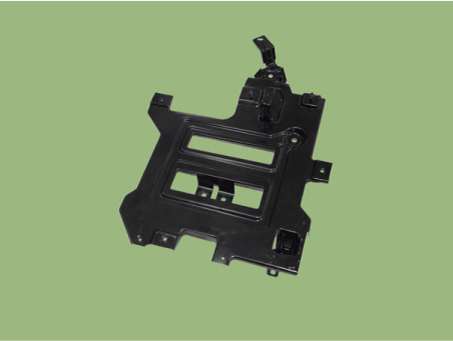
Hybrid Power Control Unit (HPCU) Tray
| 1. |
Remove the hybrid power control unit. (Refer to Hybrid Control System - "Hybrid Power Control Unit (HPCU)") |
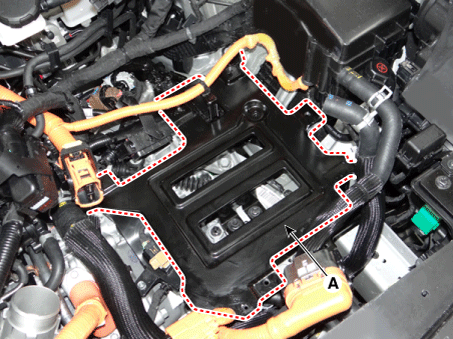
| 2. |
Remove the hybrid power control unit tray (A) after loosening the mounting bolts.
|
| Installation |
|
| 1. |
Install the HPCU in the reverse order of removal. |
| 2. |
Refill the hybrid motor cooling system coolant and perform air bleeding by using the KDS/GDS. (refer to Hybrid Motor Cooling System - "Coolant"). |
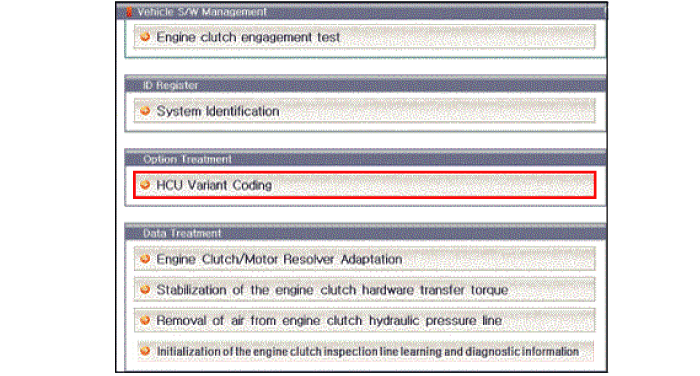
| Adjustment |
Perform HCU Variant Coding and Engine Clutch / Motor Resolver learning after replacing the HPCU. |

| HCU Variant Coding |
| 1. |
Switch "OFF" the ignition. |
| 2. |
Connect the KDS / GDS to Data Link Connector (DLC). Switch "ON" the ignition. |
| 3. |
Select "Vehicle, Model year, Engine, System". |
| 4. |
Select "Vehicle S/W Management". |
| 5. |
Select "HCU Variant Coding".
|
| Engine Clutch / Motor Resolver learning procedure |
Perform Engine Clutch / Motor Resolver learning after replacing the HPCU.
(Refer to Clutch System - "Engine Clutch Actuator")
 Hybrid Power Control Unit (HPCU) Schematic diagrams
Hybrid Power Control Unit
(HPCU) connector and high voltage cable
Hybrid Power Control Unit
(HPCU) terminal And Input/Output signal
ECM Terminal Functi ...
 Hybrid Control Unit (HCU) Schematic diagrams
HCU Terminal And Input/Output
Signal
Terminal Function
Connector [C133-S]
Pin No.
Description
Connected to
1
...
Other information:
Kia Niro 2017 (DE HEV) Service Manual: Heated Oxygen Sensor (HO2S) Repair procedures
Inspection
1.
Switch "OFF" the ignition.
2.
Disconnect the HO2S connector.
3.
Measure resistance between the HO2S terminals 4 and 5 [B1/S1].
Specification: 2.5 - 4.0Ω [20°C(68°F)]
...
Kia Niro 2017 (DE HEV) Service Manual: Active Air Flap (AAF) Repair procedures
Removal and Installation
1.
Remove the air duct.
(Refer to Intake and Exhaust System - "Air Cleaner")
2.
Remove the front bumper cover.
(Refer to Body (Interior and Exterior) - "Front Bumper Cover")
3 ...
