Kia Niro: Lighting System / Rheostat Repair procedures
| Removal |
| 1. |
Disconnect the negative (-) battery terminal. |
| 2. |
Remove the crash pad lower panel. (Refer to Body - "Crash Pad Lower Panel") |
| 3. |
Remove the crash pad plate [LH] (A) after loosening the screws.
|
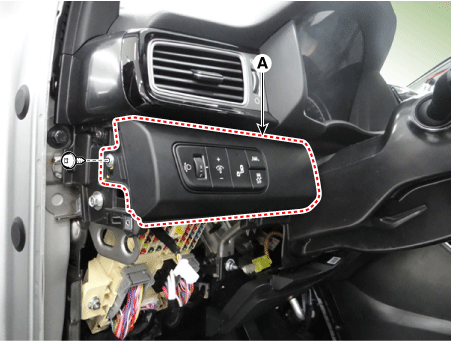
| 4. |
Disconnect the crash pad side switch connector (A).
|
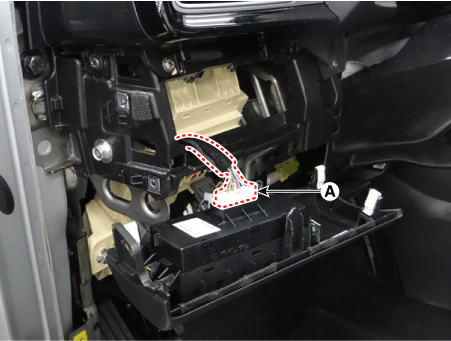
| 5. |
Remove the crash pad side switch (A) after loosening the screws.
|
| Installation |
| 1. |
Install the crash pad side switch. |
| 2. |
Connect the crash pad side switch connector. |
| 3. |
Install the crash pad plate [LH]. |
| 4. |
Install the crash pad lower panel. |
| 5. |
Connect the negative (-) battery terminal. |
| Inspection |
| 1. |
Check for intensity of new rheostat switch. If the light intensity of the lamps changes smoothly without any flickering when the rheostat is turned, it can be assumed that the rheostat is normal.
|
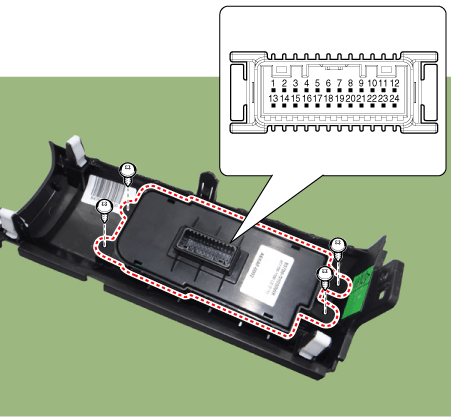

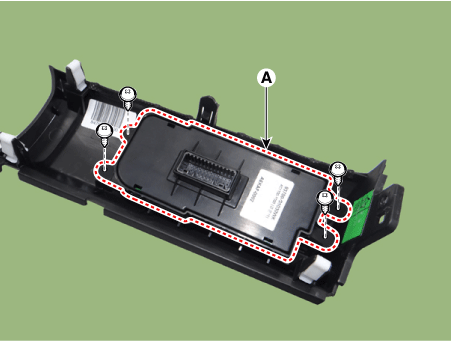
 Rheostat Components and components location
Components
...
 Front Fog Lamps Repair procedures
Removal
1.
Disconnect the negative (-) battery terminal.
2.
Remove the front bumper cover.
(Refer to Body - "Front Bumper Cover")
...
Other information:
Kia Niro (DE HEV) Owners Manual: Safety chains
You should always attach chains between your vehicle and your trailer. Cross
the safety chains under the tongue of the trailer so that the tongue will not drop
to the road if it becomes separated from the hitch.
Instructions about safety chains may be provided by the hitch manufacturer or
by ...
Kia Niro 2017 (DE HEV) Service Manual: Front Strut Assembly Components and components location
Components
1. Strut assembly
2. Insulator
3. Bearing
4. Spring upper pad
5. Spring
6. Dust cover
7. Spring lower pad
...
