
Kia Niro: AHB(Active Hydraulic Boost) System / Rear Disc Brake Repair procedures
| Removal |
| 1. |
Remove the wheel & tire. |
| 2. |
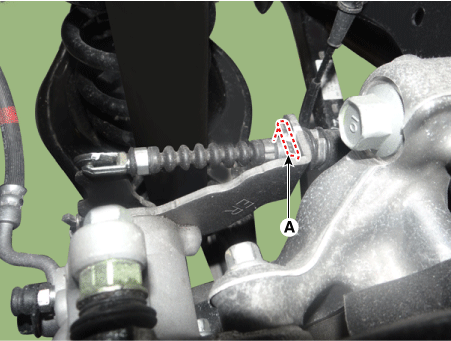
Remove the parking brake cable pin (A).
|
| 3. |
Rotates the nut (A) in the counterclockwise direction and then remove the parking cable.
|
| 4. |
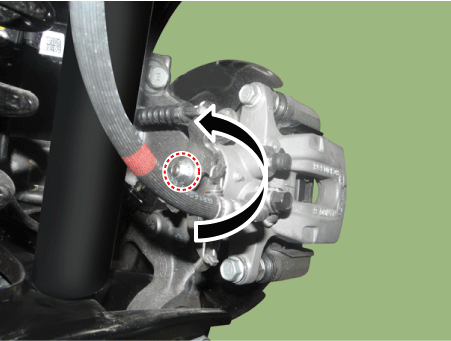
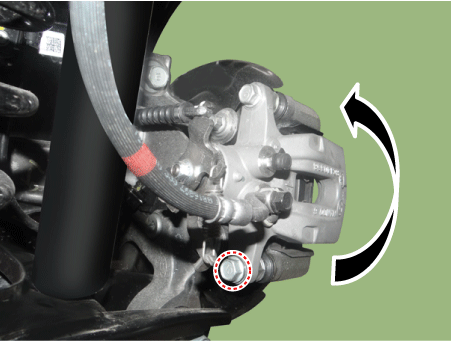
Loosen the guide rod bolt (B) and pivot the caliper (A) up out of the way.
|
| 5. |
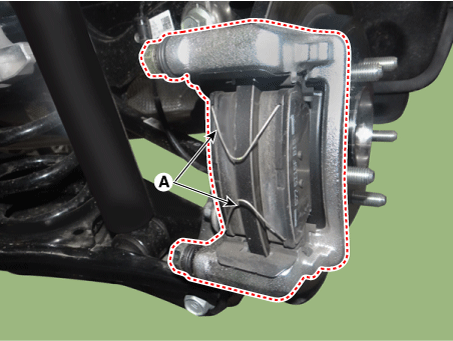
Remove the pad return spring (A), brake pad and rear caliper.
|

| 6. |
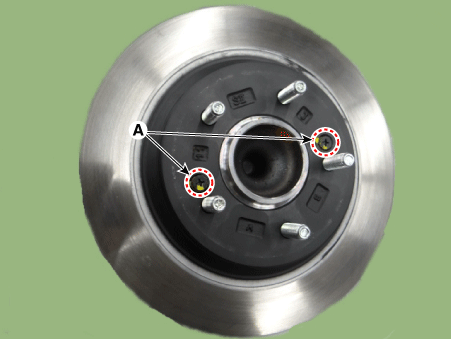
Loosen the screw and then remove the brake disk (A).
|
| Inspection |
Rear Brake Disc Thickness Check
| 1. |
Check the brake pads for wear and fade. |
| 2. |
Check the brake disc for damage and cracks. |
| 3. |
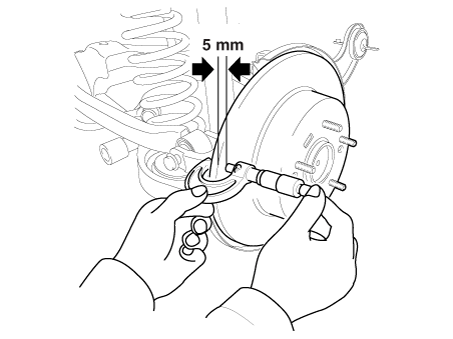
Remove all rust and contamination from the surface, and measure the disc thickness at 8 points, at least, of same distance (5mm) from the brake disc outer circle.
|
| 4. |
If wear exceeds the limit, replace the discs and pad assembly left and right of the vehicle. |
Rear Brake Pad Check
| 1. |
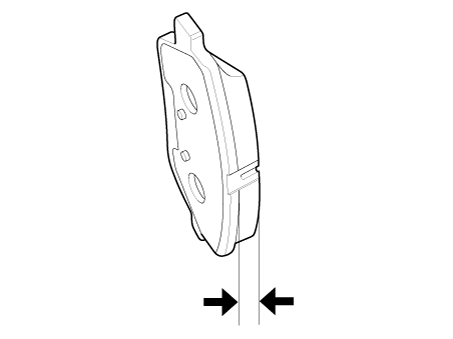
Check the pad wear. Measure the pad thickness and replace it, if it is less than the specified value.
|
| 2. |
Check that grease is applied, to sliding contact points. Check for metal damage to the pad and backing.
|
Rear Brake Disc Runout Check
| 1. |
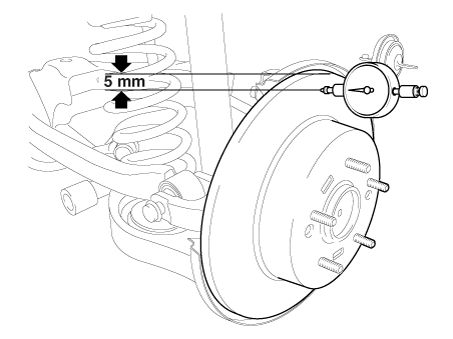
Place a dial gauge about 5mm (0.2 in.) from the outer circumference of the brake disc, and measure the runout of the disc.
|
| 2. |
If the runout of the brake disc exceeds the limit specification, replace the disc, and then measure the runout again. |
| 3. |
If the runout does not meet the limit specification, remove the disc, turn it 180° and reinstall. Then check the runout of the brake disc again. |
| 4. |
If the runout cannot be corrected by changing the position of the brake disc, replace the brake disc. |
| Installation |
| 1. |
Installation is the reverse of removal. |
| 2. |
Use a SST (09580-0U000) when installing the brake caliper assembly.
|
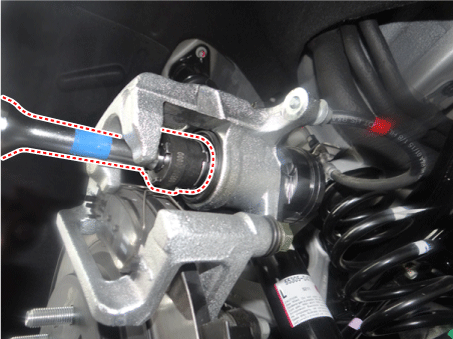
| 3. |
After filling the brake fluid in the reservoir, perform the air bleed. (Refer to the Brake system - "Brake Bleeding Procedure") |
 Rear Disc Brake Components and components location
Components
1. Return spring
2. Operating lever
3. Stopper
4. Caliper body
5. Caliper carrier
6. Pad retainer
7. Brake pad
...
 Stop Lamp Switch Components and components location
Components
1. Pedal stroke sensor
2. Stop lamp switch
3. Brake pedal arm
...
Other information:
Kia Niro 2017 (DE HEV) Service Manual: Rear Seat Cushion Cover Repair procedures
Replacement
Put on gloves to protect your hands.
•
Use a plastic panel removal tool to remove interior trim pie ...
Kia Niro 2017 (DE HEV) Service Manual: CVVT Oil Control Valve (OCV) Specifications
Specification
Item
Specification
Coil Resistance (Ω)
6.9 - 7.9 [20°C(68°F)]
Rated Voltage (V)
12
pin
2
...
