
Kia Niro: Lubrication System / Oil Pump Repair procedures
| Removal and Installation |
| 1. |
Remove the timing chain cover. (Refer to Timing System – “Timing Chain Cover”) |
| 2. |
Remove the oil level gauge pipe. (Refer to Lubrication System - "Oil Level Gauge & Pipe") |
| 3. |
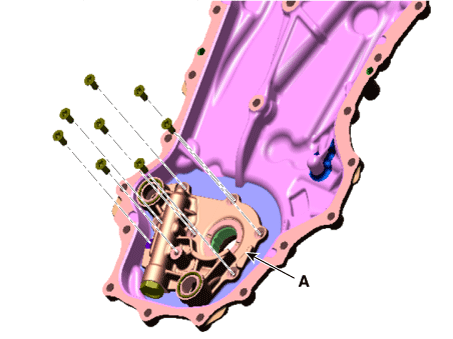
Remove the oil pump cover (A).
|
| 4. |
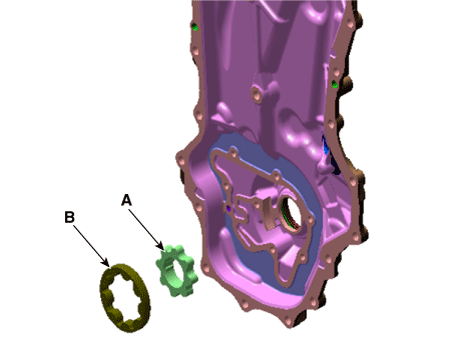
Remove the inner rotor (A) and outer rotor (B).
|
| 5. |
Install in the reverse order of removal. |
| Inspection |
| 1. |
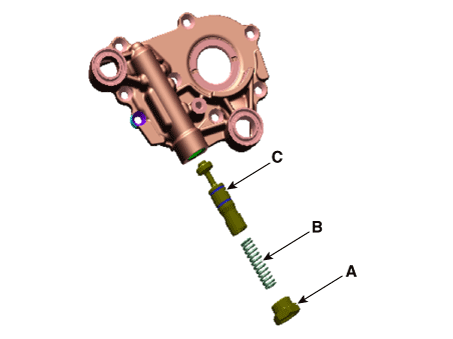
Remove the relief plunger. Remove the plug (A), spring (B) and relief plunger (C).
|
| 2. |
Inspect the relief plunger. Coat the plunger with engine oil and check that it falls smoothly into the plunger hole by its own weight. If necessary, replace timing chain cover. |
| 3. |
Inspect the relief valve spring. Inspect for distortion or breakdown of the relief valve spring. |
| 4. |
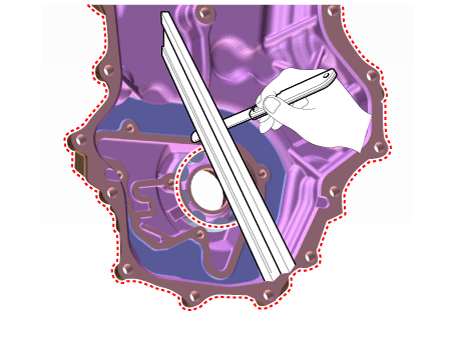
Inspect the rotor side clearance. Using a feeler gauge and precision straight edge, measure the clearance between the inner rotors and precision straight edge. If the side clearance is greater than maximum, replace the rotors as a set. If necessary, replace the timing chain cover.
|
| 5. |
Inspect the rotor body clearance. Using a feeler gauge, measure the clearance between the outer rotor and body. If the body clearance is greater than maximum, replace the rotors as a set. If necessary, replace the timing chain cover.
|
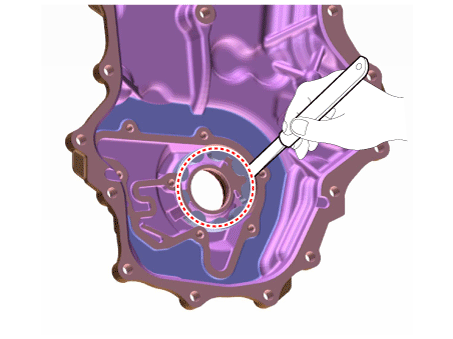
| 6. |
Inspect the rotor guide clearance.
|
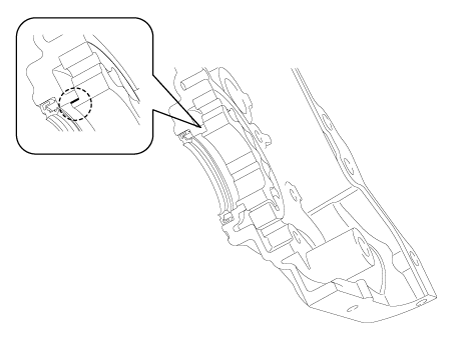
 Oil Pump Components and components location
Components
1. Timing chain cover
2. Outer rotor
3. inner rotor
4. Oil pump cover
5. O-ring
6. Relief plunger
7. Relief spring
8. Relie ...
 Oil Pan Components and components location
Components
1. Oil pan
2. Drain plug gasket
3. Drain plug
4. Oil screen
5. Oil screen gasket
...
Other information:
Kia Niro 2017 (DE HEV) Service Manual: Virtual Engine Sound Speaker Repair procedures
Removal
1.
Disconnect the negative(-) battery terminal.
2.
Remove the front bumper cover.
(Refer to Body - "Front Bumper Cover")
3.
Remove the high pitch horn and low pitch horn.
(Refer to Body Electric ...
Kia Niro (DE HEV) Owners Manual: Tilt & telescopic steering
A tilt and telescopic steering wheel allows you to adjust the steering wheel
before you drive.You can also raise it to give your legs more room when you exit
and enter the vehicle.
The steering wheel should be positioned so that it is comfortable for you to
drive, while permitting you to see ...
