
Kia Niro: Heater / Heater Unit Repair procedures
| Replacement |
When prying with a flat-tip screwdriver or a prying trim tool, wrap a protective tape around the related parts and the tool to prevent damage. |

| 1. |
Disconnect the negative (-) battery terminal. |
| 2. |
Recover the refrigerant with a recovery / recycling / charging station.
|

| 3. |
When the engine is cool, drain the engine coolant from the radiator. (Refer to Engine Mechanical System - “Coolant”) |
| 4. |
Remove the cowl top cover. (Refer to Body - "Cowl Top Cover") |
| 5. |
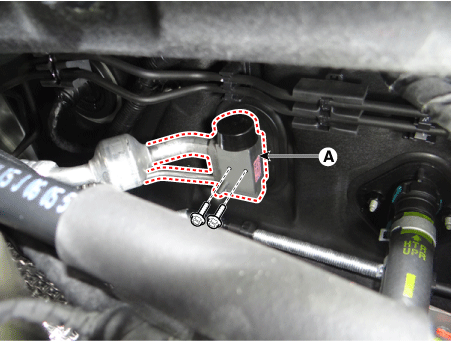
Remove the expansion valve cover (A) after loosening the bolt.
|

| 6. |
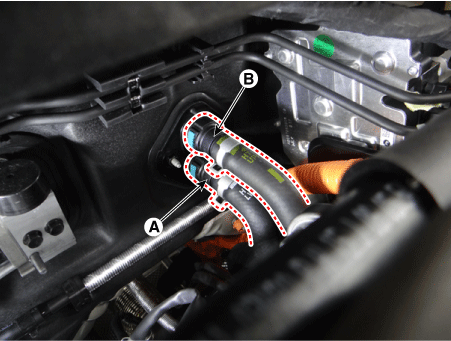
Remove the inlet (A) and outlet (B) heater hoses from the heater core.
|
| 7. |
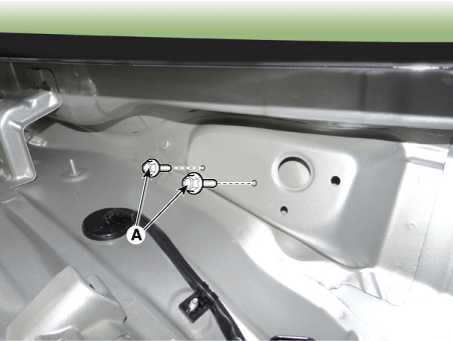
Loosen the cowl cross bar assembly mounting bolts (A).
|
| 8. |
Remove the front seat assemblies on both sides. (Refer to Body - "Front Seat Assembly") |
| 9. |
Remove the floor console. (Refer to Body - "Floor Console") |
| 10. |
Remove the front pillar trims on both sides. (Refer to Body - "Front Pillar Trim") |
| 11. |
Remove the cowl side trims on both sides. (Refer to Body - "Cowl Side Trim") |
| 12. |
Remove the crash pad lower panel. (Refer to Body - "Crash Pad Lower Panel") |
| 13. |
Remove the steering column shroud lower panel. (Refer to Body - "Steering Column Shroud Panel") |
| 14. |
Remove the steering wheel. (Refer to Steering System - "Steering Wheel") |
| 15. |
Remove the multifunction switch. (Refer to Body Electrical System - "Multifunction Switch") |
| 16. |
Lower the steering column after loosening the mounting bolts. (Refer to Steering System - "Steering Column and Shaft") |
| 17. |
Remove the front door scuff trim. (Refer to Body - "Door Scuff Trim") |
| 18. |
Remove the shift lever assembly. (Refer to Manual Transaxle System - "Shift Lever") (Refer to Automatic Transaxle System - "Shift Lever") |
| 19. |
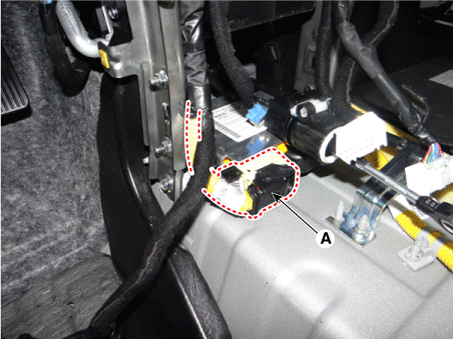
Disconnect the airbag control module (SRSCM) connector (A).
|
| 20. |
Remove the rear duct (A). [LH]
[RH]
|
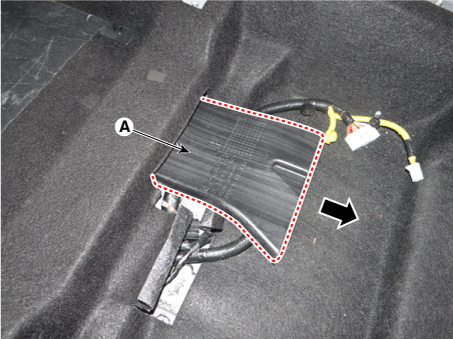
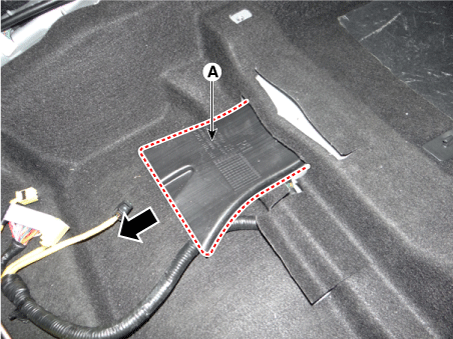
| 21. |
Put away the floor carpet (A). [Driver side]
[Passenger side]
|
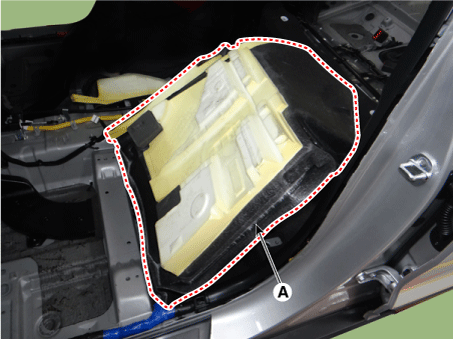
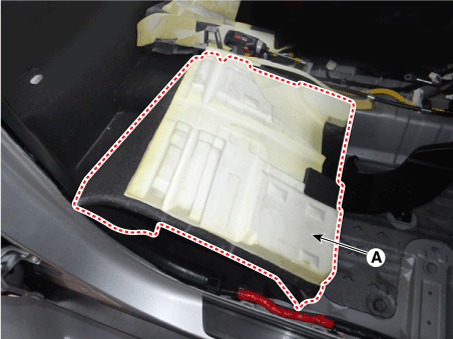
| 22. |
Remove the mounting bolt and remove the rear heating ducts (A). [Driver side]
[Passenger side]
|
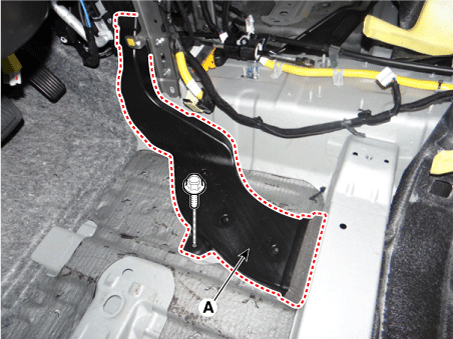
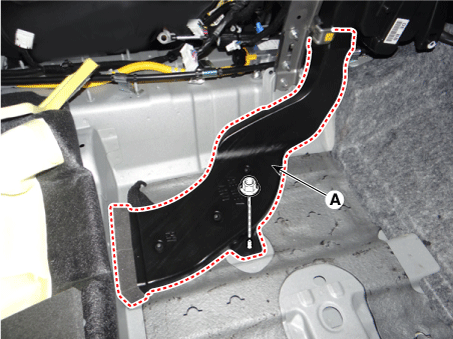
| 23. |
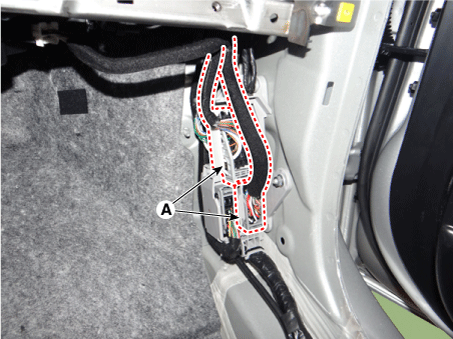
Disconnect the passenger compartment junction box connectors (A).
|
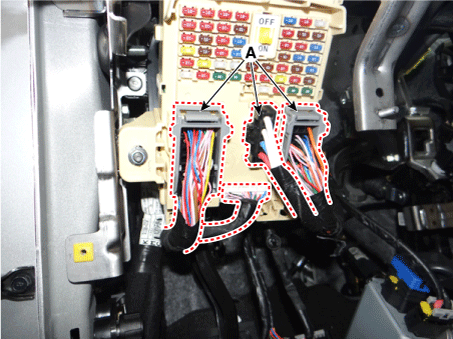
| 24. |
Disconnect the multi box connectors (A). [LH]
[RH]
|
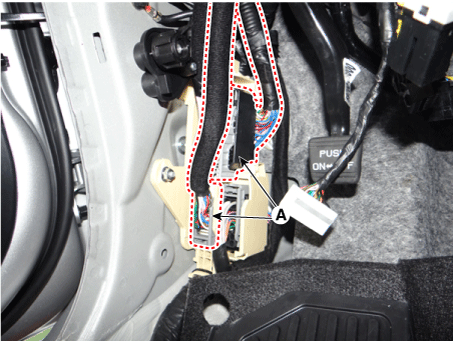
| 25. |
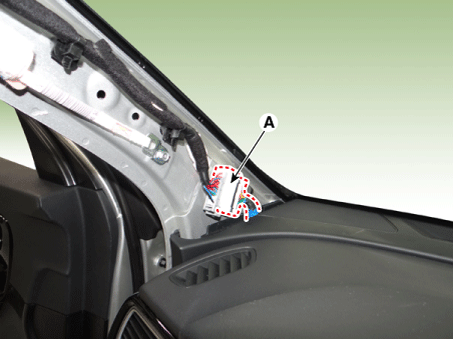
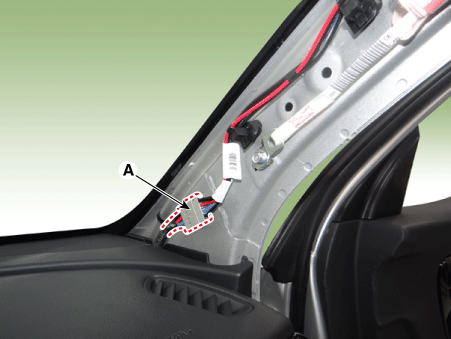
Disconnect the connector (A) and the mounting clips in the front pillar. [LH]
[RH]
|
| 26. |
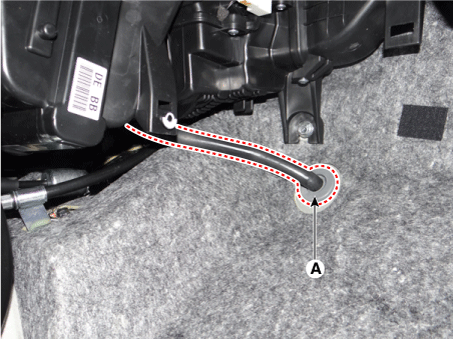
Remove the drain hose (A).
|
| 27. |
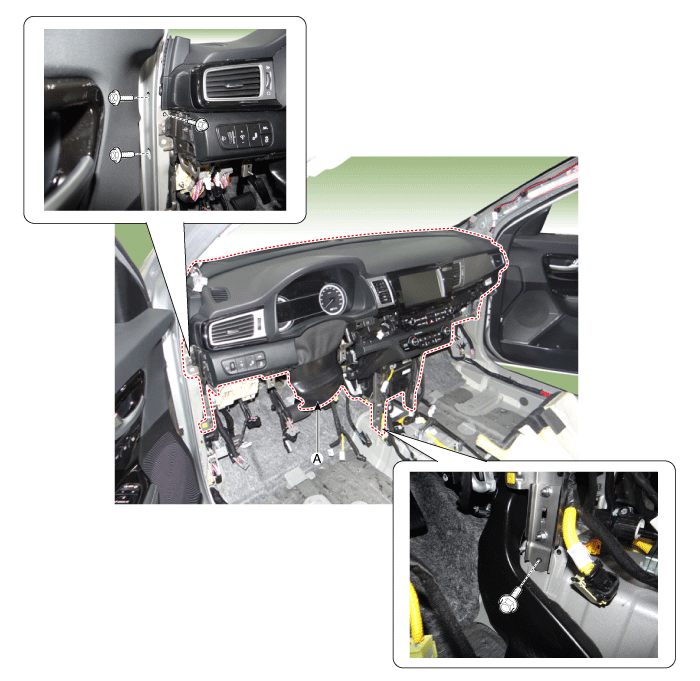
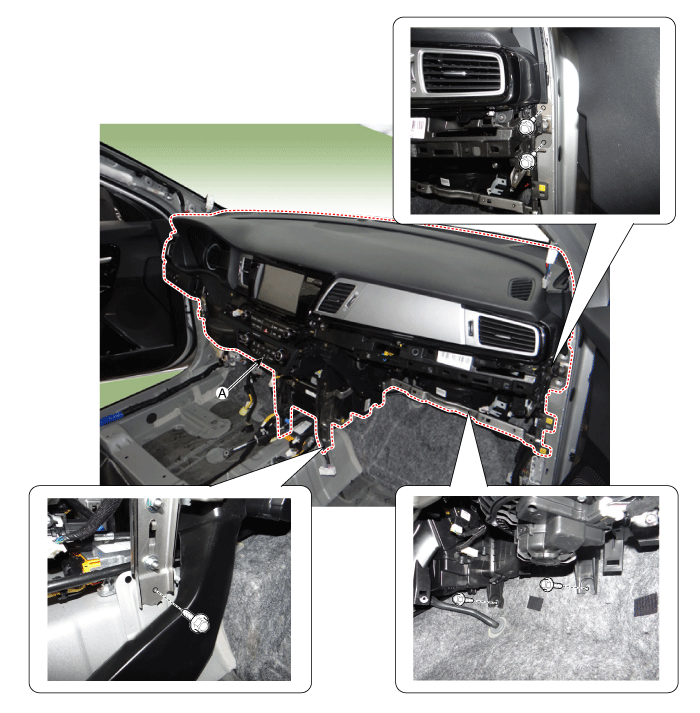
After loosening the bolts, remove the main crash pad and cowl cross bar assembly (A) altogether. [LH]
[RH]
|
| 28. |
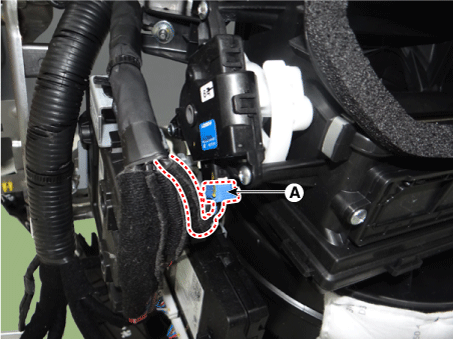
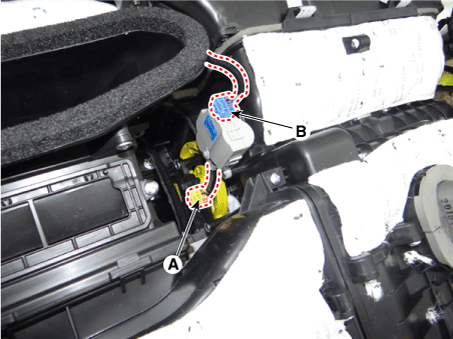
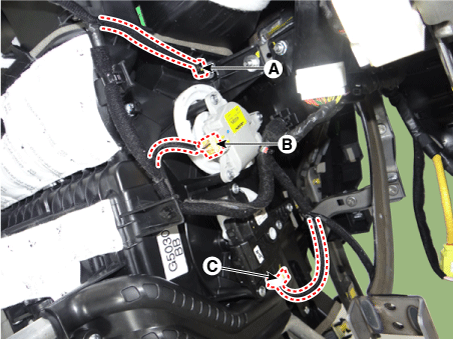
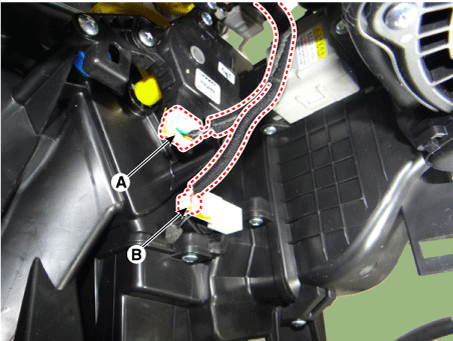
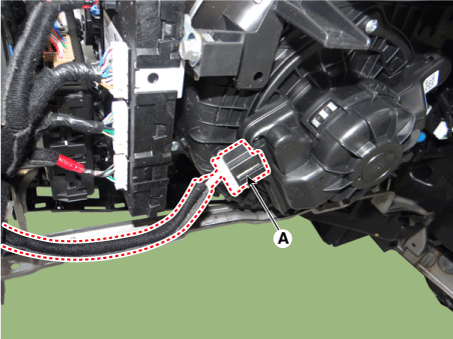
Disconnect the heater & blower unit connectors.
|
| 29. |
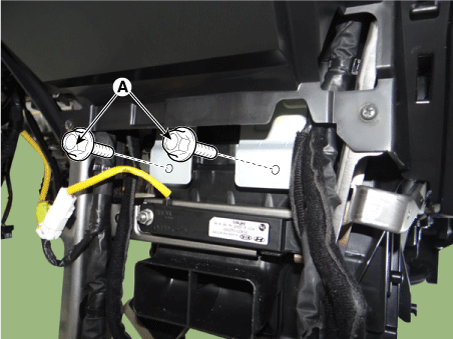
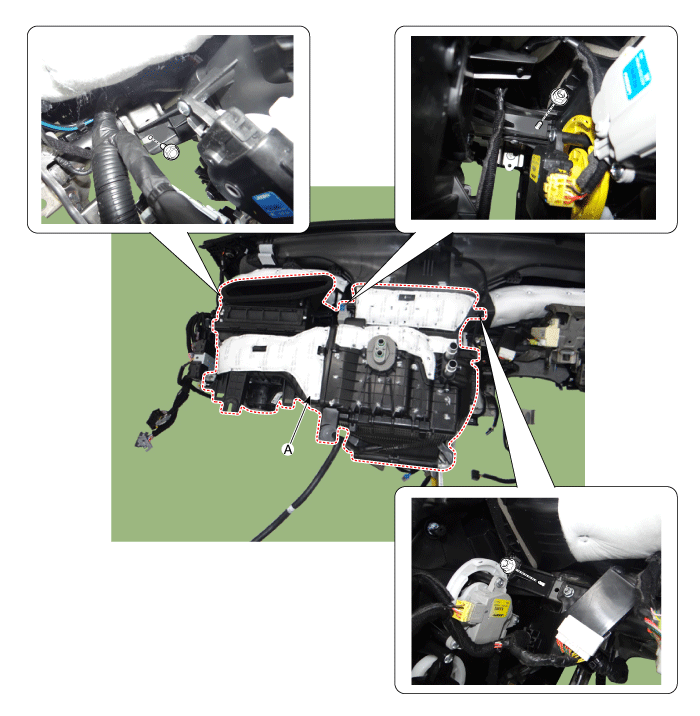
Loosen the heater & blower unit mounting bolt (A).
|
| 30. |
Loosen the mounting nuts and remove the heater and blower units (A) from the crash pad.
|
| 31. |
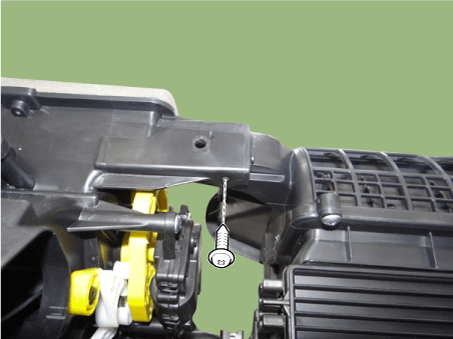
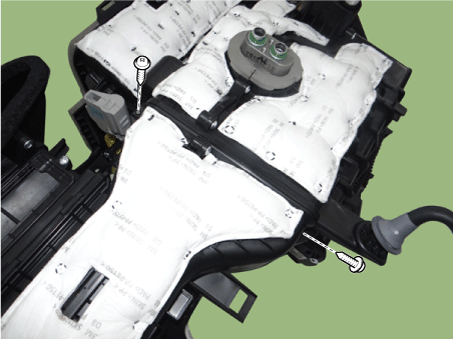
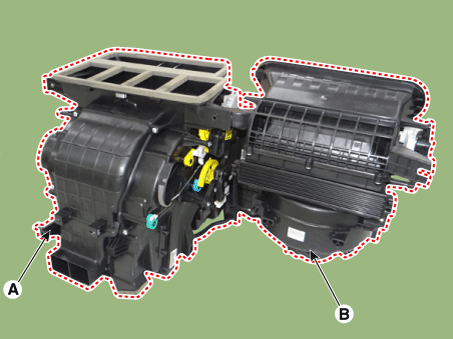
Separate the blower unit (B) from the heater unit (A) after loosening the screws.
|
| 32. |
install in the reverse order of removal |
 Heater Unit Components and components location
Component Location
1. Heater unit assembly
Components
[LH]
1. Heater Core Cover
2. Heater Core Ass ...
 Heater Core Repair procedures
Replacement
1.
Disconnect the negative (-) battery terminal.
2.
Remove the heater and blower assembly.
(Refer to Heater -"Heater Unit&quo ...
Other information:
Kia Niro 2017 (DE HEV) Service Manual: Smart Cruise Control (SCC) Switch Repair procedures
Inspection
Measuring Resistance
1.
Disconnect the cruise control switch connector from the control switch.
2.
Measure resistance between terminals on the control switch when each
function switch is ON (switch is depressed).
...
Kia Niro 2017 (DE HEV) Service Manual: TJ Joint Components and components location
Components
[LH]
1. BJ assembly
2. BJ circlip
3. BJ boot band
4. BJ boot
5. Dynamic damper band
6. Dynamic damper
7. Shaft
8. TJ boot band
9. TJ boot
10. Spider assembly
11. Retainer ring
12. TJ hou ...
