Kia Niro: Front Suspension System / Front Lower Arm Repair procedures
| Removal |
| 1. |
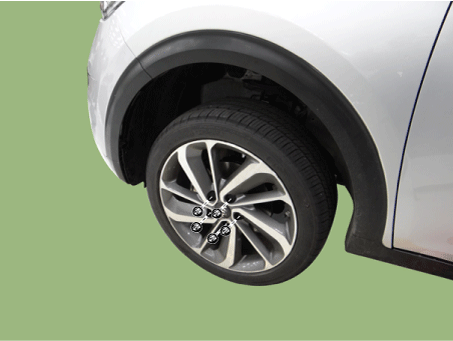
Remove the wheel and tire.
|
| 2. |
Remove the under cover. (Refer to Engine Mechanical System - "Engine Room Under Cover") |
| 3. |
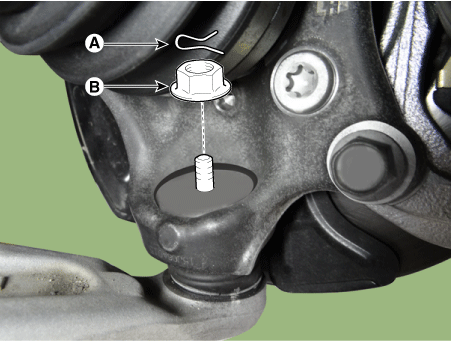
Remove the lower arm pin (A) and nut (B).
|
| 4. |
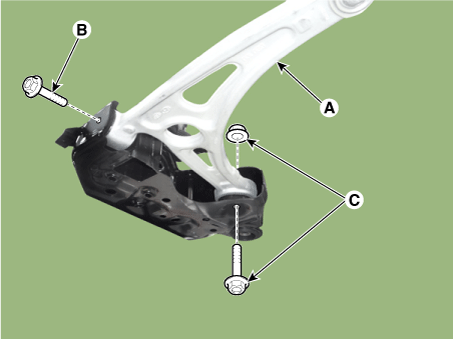
Remove the lower arm (A) from the sub frame.
|
| 5. |
Install in the reverse order of removal. |
| 6. |
Check the wheel alignment. (Refer to Tires/Wheels - "Alignment") |
| Inspection |
| 1. |
Check the bushing for wear and deterioration. |
| 2. |
Check the lower arm for bending or breakage. |
| 3. |
Check the lower arm for deformation. |
| 4. |
Check all bolts and nuts. |
 Front Lower Arm Components and components location
Components
1. Ball joint assembly
2. Front lower arm assembly
...
 Front Stabilizer Bar Components and components location
Components
1. Stabilizer bar
2. Stabilizer link
...
Other information:
Kia Niro (DE HEV) Owners Manual: Air conditioning
Kia air conditioning systems are filled with R-134a or R-1234yf refrigerant.
1. Start the engine. Push the air conditioning button.
2. Set the mode to the position.
3. Set the air intake control to the outside air or recirculated air position.
4. Adjust the fan speed control and temperature con ...
Kia Niro 2017 (DE HEV) Service Manual: Battery Sensor Repair procedures
Removal
1.
Open the trunk.
2.
Remove the luggage side trim [RH].
(Refer to Body - "Luggage Side Trim")
3.
Turn ignition switch OFF and disconnect the battery negative (-) terminal
(A).
...


