Kia Niro: Air Conditioning System / Duct Sensor Repair procedures
| Inspection |
| 1. |
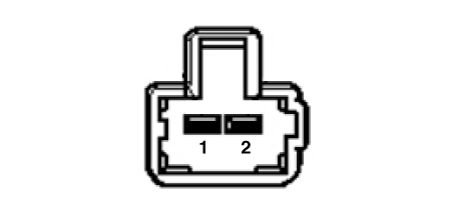
Check that the voltage between No. 1 and 2 duct sensors change.
Specification
|
| Replacement |
[Duct sensor - Floor]
| 1. |
Disconnect the negative (-) battery terminal. |
| 2. |
Remove the crash pad lower panel. (Refer to Body - "Crash Pad Lower Panel") |
| 3. |
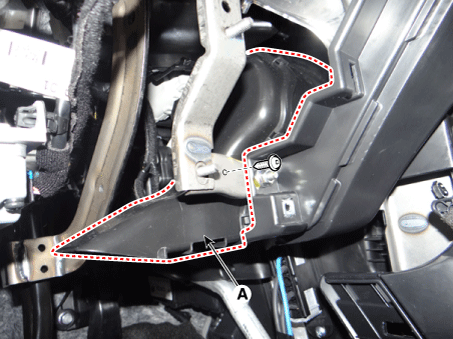
Loosen the mounting screw and remove the cockpit shower duct (A).
|
| 4. |
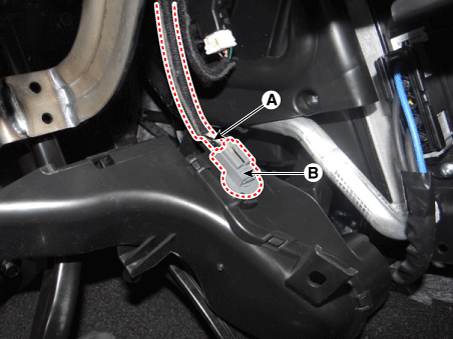
Remove the connector (A). Then, turn the duct sensor (B) by 90° in the counterclockwise direction to remove it.
|
| 5. |
install in the reverse order of removal |
[Duct sensor - Vent]
| 1. |
Disconnect the negative (-) battery terminal. |
| 2. |
Remove the crash pad lower panel. (Refer to Body - "Crash Pad Lower Panel") |
| 3. |
Loosen the mounting screw and remove the cockpit shower duct (A).
|
| 4. |
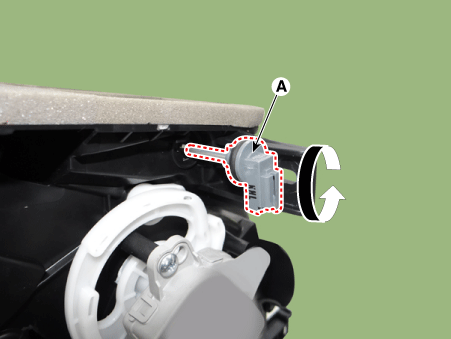
Turn the duct sensor (A) by 90° in the counterclockwise direction to remove it.
|
| 5. |
Install in the reverse order of removal. |
 Auto Defogging Sensor Repair procedures
Replacement
1.
Disconnect the negative (-) battery terminal.
2.
Remove the auto defogging sensor cover (A).
3.
U ...
 Blower
...
Other information:
Kia Niro (DE HEV) Owners Manual: Opening the fuel filler lid
1. The fuel filler lid must be opened from inside the vehicle by pushing the
fuel filler lid opener.
✽ NOTICE
If the fuel filler lid does not open because ice has formed around it, tap
lightly or push on the lid to break the ice and release the lid. Do not pry on the
lid. If necessary, s ...
Kia Niro 2017 (DE HEV) Service Manual: Cooling System Repair procedures
Inspection
Radiator hoses
1.
Check radiator hoses for the following
(1)
Improper attachment
(2)
Leaks
(3)
Cracks
(4)
D ...


