Kia Niro: Interior Trim / Center Pillar Trim Repair procedures
[Center pillar lower
trim]
|
Put on gloves to protect your hands.
|
| • |
Use a plastic panel removal tool to remove interior trim pieces
without marring the surface.
|
| • |
Be careful not to bend or scratch the trim and panels.
|
|
| 1. |
Remove the front door scuff trim.
(Refer to Interior Trim - "Door Scuff Trim")
|
| 2. |
Remove the rear door scuff trim.
(Refer to Interior Trim - "Door Scuff Trim")
|
| 3. |
Carefully remove the front door body side weatherstrip.
|
| 4. |
Carefully remove the rear door body side weatherstrip.
|
| 5. |
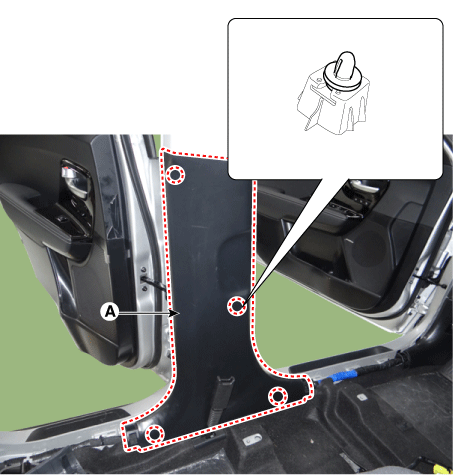
Using a remover, remove the center pillar lower trim (A).
|
| 6. |
Install in the reverse order of removal.
| •
|
Make sure that the connector is plugged in properly.
|
| •
|
Replace any damaged clips.
|
|
|
[Center pillar upper
trim]
|
Put on gloves to protect your hands.
|
| • |
Use a plastic panel removal tool to remove interior trim pieces
without marring the surface.
|
| • |
Be careful not to bend or scratch the trim and panels.
|
|
| 1. |
Remove the center pillar lower trim.
|
| 2. |
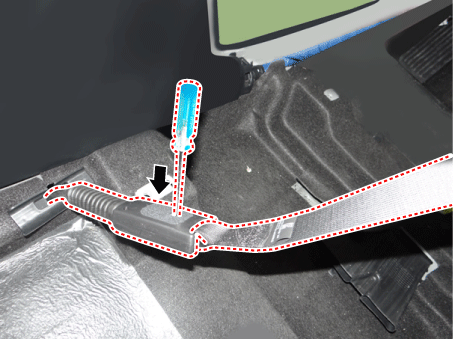
Disconnect the seat belt (B) from the EFD system (A).
|
| 3. |
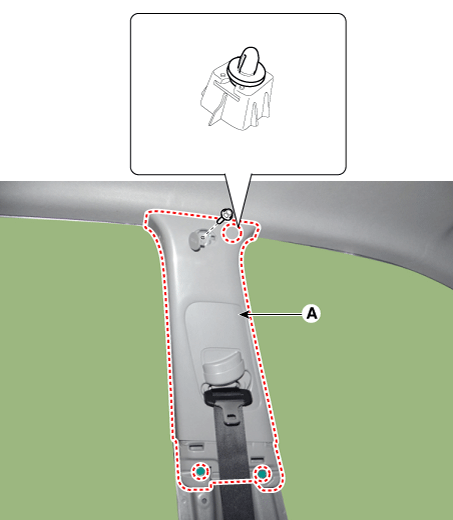
Remove the center pillar lower trim (A) after loosening the bolt.
|
| 4. |
Install in the reverse order of removal.
|
Make sure that the connector is plugged in properly.
|
|
Component Location
1. Center pillar lower trim
2. Center pillar upper trim
...
Component Location
1. Rear transverse trim
...
Other information:
Kia Niro 2017 (DE HEV) Service Manual: Description and operation
Description
The HCU (Hybrid Control Unit) controls the overall hybrid systems and is connected
with each of the control modules (ECM, TCM, MCU, BMS, ECU, etc.) via CAN. The hybrid
system is controlled based on the brake switch signals.
...
Kia Niro (DE HEV) Owners Manual: VSM operation
When the VSM is operating:
ESC (Electronic Stability Control) ()
light will blink.
The steering wheel may be controlled.
When the vehicle stability management is operating properly, you can feel a slight
pulsation in the vehicle. This is only the effect of brake control and indicates
...



 Center Pillar Trim Components and components location
 Rear Transverse Trim Components and components location