Kia Niro: Timing System / Timing Chain Repair procedures
| Removal |
|

| 1. |
Shut off the high voltage circuit. (Refer to Engine Mechanical System - “High Voltage Shut off Procedure”) |
| 2. |
Remove the cylinder head cover. (Refer to Cylinder Head Assembly - "Cylinder Head Cover") |
| 3. |
Set No.1 cylinder to TDC (Top dead center) on compression stroke.
|
| 4. |
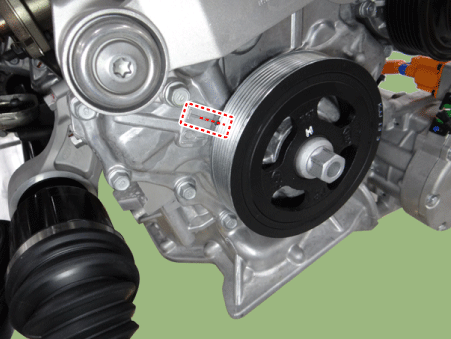
Remove the timing chain cover. (Refer to Timing System - "Timing Chain Cover") |
| 5. |
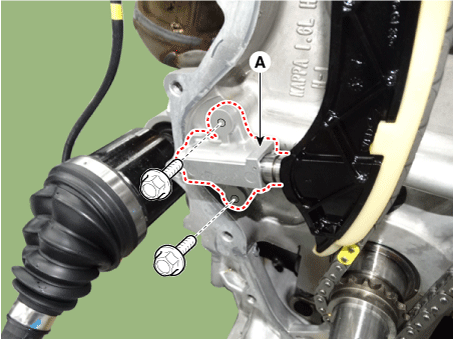
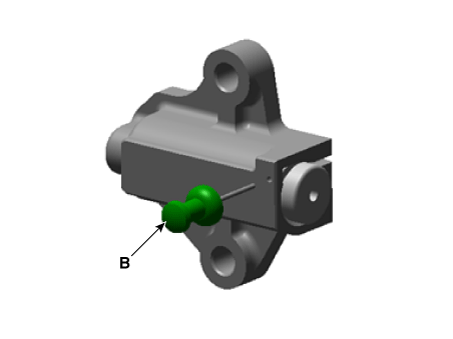
Remove the timing chain tensioner (A).
|

| 6. |
Remove the timing chain tensioner arm (A).
|
| 7. |
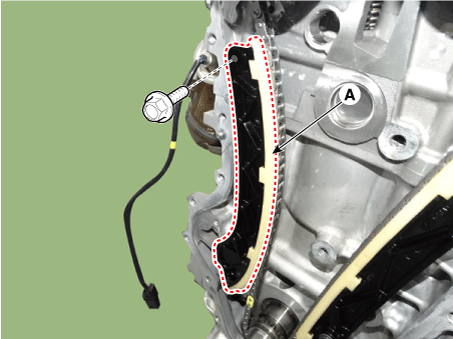
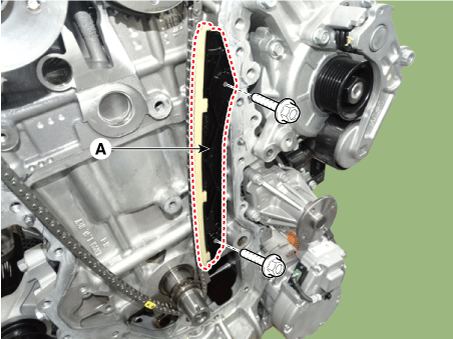
Remove the timing chain guide (A).
|
| 8. |
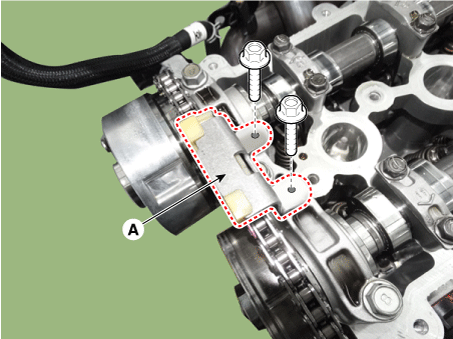
Remove the timing chain cam guide (A).
|
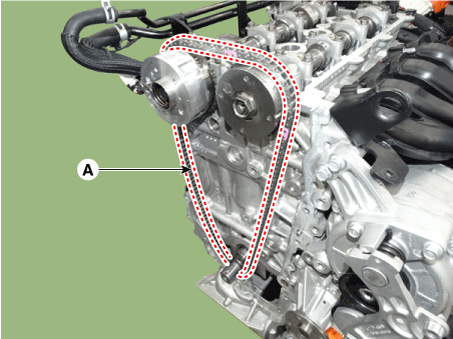
| 9. |
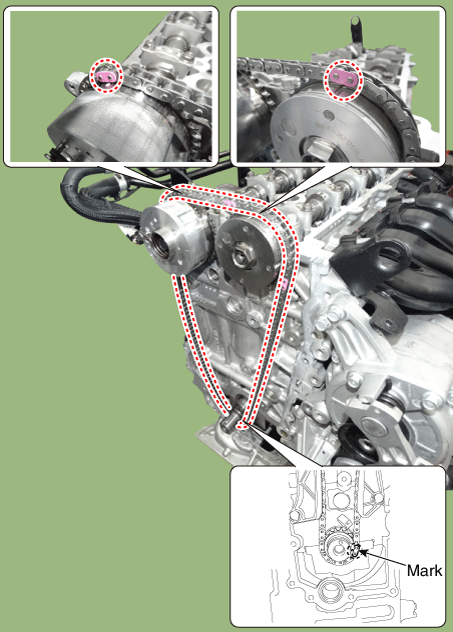
Remove the timing chain (A).
|
| Inspection |
Sprockets, Chain Tensioner, Chain Guide, Chain Tensioner Arm
| 1. |
Check the CVVT sprocket and crankshaft sprocket for abnormal wear, cracks, or damage. Replace if necessary. |
| 2. |
Inspect the tensioner arm and chain guide for abnormal wear, cracks, or damage. Replace if necessary. |
| 3. |
Check that the tensioner piston moves smoothly. |
| Installation |
| 1. |
Install the timing chain. Crankshaft sprocket → Intake CVVT sprocket → Exhaust CVVT sprocket Install the timing chain with no slack between the crankshaft sprocket and the intake CVVT sprocket.
|
| 2. |
Install the timing chain cam guide (A).
|
| 3. |
Install the timing chain guide (A).
|
| 4. |
Install the timing chain tensioner arm (A).
|
| 5. |
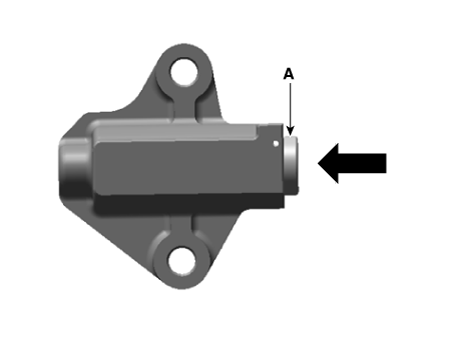
Install the timing chain auto tensioner (A) and remove the stopper pin.
|
| 6. |
Install the timing chain cover. (Refer to Timing System - "Timing Chain Cover") |
| 7. |
Install the cylinder head cover. (Refer to Cylinder Head Assembly - "Cylinder Head Cover") |
| 8. |
Add all the necessary fluids and check for leaks. Connect KDS/GDS. Check for codes, note, and clear. Recheck.
|
 Timing Chain Cover Repair procedures
Removal
•
Be sure to read and follow the “General Safety Information and
Caution” ...

Other information:
Kia Niro (DE HEV) Owners Manual: If An Accident Occurs
Avoid the engine compartment.
Avoid any orange or high voltage wires, cables, or components.
Assume that a high voltage component is exposed and move away from the vehicle
as promptly as possible.
Refer to Chapter 7 for towing information.
WARNING
After parking the vehicle, shift ...
Kia Niro 2017 (DE HEV) Service Manual: Evaporator Temperature Sensor Description and operation
Description
The evaporator temperature sensor will detect the evaporator core temperature
and interrupt compressor relay power in order to prevent evaporator from freezing
by excessive cooling. The evaporator temperature sensor has the Negative Temperature
Coefficient (NTC). Elect ...
