Kia Niro: Sunroof / Sunroof Assembly Repair procedures
| Replacement |
|

| 1. |
Remove the roof trim. (Refer to Roof Trim - "Roof Trim Assembly") |
| 2. |
Remove the sunroof glass. (Refer to Sunroof - "Sunroof Glass") |
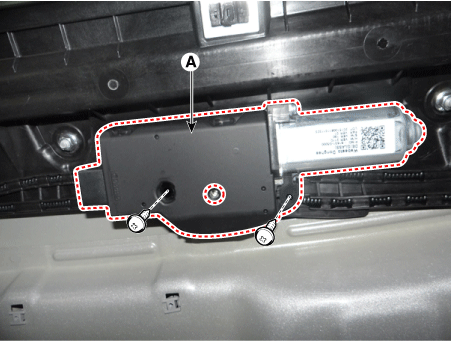
| 3. |
Loosen the mounting screws and remove the sunroof motor (A).
|
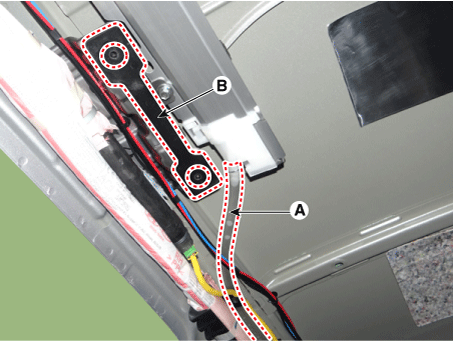
| 4. |
Remove the drain hose (A) and assist handle guide plate (B).
|
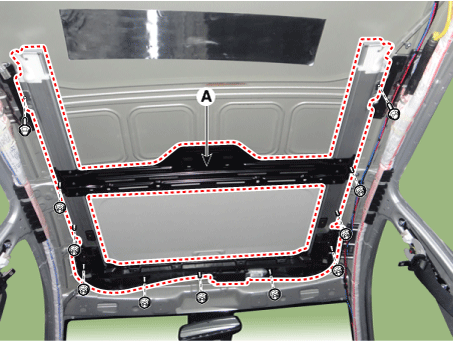
| 5. |
Remove the sunroof assembly (A) after loosening the nuts and bolts.
|
| 6. |
Install in the reverse order of removal.
|
 Sunroof Assembly Components and components location
Components
1. Sunroof assembly
...
 Sunroof Sunshade Repair procedures
Replacement
1.
Remove the sunroof assembly.
(Refer to Sunroof - "Sunroof Assembly")
2.
Remove the drip rail assembly (A) after loose ...
Other information:
Kia Niro 2017 (DE HEV) Service Manual: General information
Warning And Caution Labels
1. Engine pressure cap caution
2. Cooling fan caution
3. High voltage caution
4. Inverter reservoir tank cap caution
5. Safety plug high voltage caution
6. High voltage battery caution
Battery Caution L ...
Kia Niro (DE HEV) Owners Manual: Technical Data (18 inch tire)
System voltage: DC 12 V
Working voltage: DC 10 - 15 V
Amperage rating: MAX. 15A ± 1A (at DC 12V operation)
Suitable for use at temperatures: -30 ~ +70°C (-22 ~ +158°F)
Max. working pressure: 6 bar (87 psi)
Size
Compressor: 168 x 150 x 68 mm (6.6 x 5.9 x 2.7 in.)
Sealant bottle: 104 x 85 ø ...
