Kia Niro: High Voltage Battery System / Repair procedures
| Removal |
|

| 1. |
Shut off the high voltage circuit. (Refer to Hybrid Control System - “High Voltage Shutoff Procedure”) |
| 2. |
Remove the rear seat cushion. (Refer to Body - "Rear Seat Assembly") |
| 3. |
Remove the rear door scuff trim. (Refer to Body - "Door Scuff Trim") |
| 4. |
Remove the cooling duct. (Refer to High Voltage Battery Cooling System - "Cooling Duct") |
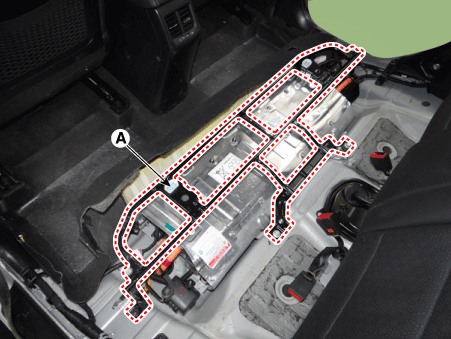
| 5. |
Remove the upper frame (A) after loosening the mounting bolts and nuts.
|
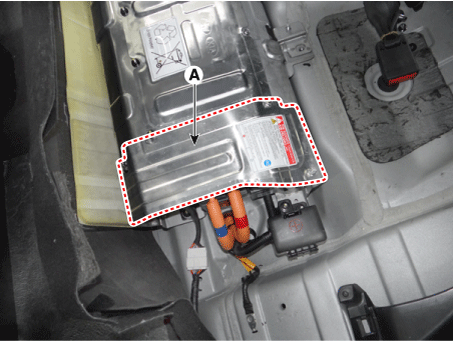
| 6. |
Remove the high voltage battery rear cover (A) after loosening the mounting bolts and nuts.
|
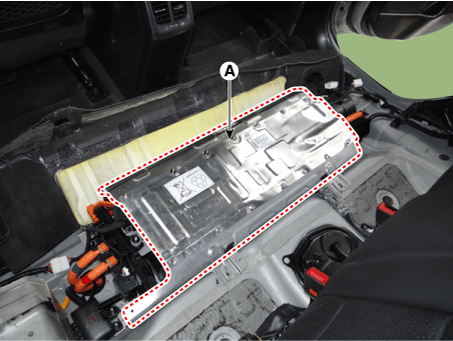
| 7. |
Remove the high voltage battery front cover (A) after loosening the mounting bolts and nuts.
|
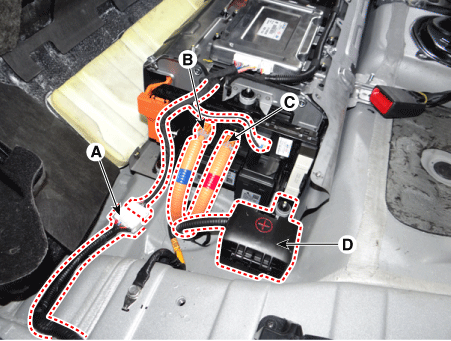
| 8. |
Disconnect the BMS ECU extension wiring connector (A), inverter power connector [-] (B) and inverter power connector [+] (C) |
| 9. |
Remove the 12V junction box (D) after loosening the mounting nuts.
|
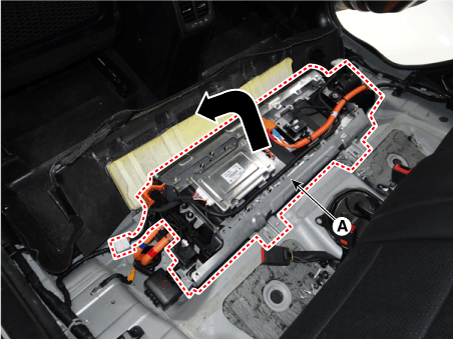
| 10. |
Unfasten the high voltage battery system assembly (A) in the direction of arrow.
|
| 11. |
Disconnect the auxiliary 12V battery wiring harness (A) after releasing the fixing hook.
|
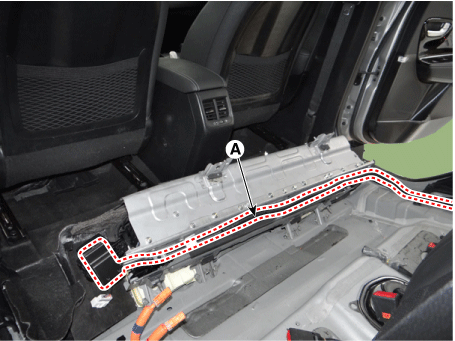
| 12. |
Remove the high voltage battery system assembly (A) from the vehicle.
|
| Installation |
|
| 1. |
Install the high voltage battery system in the reverse order of removal. |
 Components and components location
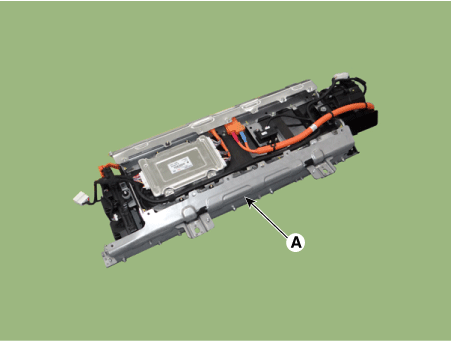
Components Location
1. High Voltage Battery System Assembly
2. High Voltage Battery Pack Assembly
3. Power Relay Assembly (PRA)
4. High Voltage Front ...
 Battery Pack Assembly Specifications
Specification
Battery Pack Assembly
[General Specification]
Item
Specification
Remarks
Number of Cells
16 Cells × 4 ...
Other information:
Kia Niro 2017 (DE HEV) Service Manual: TPMS Sensor Repair procedures
Removal
1.
Remove the valve core and deflate the tire.
2.
Remove the side of the tire bead area from the wheel using tire changing
machine .
...
Kia Niro 2017 (DE HEV) Service Manual: Sub Frame Repair procedures
Removal
1.
Disconnect the battery negative cable.
2.
Remove the universal bolt (A).
Tightening torque :
32.4 - 37.3 N·m (3.3 - 3.8 kgf·m, 23.9 - 27.5 lb·ft)
...
