Kia Niro: Front Suspension System / Front Strut Assembly Repair procedures
| Removal |
| 1. |
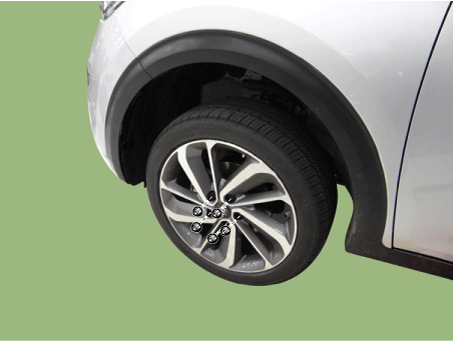
Remove the wheel and tire.
|
| 2. |
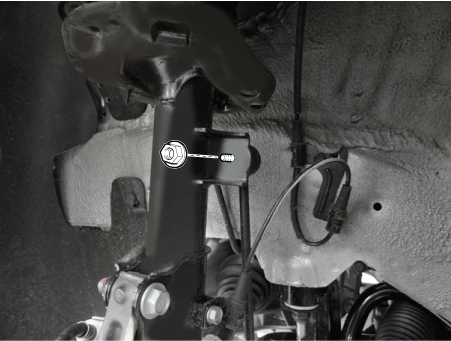
Remove the stabilizer link nut.
|
| 3. |
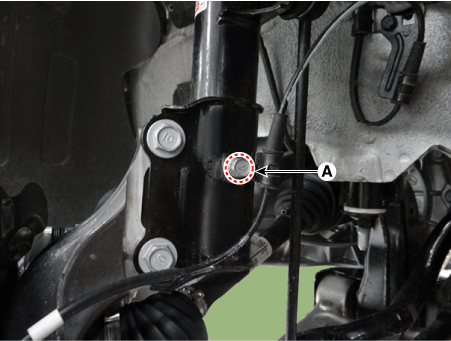
Remove the wheel speed sensor bracket bolt (A).
|
| 4. |
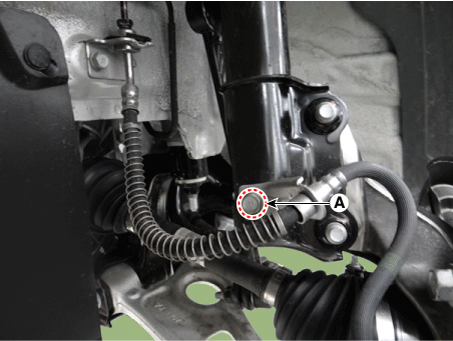
Remove the caliper hose bracket bolt (A).
|
| 5. |
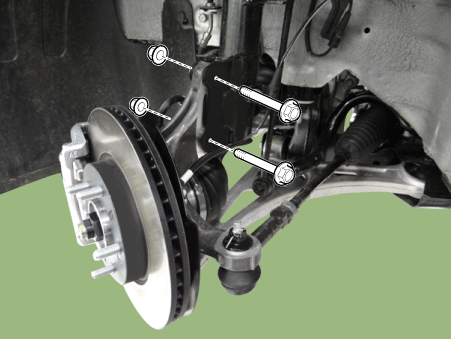
Loosen the front strut lower bolts.
|
| 6. |
Remove the cowl top cover. (Refer to Body - "Cowl Top Cover") |
| 7. |
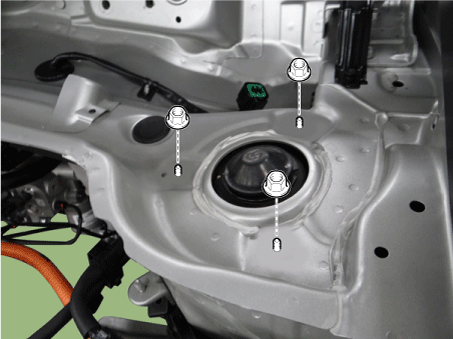
Loosen the front strut upper nuts and then remove the strut assembly.
|
| Disassembly |
| 1. |
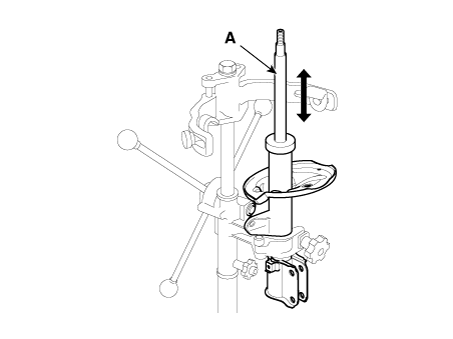
Compress and extend the piston rod and check that there is no abnormal resistance or unusual sound during operation.
|
| 2. |
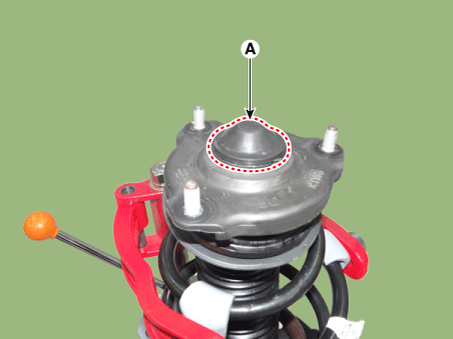
Remove the insulator cap (A).
|
| 3. |
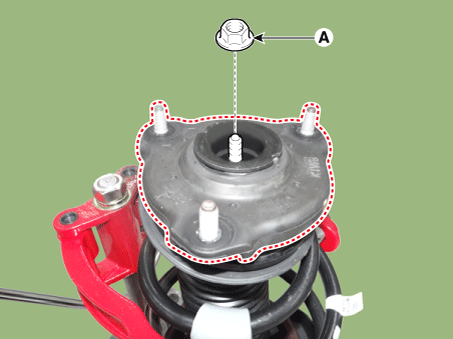
Loosen the insulator nut (A) and then remove the insulator.
|
| 4. |
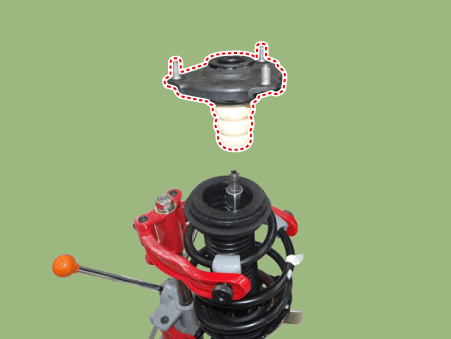
Remove the strut bearing, spring upper pad and ruber.
|
| 5. |
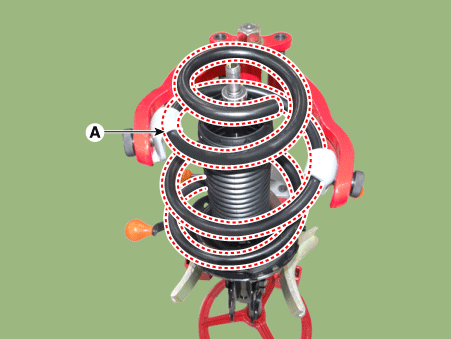
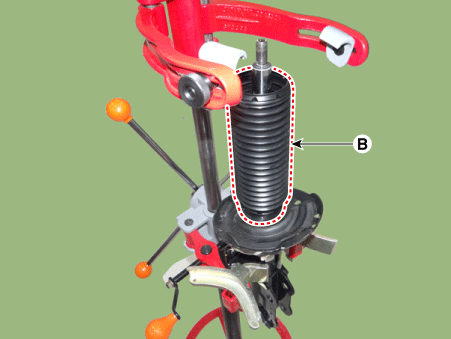
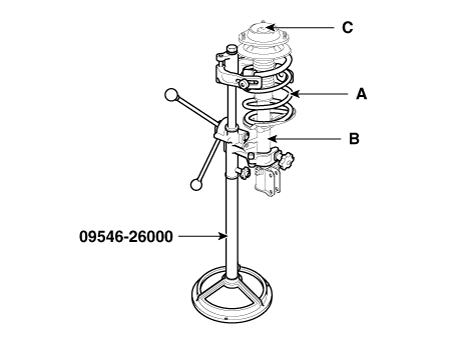
Remove the spring (A) and dust cover (B).
|
| 6. |
Remove the spring lower pad (A).
|
| Inspection |
| 1. |
Check the strut insulator for wear or damage. |
| 2. |
Check rubber parts for damage or deterioration. |
| 3. |
Compress and extend the piston rod (A) and check that there is no abnormal resistance or unusual sound during operation.
|
Disposal
| 1. |
Fully extend the piston rod. |
| 2. |
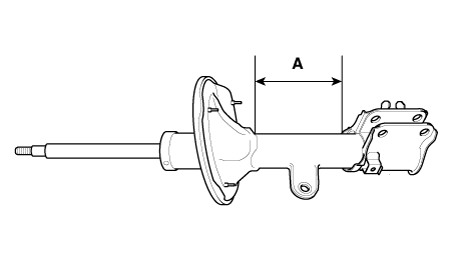
Drill a hole on the A section to remove gas from the cylinder.
|
| Reassembly |
| 1. |
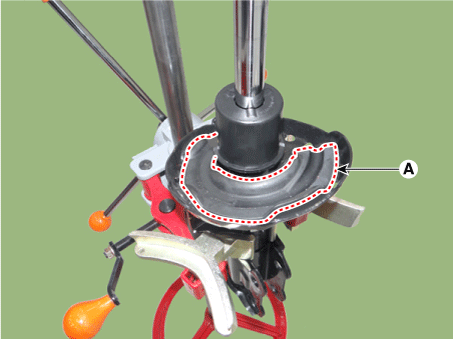
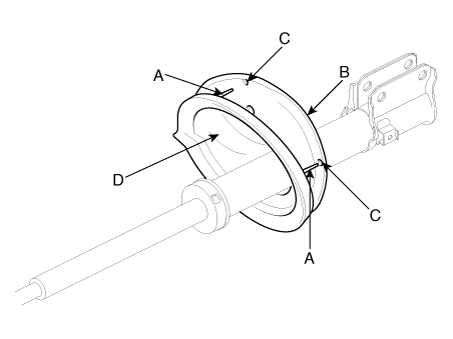
Install the spring lower pad (D) so that the protrusions (A) fits in the holes (C) in the spring lower seat (B).
|
| 2. |
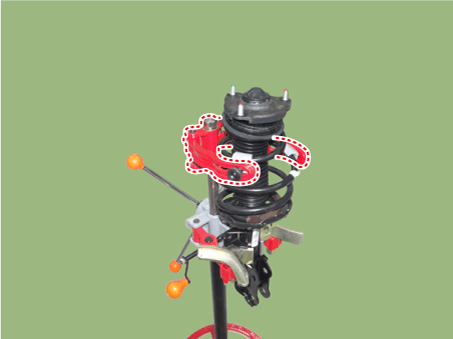
Compress coil spring using special tool (09546-26000). Install compressed coil spring into shock absorber.
|
| 3. |
After fully extending the piston rod, install the spring upper seat and insulator assembly. |
| 4. |
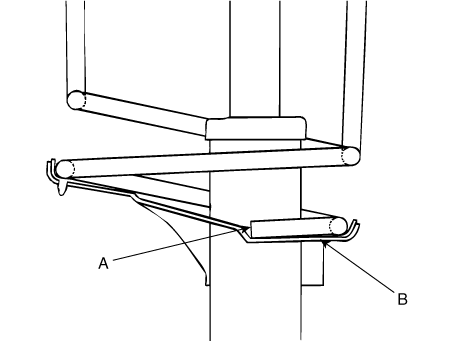
After seating the upper and lower ends of the coil spring (A) in the upper and lower spring seat grooves (B) correctly, tighten new self-locking nut temporarily.
|
| 5. |
Remove the special tool (09546-26000). |
| 6. |
Tighten the self-locking nut to the specified torque.
|
 Front Strut Assembly Components and components location
Components
1. Strut assembly
2. Insulator
3. Bearing
4. Spring upper pad
5. Spring
6. Dust cover
7. Spring lower pad
...
 Front Lower Arm Components and components location
Components
1. Ball joint assembly
2. Front lower arm assembly
...
Other information:
Kia Niro (DE HEV) Owners Manual: Windows
(1) Driver’s door power window switch
(2) Front passenger’s door power window switch
(3) Rear door (left) power window switch
(4) Rear door (right) power window switch
(5) Window opening and closing
(6) Automatic power window up*/ down*
(7) Power window lock switch
✽ NOTICE
In cold a ...
Kia Niro 2017 (DE HEV) Service Manual: Repair procedures
Checking Refrigerant Specifications
1.
Check refrigerant specifications label inside engine room.
R-134a
R-1234yf
Examples
...

