Kia Niro: Headrest (for front seat) / Forward and backward adjustment
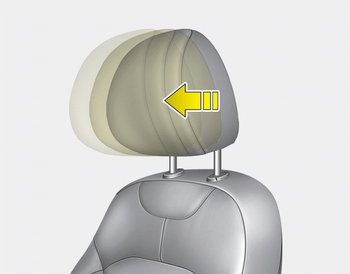
The headrest may be adjusted forward to 3 different positions by pulling the headrest forward to the desired detent.
To adjust the headrest to it’s furthest backwards position, Pull the headrest fully forward to the farthest position and release it.
Adjust the headrest so that it properly supports the head and neck.
CAUTION
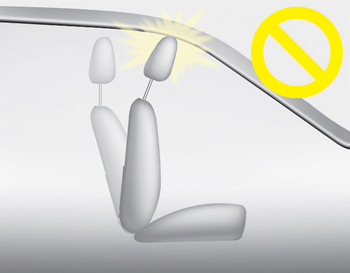
If you recline the seatback towards the front with the headrest and seat cushion raised, the headrest may come in contact with the sunvisor or other parts of the vehicle.
Removal/Reinstall
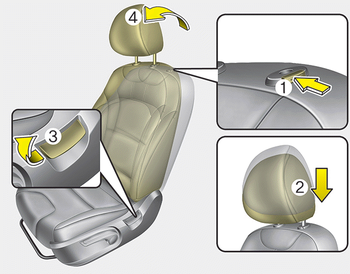
■ Type A
■ Type B
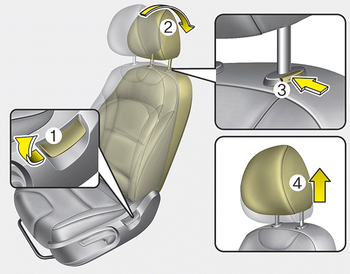
To remove the headrest:
1. Recline the seatback (2) with the recline dial or switch (1).
2. Raise headrest as far as it can go.
3. Press the headrest release button (3) while pulling the headrest up (4).
WARNING
NEVER allow anyone to ride in a seat with the headrest removed.
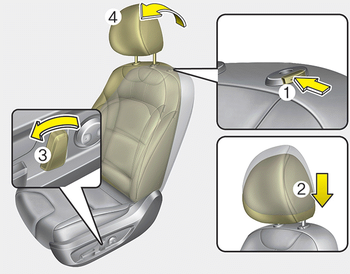
■ Type A
■ Type B
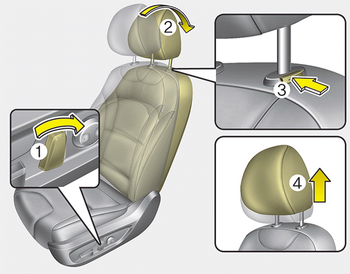
To reinstall the headrest:
1. Put the headrest poles (2) into the holes while pressing the release button or switch (1).
2. Recline the seatback(4) with the recline dial or switch (3).
3. Adjust the headrest to the appropriate height.
WARNING
Always make sure the headrest locks into position after reinstalling and adjusting it properly.
 Adjusting the height up and down
To raise the headrest, pull it up to the desired position (1). To lower the headrest,
push and hold the release button (2) and lower the headrest to the desired position
(3). ...
 Seatback pocket
The seatback pocket is provided on the back of the front passenger’s and driver’s
seatbacks.
WARNING - Seatback pockets
Do not put heavy or sharp objects in the seatback pockets. In an accid ...
Other information:
Kia Niro 2017 (DE HEV) Service Manual: High Mounted Stop Lamp Repair procedures
Removal
1.
Disconnect the negative (-) battery terminal.
2.
Remove the rear spoiler.
(Refer to Body - "Rear Spoiler")
3.
Remove the high mounted stop lamp cover.
4.
Remove ...
Kia Niro 2017 (DE HEV) Service Manual: Hood Latch Release Handle Repair procedures
Replacement
1.
Using a remover, remove the hood release handle (A).
2.
Install in the reverse order of removal.
•
...
