Kia Niro: Driveshaft Assembly / Dynamic Damper Repair procedures
| Replacement |
| 1. |
Remove the front driveshaft. (Refer to Driveshaft Assembly - “Front Driveshaft”) |
| 2. |
Remove the TJ joint assembly. (Refer to Driveshaft Assembly - “TJ joint”) |
| 3. |
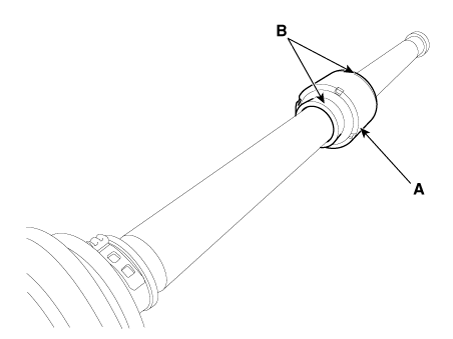
Remove the remove the both side of band (B) of the dynamic damper (A).
|
| 4. |
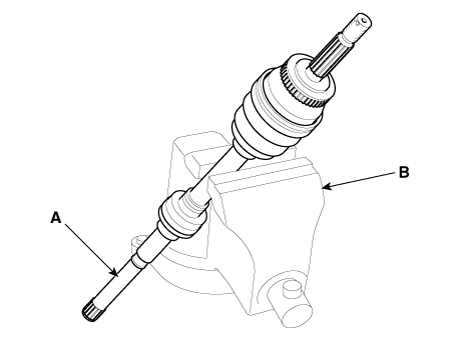
Fix the driveshaft (A) with a vice (B) as illustrated.
|
| 5. |
Apply soap powder on the shaft to prevent being damaged between the shaft spline and the dynamic damper when the dynamic damper is removed. |
| 6. |
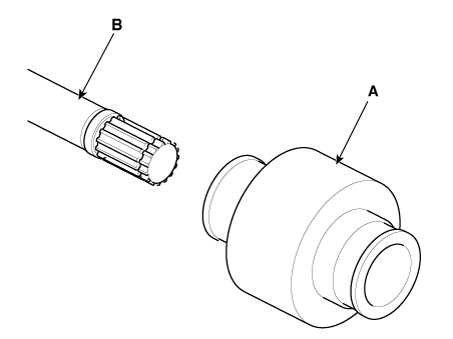
Seperate the dynamic damper (A) from the shaft (B) carefully.
|
| Installation |
| 1. |
Apply soap powder on the shaft to prevent being damaged between the shaft spline and the dynamic damper. |
| 2. |
Install the dynamic damper. |
| 3. |
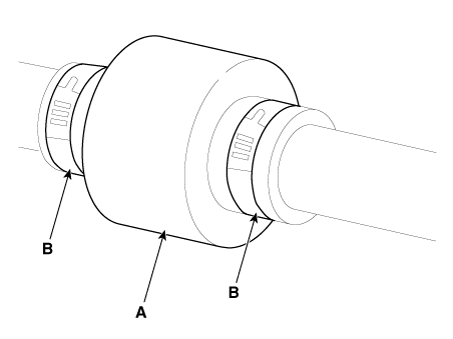
Install the dynamic damper band (A). |
| 4. |
Using the SST(09495-3K000), secure the TJ boot bands (B).
|
| 5. |
Install the TJ joint assembly. (Refer to Driveshaft Assembly - “TJ Joint”) |
| 6. |
Install the front driveshaft. (Refer to Driveshaft Assembly - “Front Driveshaft”) |
| 7. |
Check the front alignment. (Refer to Suspension System - "Front Alignment") |
 Dynamic Damper Components and components location
Components
1. BJ assembly
2. BJ circlip
3. BJ boot band
4. BJ boot
5. Dynamic damper band
6. Dynamic damper
7. Shaft
8. TJ boot band
...
 BJ Boot Components and components location
Components
1. BJ assembly
2. BJ circlip
3. BJ boot band
4. BJ boot
5. Dynamic damper band
6. Dynamic damper
7. Shaft
8. TJ boot band
...
Other information:
Kia Niro 2017 (DE HEV) Service Manual: High voltage shut-off procedures
High Voltage Shut-off Procedures
•
Be sure to read and follow the “General Safety Information and
Caution” before doing any work related with the high voltage system.
Failure t ...
Kia Niro (DE HEV) Owners Manual: Hazardous driving conditions
When hazardous driving conditions are encountered such as water, snow, ice, mud,
sand, or similar hazards, follow these suggestions:
Drive cautiously and allow extra distance for braking.
Avoid sudden braking or steering.
When braking with non-ABS brakes pump the brake pedal with a light u ...


