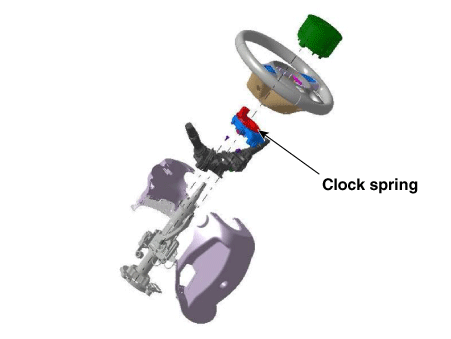
Kia Niro: Airbag Module / Driver Airbag (DAB) Module and Clock Spring Repair procedures
| Inspection |
Air bag module
If any improper parts are found during the following inspection, replace the airbag module with a new one.
Never attempt to measure the circuit resistance of the airbag module (squib) even if you are using the specified tester. If the circuit resistance is measured with a tester, accidental airbag deployment will result in serious personal injury. |

| 1. |
Check pad cover for dents, cracks or deformities. |
| 2. |
Check the airbag module for denting, cracking or deformities. |
| 3. |
Check hooks and connectors for damage, terminals for deformities, and harness for binds. |
| 4. |
Check airbag inflator case for dents, cracks or deformities |
| 5. |
Install the airbag module to the steering wheel to check for fit or alignment with the wheel. |
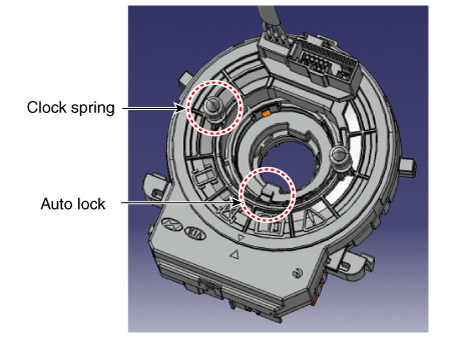
Clock Spring
| 1. |
If, as a result of the following checks, even one abnormality is discovered, replace the clock spring with a new one. |
| 2. |
Check connectors and protective tube for damage, and terminals for deformities.
|
| Removal |
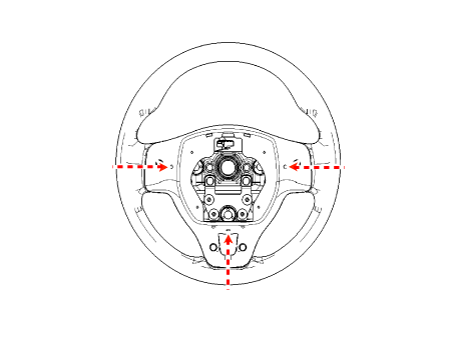
| 1. |
Set the front tires straight-ahead before assembling the steering wheel.
|
| 2. |
Disconnect the battery negative terminal, and wait for at least three minutes before beginning to work. |
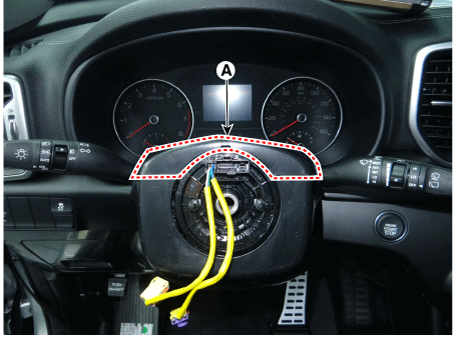
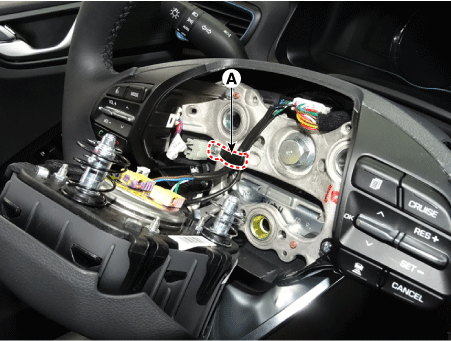
| 3. |
While turning the steering wheel to left and right, press the parts marked A (3 red dotted circles) under the steering wheel and then remove the airbag module.
|
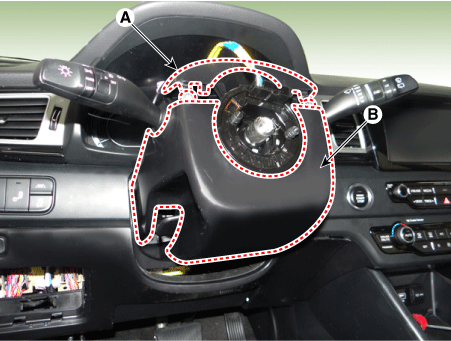
| 4. |
Disconnect the air bag connector (A) and horn connector (B).
|
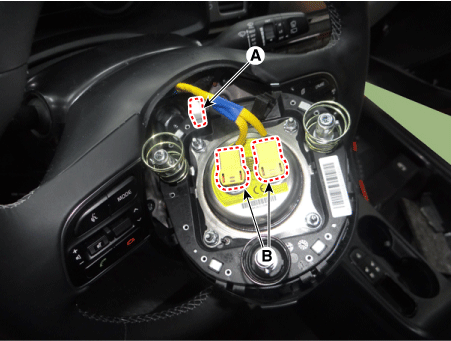
| 5. |
Remove the steering wheel. (Refer to Steering System - "Steering wheel") |
| 6. |
Remove the upper steering wheel column shroud (A).
|
| 7. |
Loosen the screws and remove the lower shroud (B).
|
| 8. |
Separate clock spring wiring harness connector (A) to the horn wiring harness connector (B) in a clock spring.
|

| Installation |
| 1. |
Set the front tires straight-ahead before assembling the steering wheel.
|
| 2. |
Make sure the cable is disconnected (-) Battery
|

| 3. |
Turn the vehicle in neutral before assembling the clock spring
|

| 4. |
Check the neutral state of the clock spring is attached to the steering column. |
| 5. |
Connect the clock spring harness connector and horn harness connector to the clock spring.
|
| 6. |
Fit the steering column shroud panel. (Refer to Body - see "steering column shroud panel") |
| 7. |
Fit the steering wheel. (Refer to Steering system - see "steering wheel") |
| 8. |
Connect the driver airbag connector is equipped with a driver's airbag module.
|
| 9. |
Connect the cable from the back (-) the battery. |
| 10. |
After installing the airbag, confirm proper system operation : • Turn the ignition switch ON; the SRS indicator light should be turned on for about six seconds and then go off. • Make sure horn button works.
|

 Passenger Airbag (PAB) Module Description and operation
Description
The passenger airbag (PAB) is installed inside the crash pad and protects the
front passenger in the event of a frontal crash. The SRSCM determines if and when
to deploy t ...
Other information:
Kia Niro (DE HEV) Owners Manual: Low tire pressure telltale
When the tire pressure monitoring system warning indicators are illuminated and
warning massage displayed on the cluster LCD display, one or more of your tires
is significantly under-inflated. The low tire pressure position telltale light will
indicate which tire is significantly under-inf ...
Kia Niro 2017 (DE HEV) Service Manual: General safety information and caution
Safety Precaution
Precautions to take before servicing
high voltage system
Hybrid vehicles have high voltage batteries. Incorrect handling
of high voltage sy ...
