Kia Niro: Cylinder Head Assembly / Cylinder Head Cover Repair procedures
| Removal |
Engine removal is not required for this procedure.
|

Mark all wiring and hoses to avoid misconnection. |

| 1. |
Disconnect the negative battery terminal. |
| 2. |
Remove the air cleaner assembly. (Refer to Intake And Exhaust System - "Air Cleaner") |
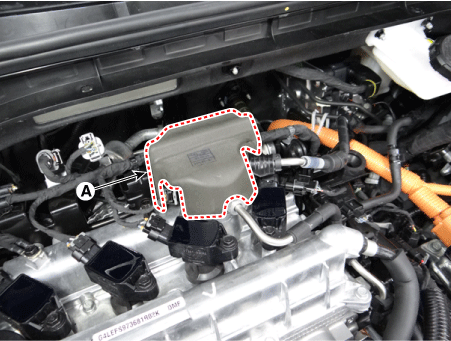
| 3. |
Remove the high pressure fuel pump foam (A).
|
| 4. |
Disconnect the fuel hose (A).
|
| 5. |
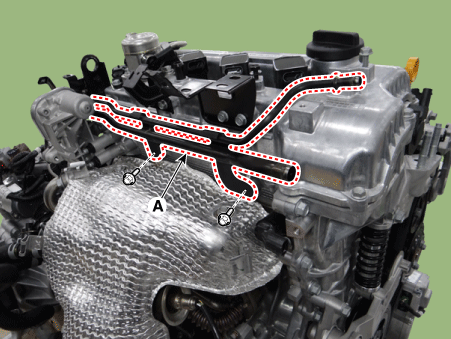
Disconnect the wiring connectors and harness clamps and remove the connector brackets around the cylinder head cover.
|
| 6. |
Disconnect the reservoir tank coolant hose (A) and then drain the coolant from the reservoir tank.
|
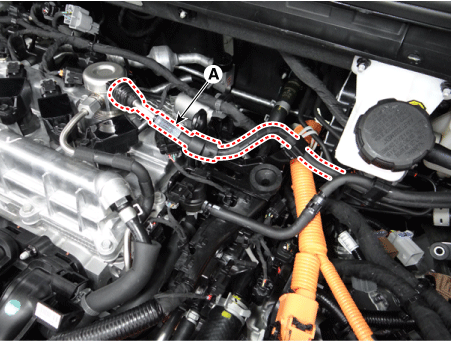
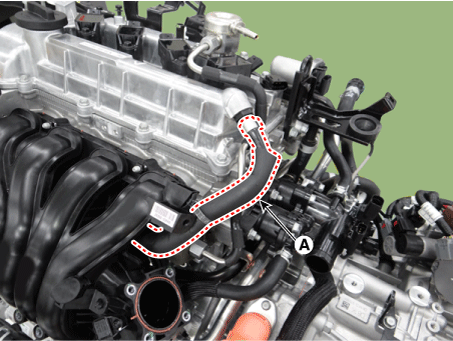
| 7. |
Separate the water return & degas pipe (A).
|
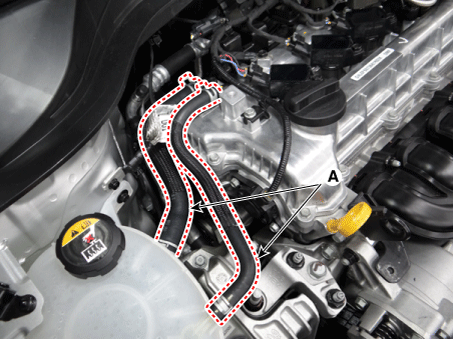
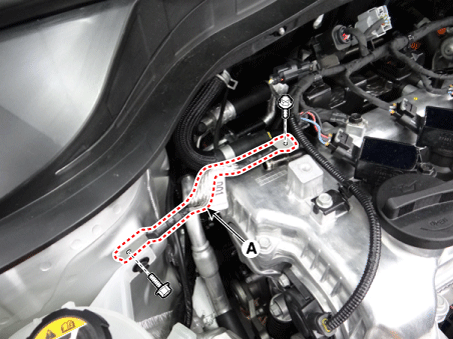
| 8. |
Disconnect the positive crankcase ventilation (PCV) hose (A).
|
| 9. |
Remove the high pressure fuel pump. (Refer to Engine Control/Fuel System - "High Pressure Fuel Pump") |
| 10. |
Remove the ignition coils. (Refer to Engine Electrical System - “Ignition Coil”) |
| 11. |
Disconnect the engine ground cable (A).
|
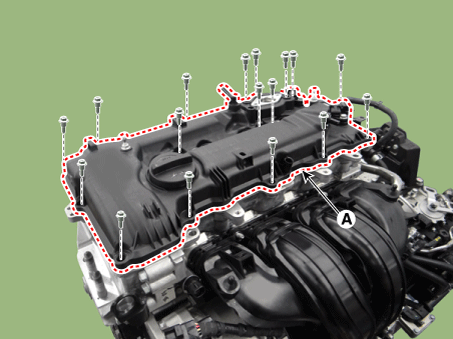
| 12. |
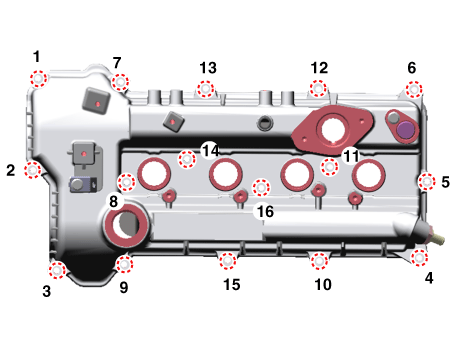
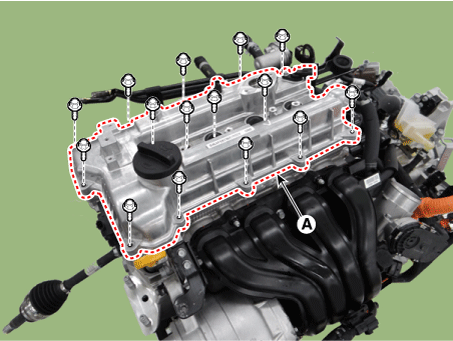
Remove the cylinder head cover (A).
|
| Installation |
| 1. |
Install the cylinder head cover.
|
| 2. |
Install the remaining parts in the reverse order of removal. |
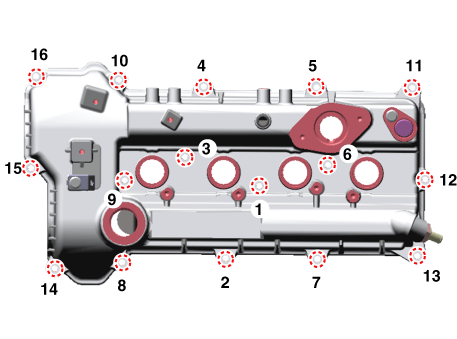
 Cylinder Head Cover Components and components location
Components
1. Cylinder head cover
2. High pressure fuel pump gasket
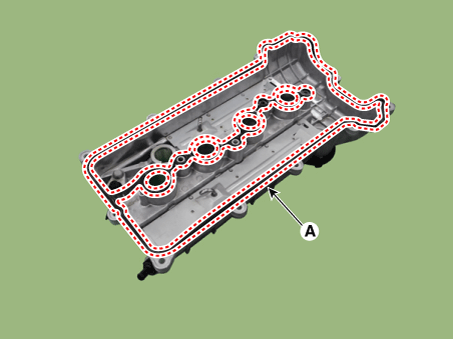
3. Cylinder head cover gasket
...
 CVVT & Camshaft Description and operation
Description
Continuous Variable Valve Timing (CVVT) system advances or retards the valve
timing of the intake and exhaust valve in accordance with the ECM control signal
which is calc ...
Other information:
Kia Niro (DE HEV) Owners Manual: Armed stage
Park the vehicle and stop the engine. Arm the system as described below.
Using the folding key
1. Turn off the engine and remove the ignition key from the ignition switch.
2. Make sure that all doors, the engine hood and tailgate are closed and latched.
3. Lock the doors by pressing the lock but ...
Kia Niro 2017 (DE HEV) Service Manual: Pre-Charge Relay Specifications
Specification
Item
Specification
Contact
Rated Voltage (V)
450
Rated Current (A)
10
Coil
Operating Voltage (V)
12
Resistance (Ω) ...
