Kia Niro: Crash Pad / Crach Pad Center Panel Repair procedures
| Replacement |
Put on gloves to protect your hands. |

|

| 1. |
Disconnect the negative (-) battery terminal. |
| 2. |
Remove the floor console assembly. (Refer to Floor Console - "Floor Console Assembly") |
| 3. |
Remove the cluster fascia panel. (Refer to Crash Pad - "Cluster Fascia Panel ") |
| 4. |
Remove the glove box housing. (Refer to Crash Pad - "Glove Box Housing") |
| 5. |
Remove the center fascia panel. (Refer to Crash Pad - "Center Fascia Panel") |
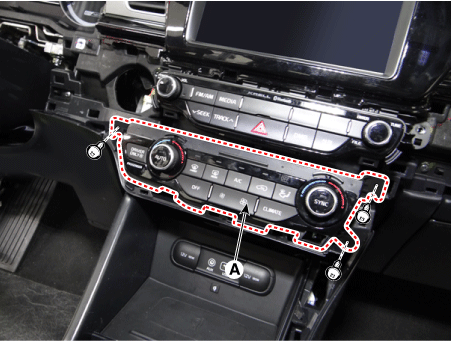
| 6. |
Separate the heater control unit (A) after loosening the screws.
|
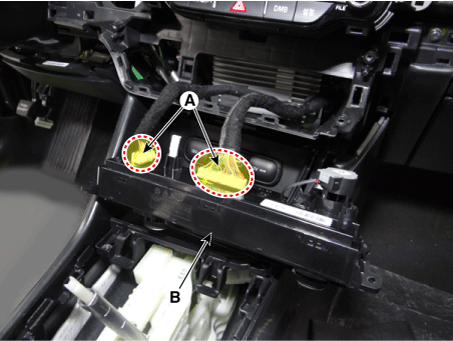
| 7. |
Remove the heater control unit (B) after disconnecting the connector (A).
|
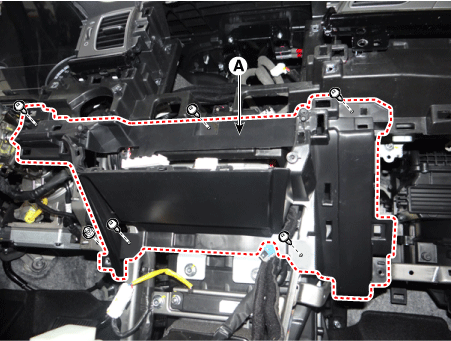
| 8. |
Remove the crash pad main lower panel (A) after loosening the nut & screws.
|
| 9. |
Install in the reverse order of removal.
|
 Crach Pad Center Panel Components and components location
Component Location
1. Crash pad main lower panel
...
 Main Crash Pad Assembly Components and components location
Component Location
1. Crash pad main lower panel
...
Other information:
Kia Niro 2017 (DE HEV) Service Manual: Components and components location
Component Location
1. Body control module (BCM)
2. Rear glass defogger switch (Audio Type)
3. Rear glass defogger switch (AVN Type)
4. Rear glass defogger
...
Kia Niro 2017 (DE HEV) Service Manual: General information
General Troubleshooting
Information
Before Troubleshooting
1.
Check applicable fuses in the appropriate fuse/relay box.
2.
Check the battery for damage, state of charge, cleanliness and tight
connections.
(Refer to Engine Electrical ...
