Kia Niro: High Voltage Battery Cooling System / Cooling Fan Repair procedures
| Removal |
|

| 1. |
Shut off the High Voltage circuit. (Refer to Hybrid Control System - “High Voltage Shutoff Procedure”) |
| 2. |
Remove the high voltage battery front cover. (Refer to High Voltage Battery System - "Case") |
| 3. |
Disconnect the cooling fan connector (A). |
| 4. |
Remove the cooling fan (B) after loosening the mounting bolt and nuts.
|

| Installation |
|
| 1. |
Install the cooling fan in the reverse order of removal. |
| Inspection |
| 1. |
Connect the KDS/GDS to the Data Link Connector (DLC). |
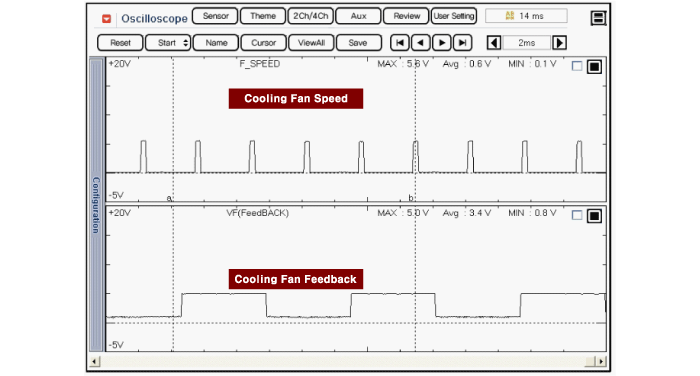
| 2. |
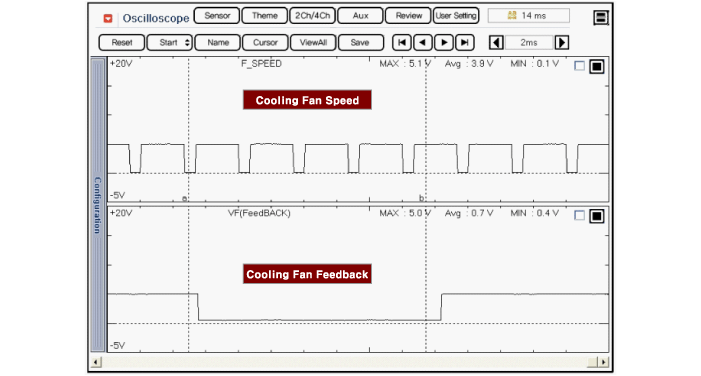
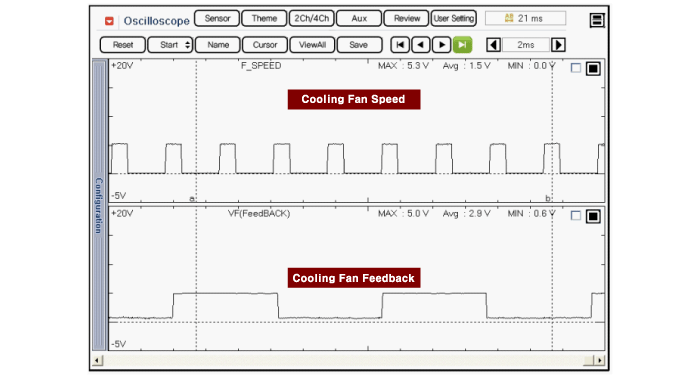
Connect the oscilloscope probe to the BMS extension connectors.
|
| 3. |
Switch "ON" the ignition. |
| 4. |
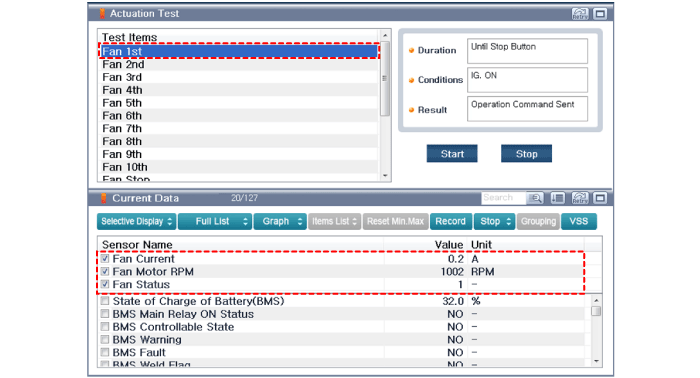
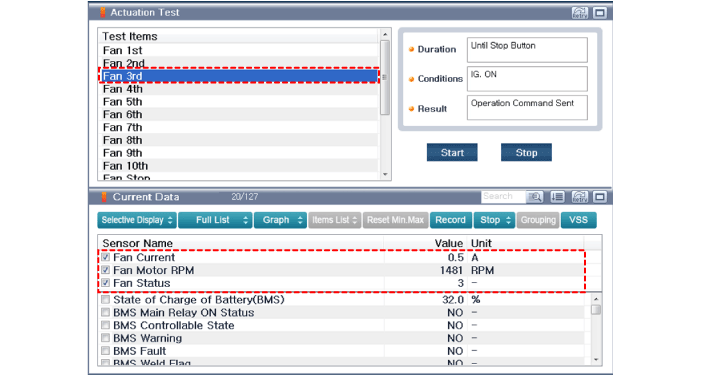
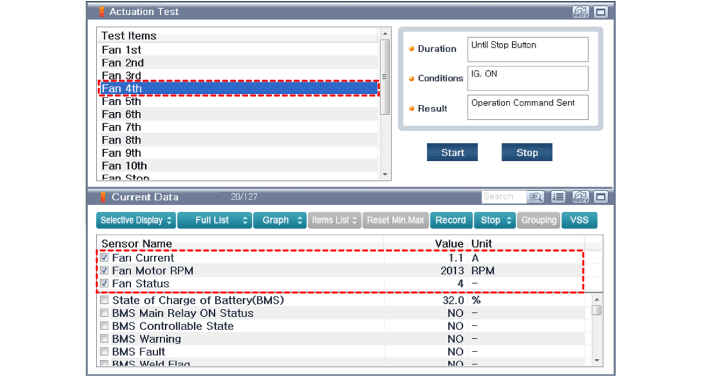
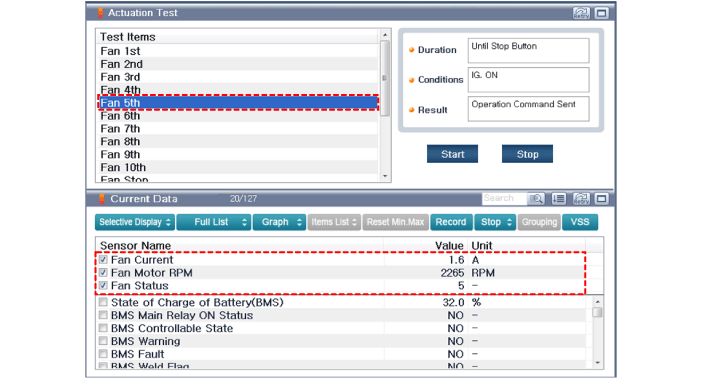
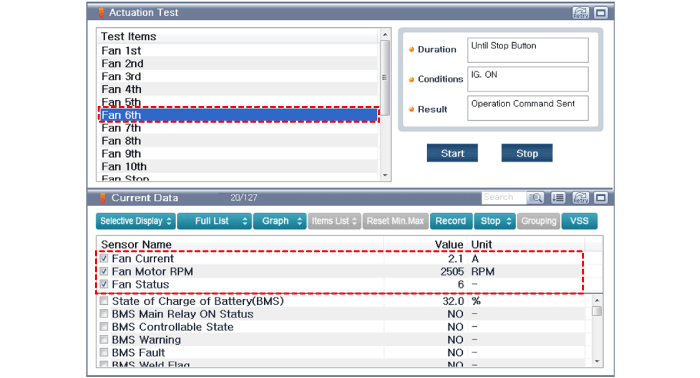
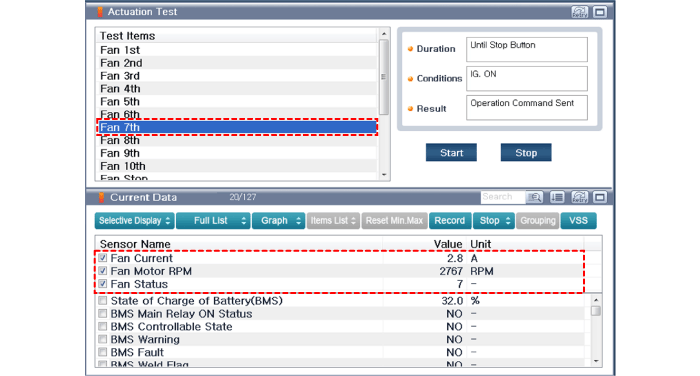
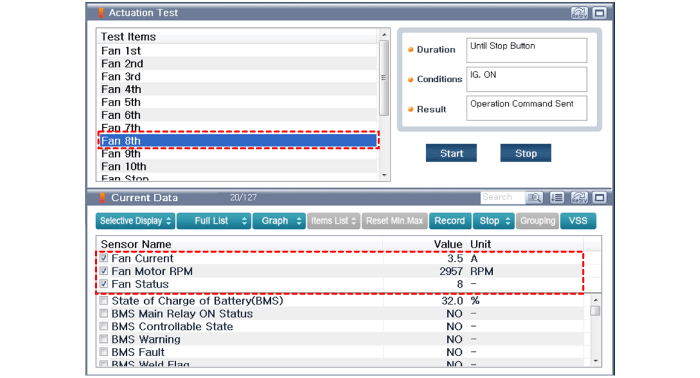
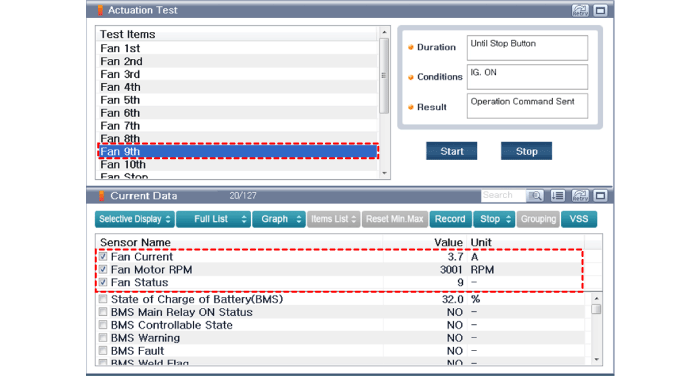
Using KDS/GDS, perform "Actuation Test" and inspect the "current and waveform in each fan operation mode". Duty
[Cooling Fan at 1st]
[Cooling Fan at 2nd]
[Cooling Fan at 3rd]
[Cooling Fan at 4th]
[Cooling Fan at 5th]
[Cooling Fan at 6th]
[Cooling Fan at 7th]
[Cooling Fan at 8th]
[Cooling Fan at 9th]
|


 Cooling Fan Description and operation
Description
Consisting of the main connector, the cooling fan relay and the BLDC motor, the
cooling fan is controlled by the BMS ECU PWM signal which varies with the high voltage
batt ...
 Cooling Duct Repair procedures
Removal
•
Be sure to read and follow the “General Safety Information and
Caution” ...
Other information:
Kia Niro 2017 (DE HEV) Service Manual: Audio Remote Control Components and components location
Components
1. Left Remote Control Switch
(Audio + Hands free + Voice)
2. Right Remote Control Switch
(Cruise+Trip Computer)
...
Kia Niro 2017 (DE HEV) Service Manual: Idler Repair procedures
Removal and Installation
1.
Remove the drive belt.
(Refer to Drive Belt System - "Drive Belt")
2.
Remove the idler (A).
Tightening torque :
39.2 - 49.0 N·m (4.0 - 5.0 kgf·m, 28.9 - 36.2 lb·ft)
...
