Kia Niro: High Voltage Battery Cooling System / Cooling Fan Repair procedures
| Removal |
|

| 1. |
Shut off the High Voltage circuit. (Refer to Hybrid Control System - “High Voltage Shutoff Procedure”) |
| 2. |
Remove the high voltage battery front cover. (Refer to High Voltage Battery System - "Case") |
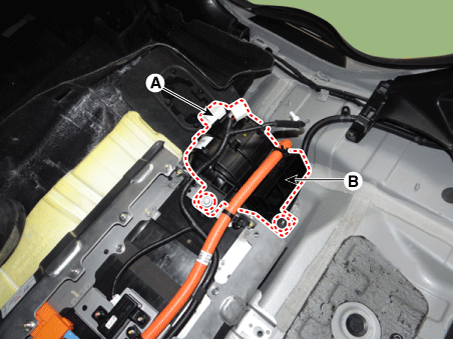
| 3. |
Disconnect the cooling fan connector (A). |
| 4. |
Remove the cooling fan (B) after loosening the mounting bolt and nuts.
|
| Installation |
|
| 1. |
Install the cooling fan in the reverse order of removal. |
| Inspection |
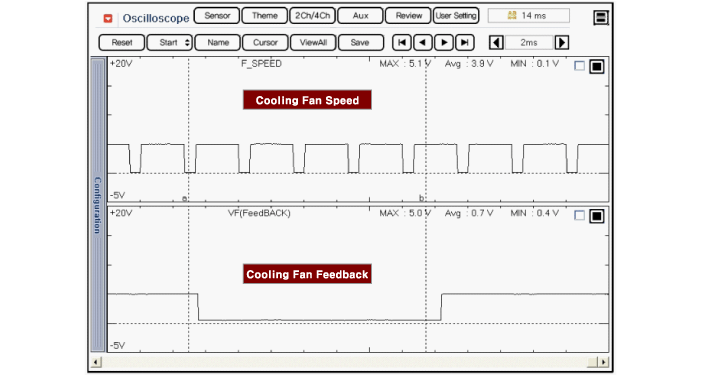
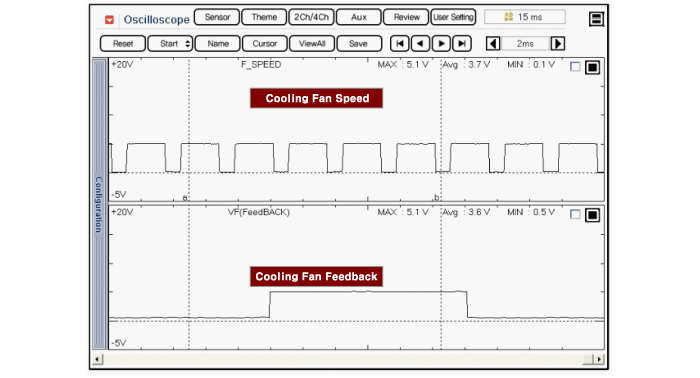
| 1. |
Connect the KDS/GDS to the Data Link Connector (DLC). |
| 2. |
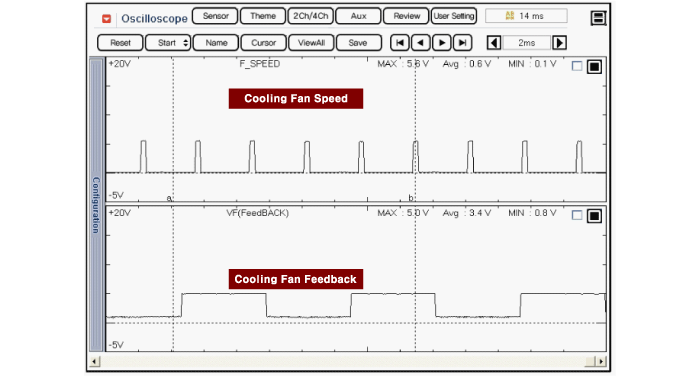
Connect the oscilloscope probe to the BMS extension connectors.
|
| 3. |
Turn the ignition switch ON. |
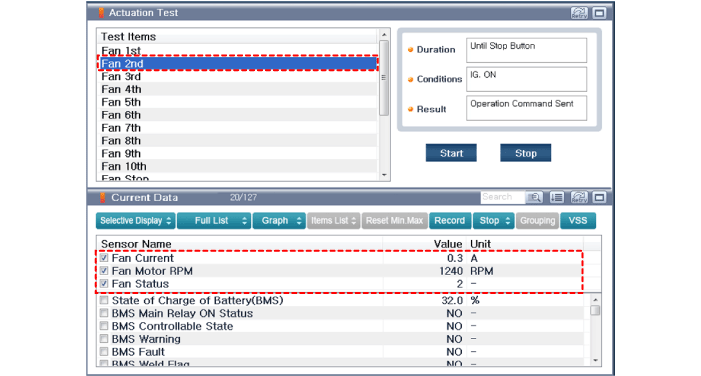
| 4. |
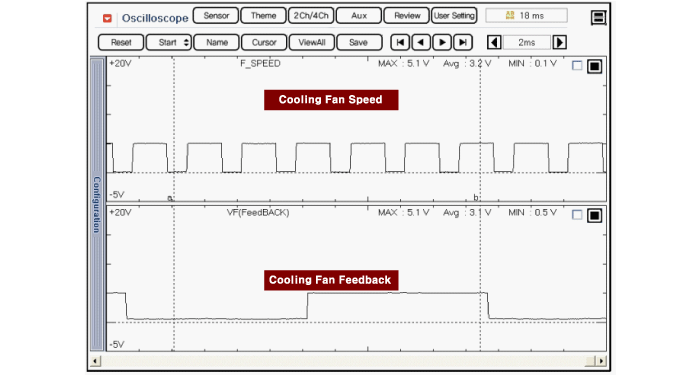
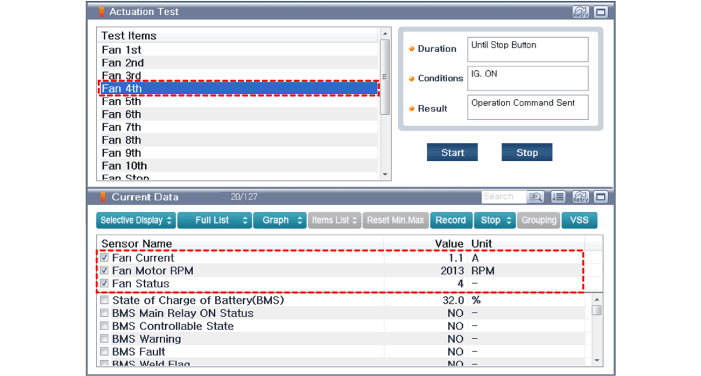
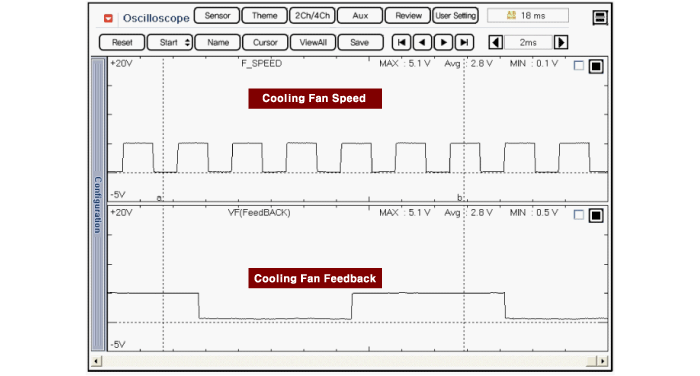
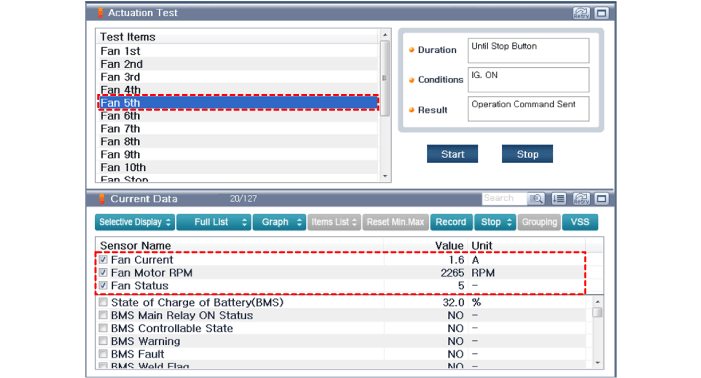
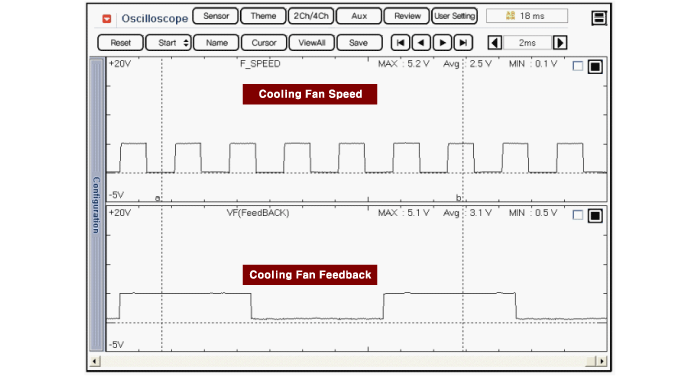
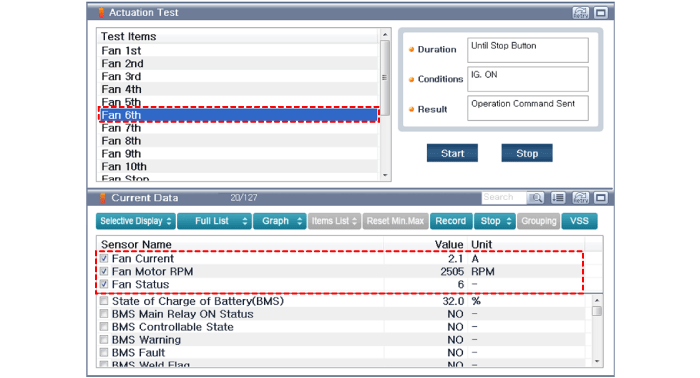
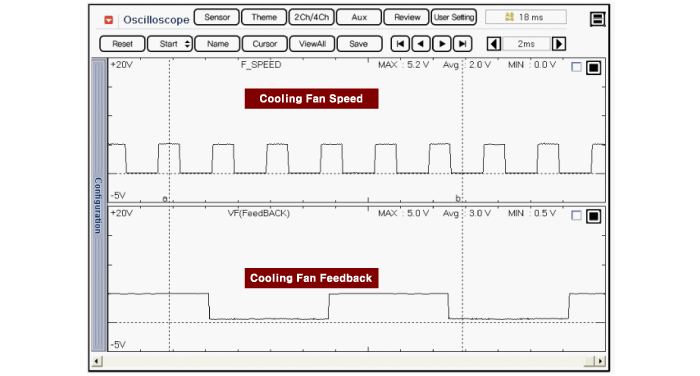
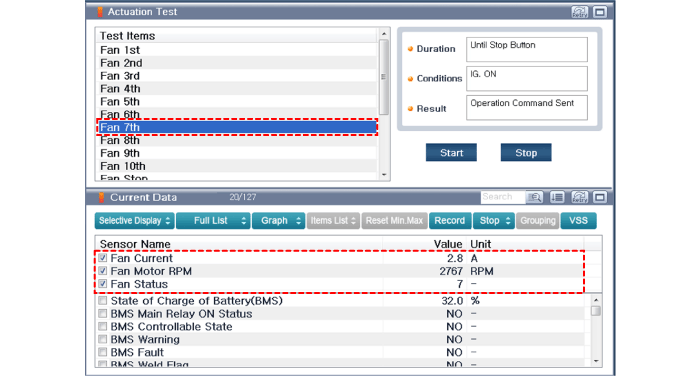
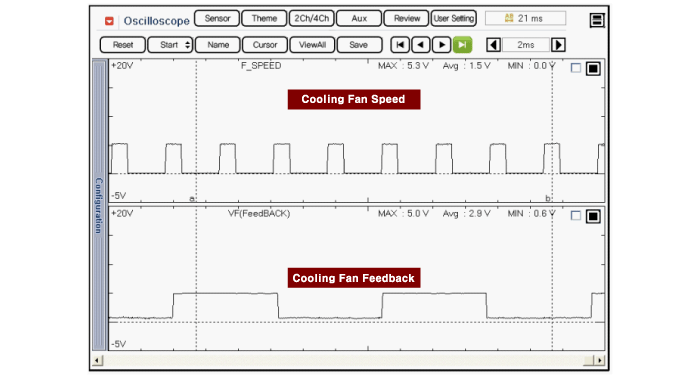
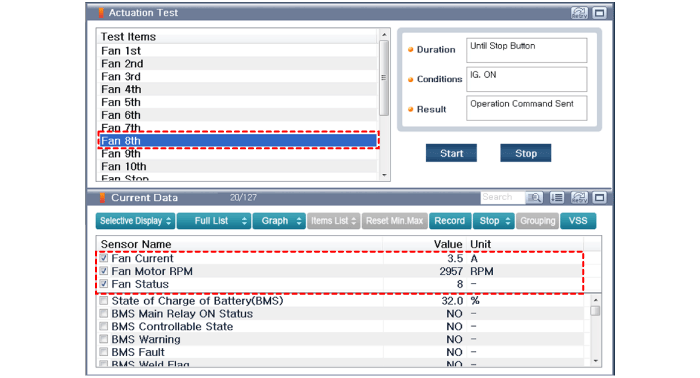
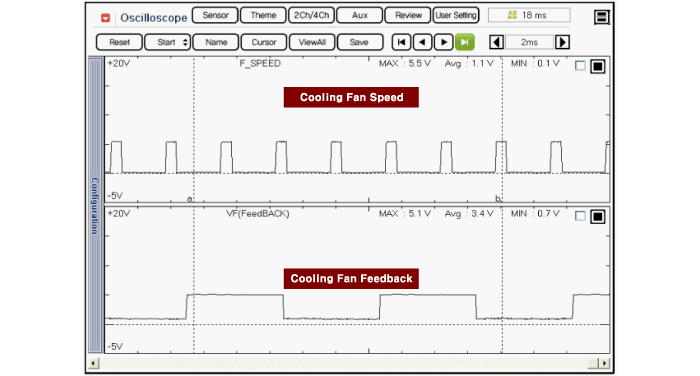
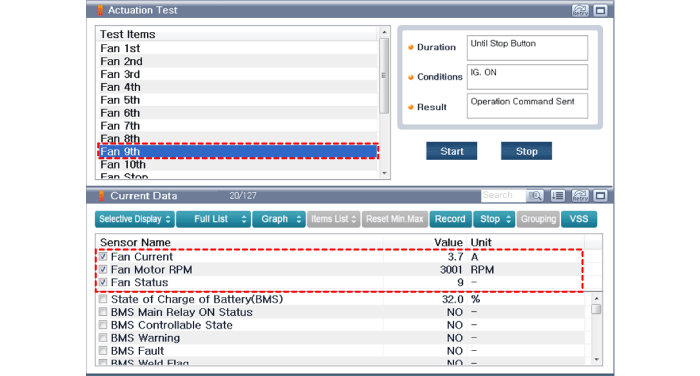
Check “Fan Status”, “Current” "Waveform" and waveforms in each cooling fan operation mode by using “Actuation Test” function in KDS/GDS. Duty
[Cooling Fan at 1st]
[Cooling Fan at 2st]
[Cooling Fan at 3st]
[Cooling Fan at 4st]
[Cooling Fan at 5st]
[Cooling Fan at 6st]
[Cooling Fan at 7st]
[Cooling Fan at 8st]
[Cooling Fan at 9st]
|


 Cooling Fan Description and operation
Description
The cooling Fan consists of the main connector, the cooling fan relay and the
BLDC motor. It is controlled by the BMS ECU PWM signal which varies with the high
voltage bat ...

Other information:
Kia Niro 2017 (DE HEV) Service Manual: Crash Pad Lower Panel Repair procedures
Replacement
Put on gloves to protect your hands.
•
Use a plastic panel removal tool to remove interior trim pie ...
Kia Niro 2017 (DE HEV) Service Manual: Relay Box (Engine Compartment) Components and components location
Component Location
E/R Junction Block
Circuit (E/R Junction Block)
PCB Block
Circuit (PCB Block)
...
