Kia Niro: Crash Pad / Cluster Fascia Panel Repair procedures
| Replacement |
Put on gloves to protect your hands. |

|

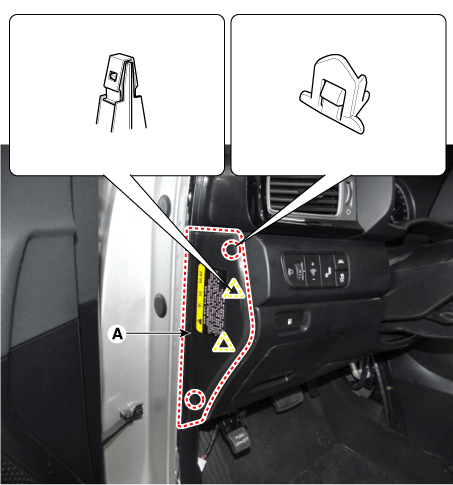
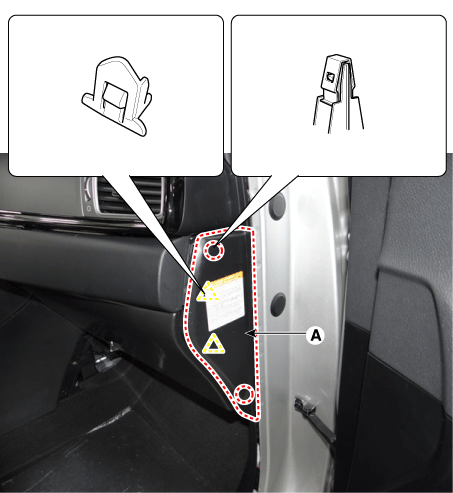
| 1. |
Remove the crash pad side cover [LH] (A) by using a remover.
|
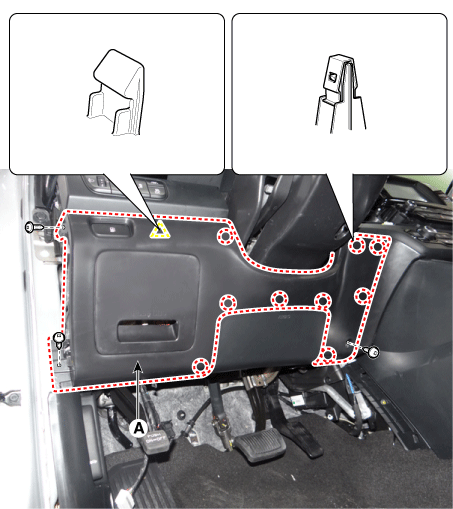
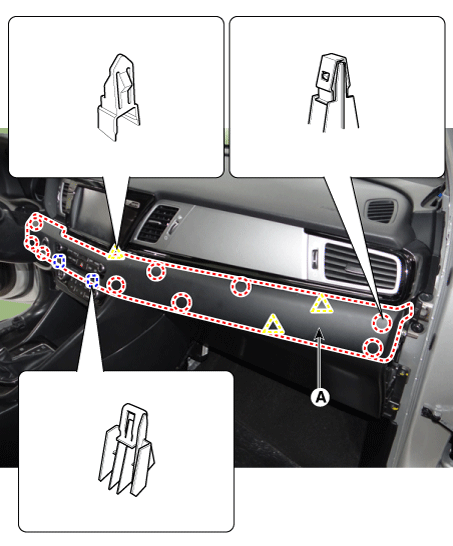
| 2. |
Remove the crash pad lower panel (A) after loosening the screw.
|
| 3. |
Disconnect the fuel filler door switch connector (A).
|

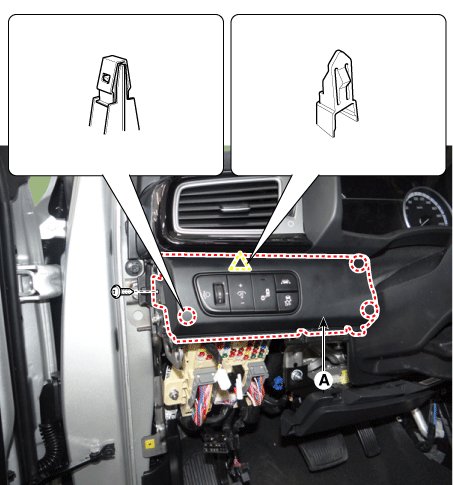
| 4. |
Remove the crash pad plate [LH] (A) after loosening the screw.
|
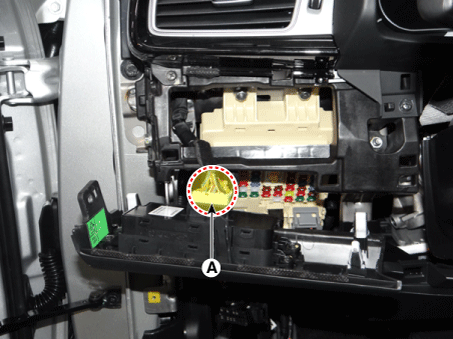
| 5. |
Disconnect the crash pad plate [LH] connector (A).
|
| 6. |
Remove the crash pad side cover [RH] (A) by using a remover.
|
| 7. |
Remove the crash pad garnish [LH] (A) by using a remover.
|
| 8. |
Disconnect the start/stop button connector (A).
|

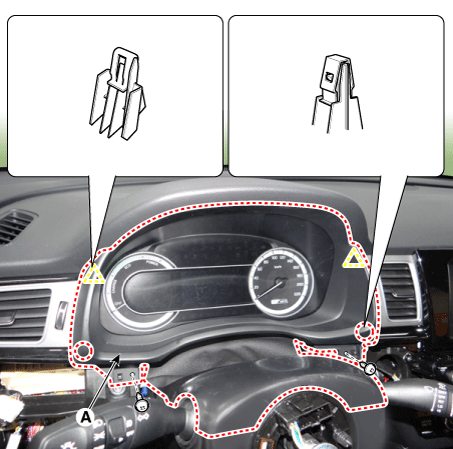
| 9. |
Remove the cluster fascia panel (A) by using a remover.
|
| 10. |
Install in the reverse order of removal.
|
 Cluster Fascia Panel Components and components location
Component Location
1. Cluster fascia panel assembly
...
 Center Fascia Panel Components and components location
Component Location
1. Center fascia panel assembly
2. Center fascia lower panel assembly
...
Other information:
Kia Niro 2017 (DE HEV) Service Manual: Parking Brake Repair procedures
Inspection
Check whether the stroke is within specification when the parking brake pedal
is depressed with 66 lb, 294 N(30 kg) of force. Also, the parking brake alone should
securely hold the vehicle on a fairly steep grade. If the stroke is more or less
than specified, have the p ...
Kia Niro 2017 (DE HEV) Service Manual: Height Adjuster Components and components location
Component Location
1. Height Adjuster
...
