Kia Niro: Seat Electrical / Air Ventilation Seat Repair procedures
| Removal |
[Ventilation Blower]
| 1. |
Disconnect the negative (-) battery terminal. |
| 2. |
Remove the front seat assembly. (Refer to Body - "Front Seat Assembly") |
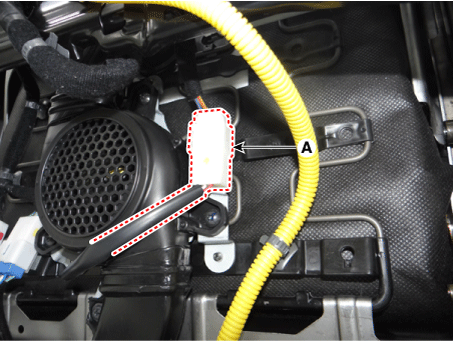
| 3. |
Disconnect the ventilation blower connector (A).
|
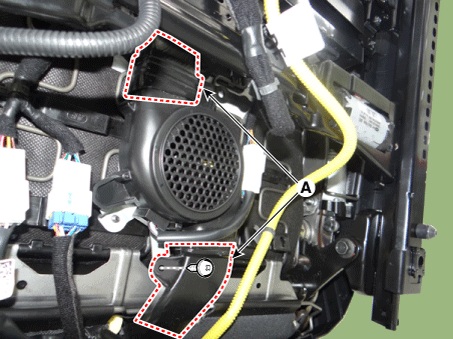
| 4. |
Remove the ventilation blower ducts (A) after removing the screw and clips.
|
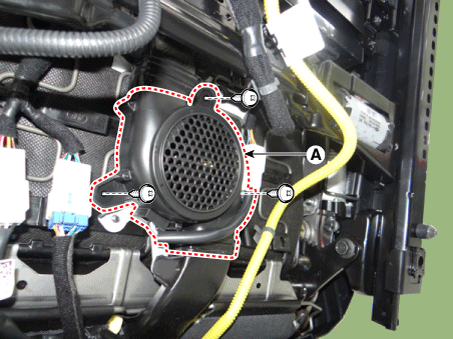
| 5. |
Remove the blower fan (A) after removing the screws.
|
[Ventilation Seat Unit]
| 1. |
Disconnect the negative (-) battery terminal. |
| 2. |
Remove the assist front seat assembly. (Refer to Body - "Front Seat Assembly") |
| 3. |
Remove the front seat cushion cover. (Refer to Body - "Front Seat Cushion Cover") |
| 4. |
Remove the front seat cushoin panel (A) after loosening the mounting bolts.
|
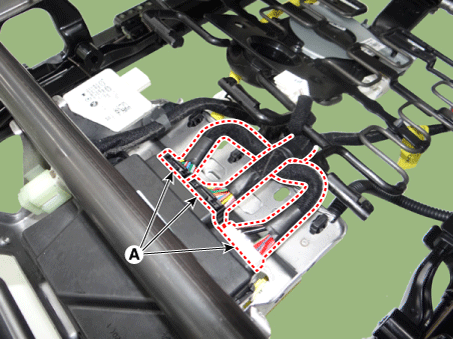
| 5. |
Disconnect the ventilation seat unit connectors (A).
|
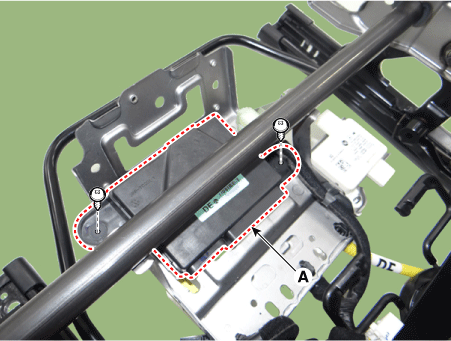
| 6. |
Remove the ventilation seat unit (A) after loosening the mounting screws.
|
| Installation |
[Ventilation Blower]
| 1. |
Install the blower fan. |
| 2. |
Install the blower duct. |
| 3. |
Install the front seat assembly. |
| 4. |
Connect the negative (-) battery terminal. |
[Ventilation Seat Unit]
| 1. |
Install the ventilation seat unit. |
| 2. |
Install the front seat cushion panel. |
| 3. |
Install the front seat cushion cover. |
| 4. |
Install the assist front seat assembly. |
| 5. |
Connect the negative (-) battery terminal. |
| Inspection |
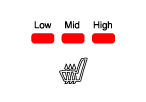
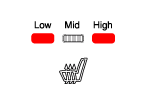
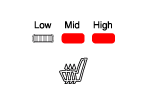
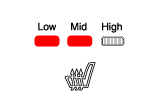
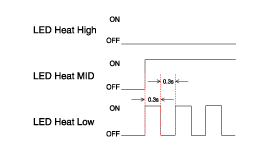
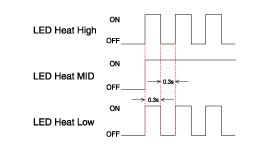
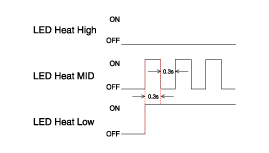
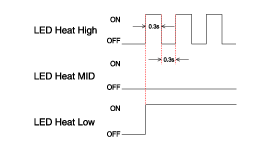
Ventilation Seat Diagnostic Mode
Ventilated seat is largely composed of seat ventilation unit for control, switch for input and blower for output.
The diagnostic mode for checking normal operation of these three components has the following functions.
| 1. |
Operate seat heater switch to enter diagnostic mode. |
| 2. |
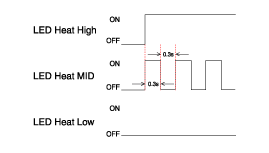
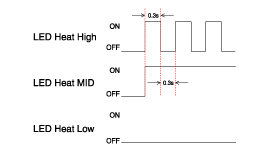
Enter diagnostic mode by referring to below timing chart and explanation. |
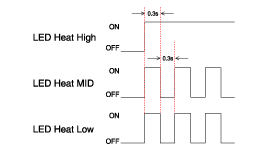
| 3. |
Press seat heater switch as below.
|
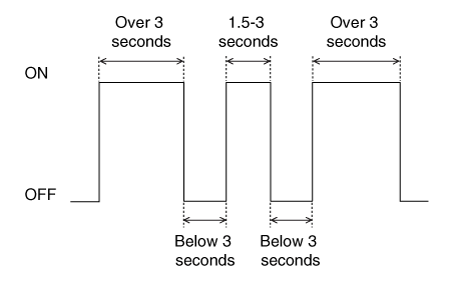
| 4. |
Diagnostic mode will start immediately after 3 LED lamps of seat heater switch (Low, Mid, High) blink once.
|
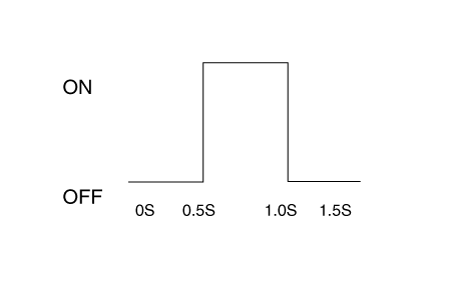
| 5. |
After entering diagnostic mode, check LED blinking status to check errors.
|
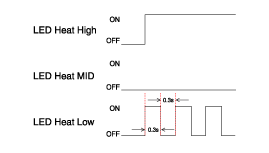
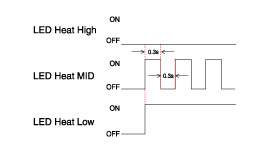
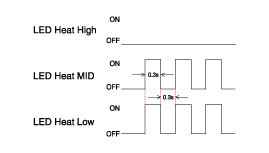
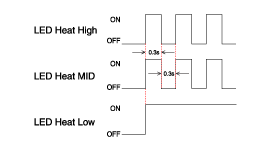
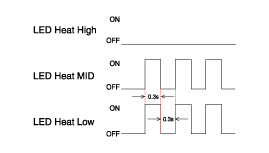
| 6. |
Inspect cause of failure indicated by LED status. |
| 7. |
Trouble code will be recorded by seat ventilation unit. |
| 8. |
When the passenger side seat heater switch is pressed for over 5 seconds, the LED will blink 4 times and trouble code will be deleted. |
| 9. |
Switch "OFF" ignition to exit diagnostic mode of ventilated seat. |
| 10. |
Switch "ON" ignition and check that seat ventilation system works properly. To check trouble code, refer to step 2 again. |
 Air Ventilation Seat Schematic diagrams
Circuit Diagram
...
 Lumbar Support Units Repair procedures
Removal
1.
Disconnect the negative (-) battery terminal.
2.
Remove the front seat back cover.
(Refer to Body - "Front Seat Back Cover&quo ...
Other information:
Kia Niro 2017 (DE HEV) Service Manual: Rear Cross Member Repair procedures
Removal
1.
Disconnect the battery negative cable.
2.
Remove the wheel and tire.
Tightening torque:
107.9 - 127.5 N·m (11.0 - 13.0 kgf·m, 79.6 - 94.0 lb·ft)
...
Kia Niro 2017 (DE HEV) Service Manual: Battery Repair procedures
Inspection
Battery Voltage and
Status
Check the battery voltage and status using the battery tester.
Battery Terminal
1.
Move back and forth to check that the battery terminals (A) are loose
or corroded.If the terminals are corroded, clean them.
...
