
Kia Niro: Horn / Repair procedures
| Removal |
| 1. |
Remove the front bumper cover. (Refer to Body - "Front Bumper Cover") |
| 2. |
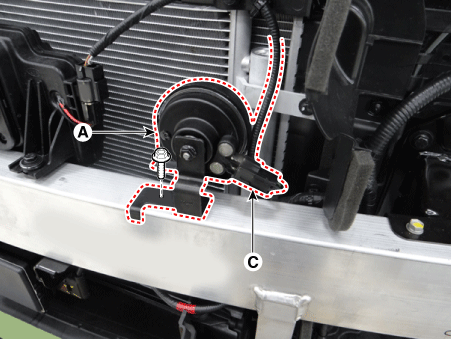
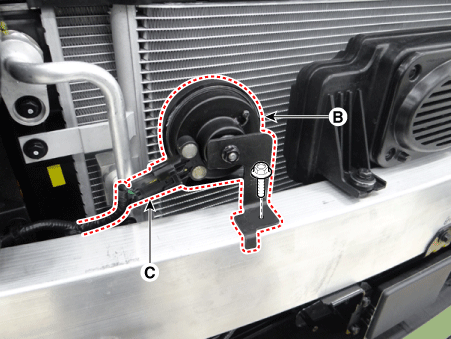
After loosening each mounting bolt of the low-pitch horn (A) and high-pitch horn (B), detach the connector (C) and remove the horn.
|
| Installation |
| 1. |
After connecting the horn connectors, install both high-pitch and low-pitch horns. |
| 2. |
Install the front bumper cover. |
| Inspection |
| 1. |
The relay on the horn of this vehicle is implanted into the metal core block PCB of the engine room relay block. |
The semi-conductor type relay inserted in the PCB is impossible to replace. If the relay needs to be replaced, replace the metal core box and conduct a test on it. |

 Components and components location
Component Location
1. Horn switch
2. Horn relay (Built - in Metal Core Block PCB)
3. Horn (Low pitch)
4. Horn (High pitch)
5. Clock spring
...
 Ignition Switch
...
Other information:
Kia Niro 2017 (DE HEV) Service Manual: Severe Condition Europe market
Maintenance Under Severe
Usage Conditions
- For Gasoline Engine
[For Europe (Except Russia)]
MAINTENANCE ITEM
MAINTENANCE
OPERATION
MAINTENANCE INTERVALS
DRIVING
CONDITION
Engine oil and engine oil filter ...
Kia Niro (DE HEV) Owners Manual: Air bag collision sensors
(1) SRS control module
(2) Front impact sensor
(3) Side pressure sensor (if equipped)
(4) Side impact sensor (if equipped)
WARNING
Do not hit or allow any objects to impact the locations where air bag
or sensors are installed.
This may cause unexpected air bag deployment, which could ...
