Kia Niro: Rear Door / Rear Door Module Repair procedures
| Replacement |
Put on gloves to protect your hands. |
|
| 1. |
Remove the rear door window glass. (Refer to Rear Door - "Rear Door Window Glass") |
| 2. |
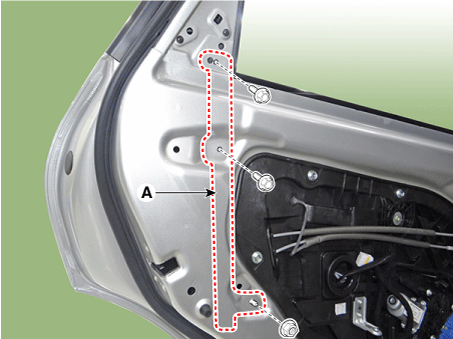
Remove the rear door channel (A) after loosening the mounting bolts and nut.
|
| 3. |
Disconnect the rear door main wiring connector cover (A). |
| 4. |
Disconnect the rear door main wiring connector (A). |
| 5. |
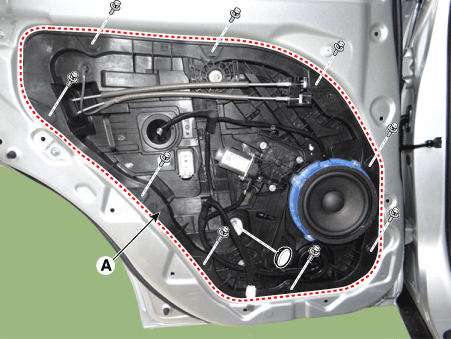
Remove the rear door module (A) after loosening the mounting bolts.
|
| 6. |
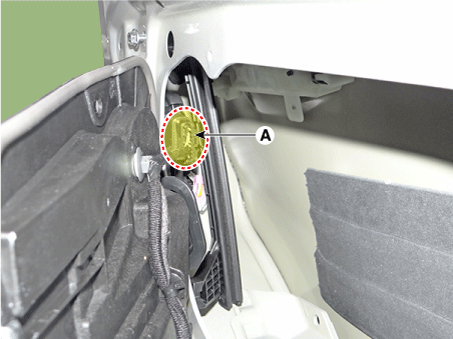
Disconnect the rear door latch connector (A).
|
| 7. |
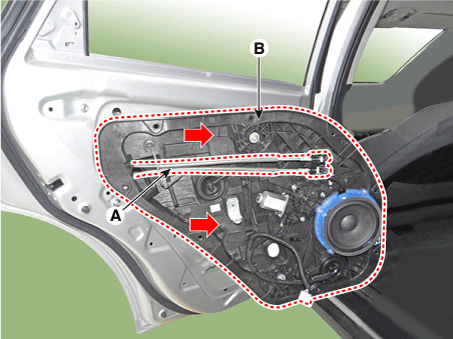
Remove the rear door module (B) from the inside handle (A) by pulling in the direction of the arrow.
|
| 8. |
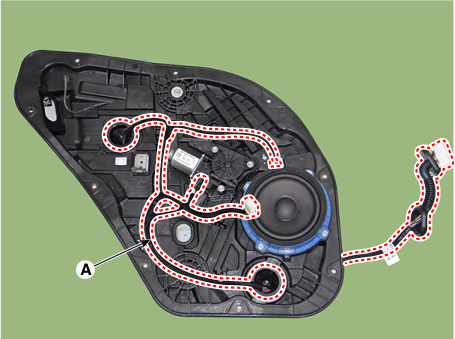
Remove ther rear door main wiring (A).
|
| 9. |
Remove the rear speaker. (Refer to Body Electrical System - "Speakers") |
| 10. |
Remove the rear power window motor. (Refer to Body Electrical System - "Power Window Motor") |
| 11. |
Install in the reverse order of removal.
|
 Rear Door Module Components and components location
Component Location
1. Rear door module
...
 Rear Door Outside Handle Components and components location
Component Location
1. Rear door outside handle
...
Other information:
Kia Niro (DE HEV) Owners Manual: Operation tips
For maximum defrosting, set the temperature control to the extreme right/hot
position and the fan speed control to the highest speed.
If warm air to the floor is desired while defrosting or defogging, set the
mode to the floor-defrost position.
Before driving, clear all snow and ice fro ...
Kia Niro 2017 (DE HEV) Service Manual: Troubleshooting
Troubleshooting
Wireless Power Charger
System Troubleshooting
Trouble status
Inspection item
Inspection
Not charged
Check the mobile phone status
R-1
Amber LED blinks
Overcurr ...


