Kia Niro: AHB(Active Hydraulic Boost) System / Pressure Source Unit Repair procedures
| Removal |
| 1. |
Turn ignition switch OFF and disconnect the negative (-) battery terminal. |
| 2. |
Remove the air cleaner assembly. (Refer to Engine Mechanical System - "Air Cleaner") |
| 3. |
Remove the brake fluid from the reservoir . |
| 4. |
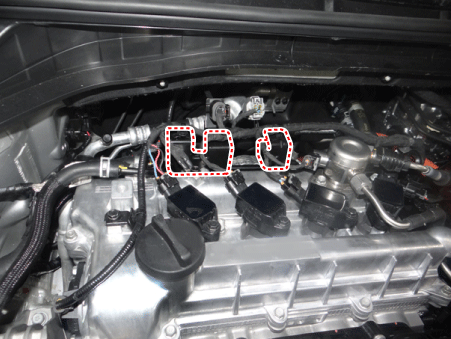
Remove the connector and wire ring bracket.
|
| 5. |
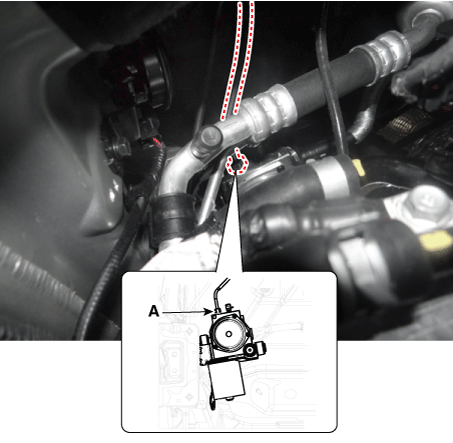
Loosen the pressure source unit (PSU) flare nut (A) and then remove the tube.
|
| 6. |
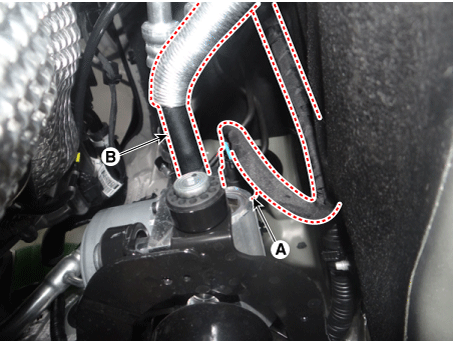
Disconnect the pressure source unit (PSU) connector (A) and hose (B).
|

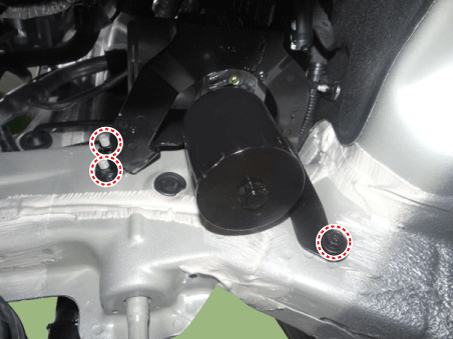
| 7. |
Remove the sub frame. (Refer to Suspension System - "Sub Frame") |
| 8. |
Loosen the nuts and bolt and then remove the pressure source (PSU).
|
| Installation |
| 1. |
Installation is the reverse of removal. |
| 2. |
Check the brake pedal operation. |
| 3. |
After filling the brake fluid in the reservoir, perform the air bleed. (Refer to the Brake system - "Brake Bleeding Procedure") |
| 4. |
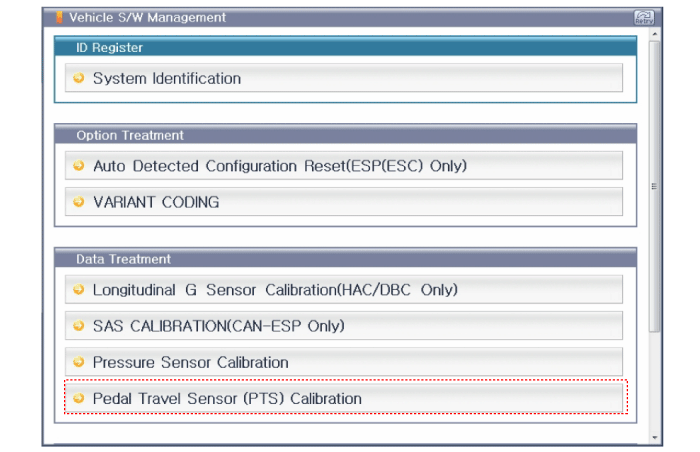
Conduct the pedal traval sensor (PTS) calibration. (Refer to the Brake System - "Brake Pedal") |
| 5. |
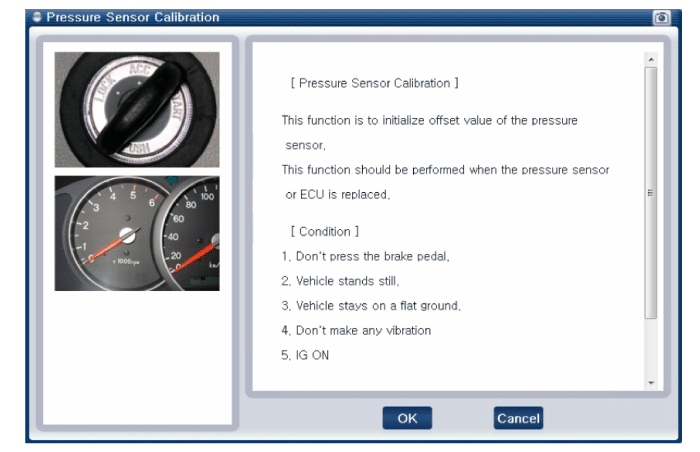
Conduct the pressure sensor calibration. |
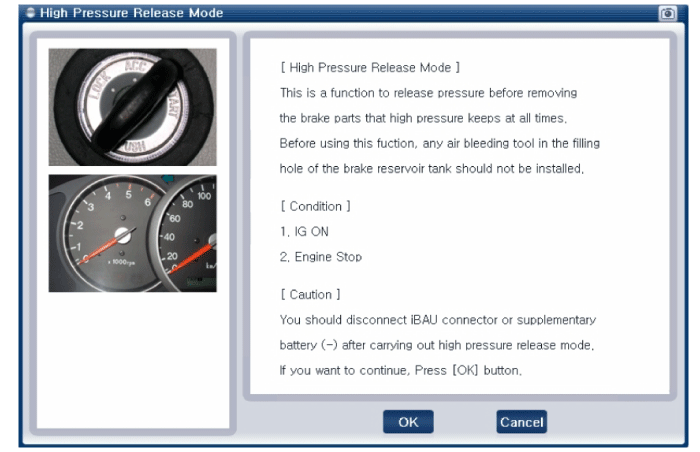
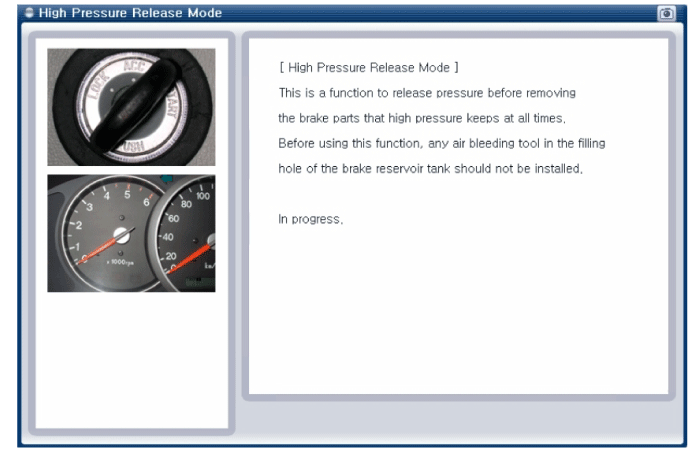
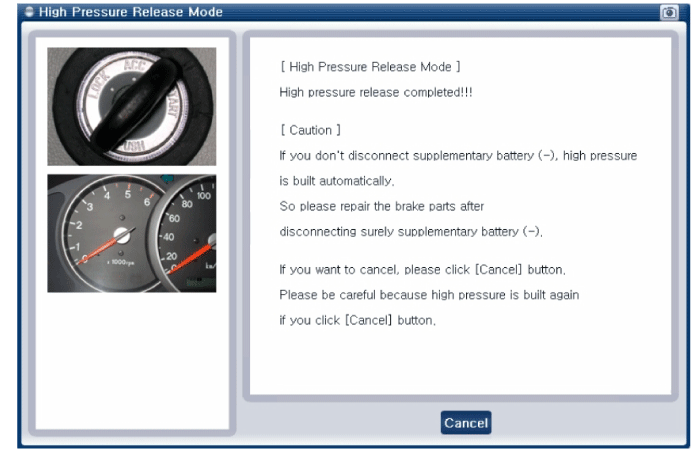
| Diagnostic Procedure Using a Diagnostic Instrument |
The following section describes how to diagnose faults using a diagnostic instrument.
| 1. |
Connect the diagnostic instrument to the self-diagnostic connector (16-pin) beneath the crash pad on the side of driver's seat, and then turn on the ignition to activate the diagnostic instrument. |
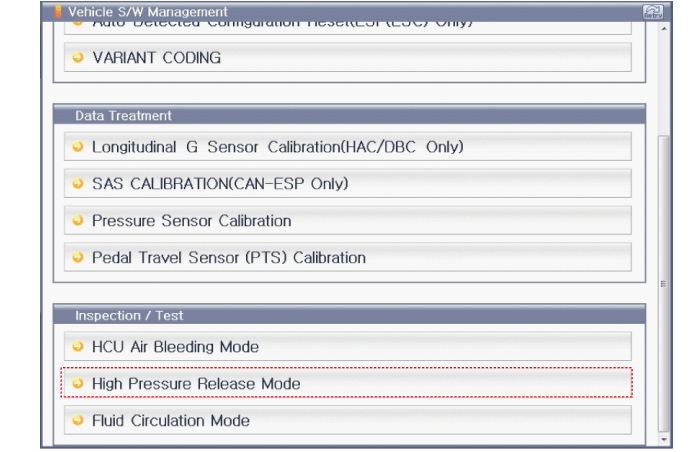
| 2. |
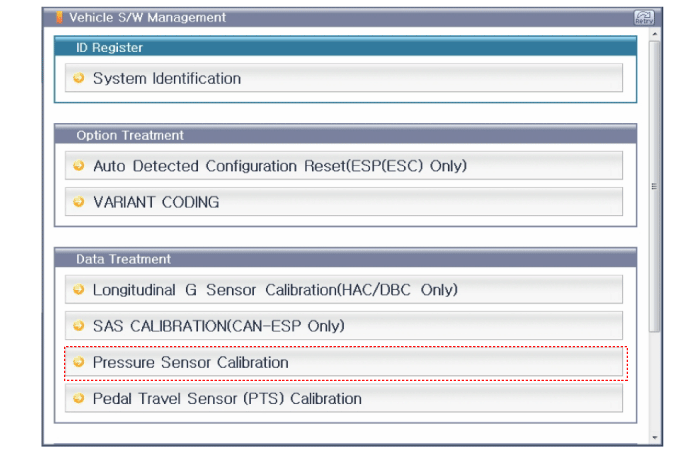
In the GDS Vehicle Type Selection menu, select "Vehicle Type" and "Brake/VDC/AHB" System, and then opt for "OK." Pressure Sensor Calibration
|
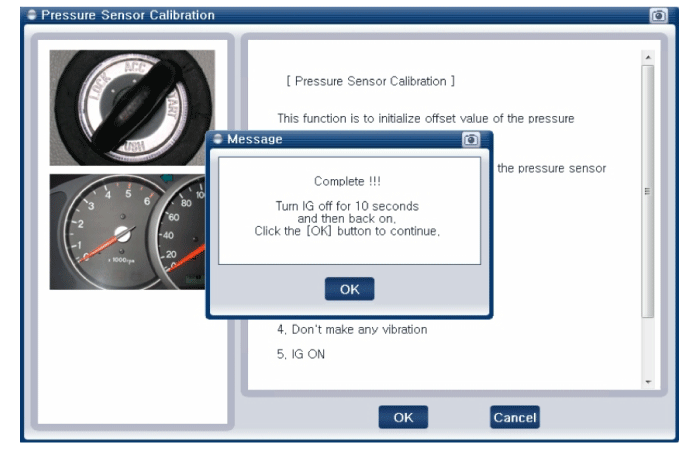
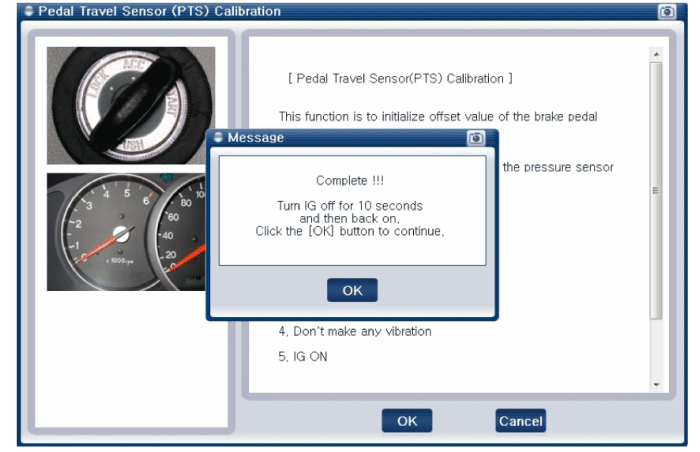
| 3. |
Turn ignition switch off and on after calibration procedure. |
| 4. |
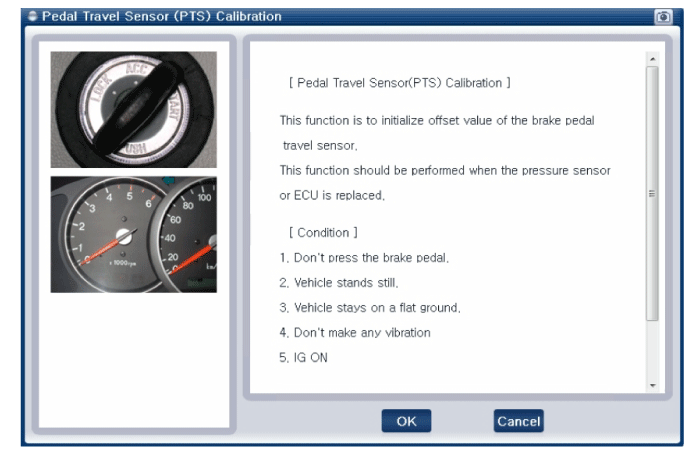
Confirm success of calibration. Pedal Travel Sensor (PTS) Calibration
|
 Pressure Source Unit Components and components location
Components
1. Pressure Source Unit (PSU)
2. Motor
3. Filler adapter
4. Accumulator
5. Bracket
...
 Maintenance
...
Other information:
Kia Niro 2017 (DE HEV) Service Manual: Active Air Flap (AAF) Description and operation
Description
The system receives information from ECU, FATC, TCU, MCU and LDC via CAN communication
. With this information, the active air flap (AAF) controls the motor properly then
the air flaps adjust air flow from radiator grille.
During high speed driving, it will reduce the ...
Kia Niro 2017 (DE HEV) Service Manual: Tailgate Assembly Repair procedures
Replacement
Wear gloves to protect hands from injury.
Work in a group of two when removing and installing the tailgate.
...
