Kia Niro: High Voltage Battery Control System / Pre-Charge Relay Repair procedures
| • |
Be sure to read and follow the “General Safety Information and
Caution” before doing any work related with the high voltage system.
Failure to follow the safety instructions may result in serious
electrical injuries.
|
| • |
Be sure to shut off the high voltage before doing any work related
with the high voltage system(Refer to "High Voltage Shut-off Procedure").
Failure to follow the safety instructions may result in serious
electrical injuries.
|
|
| 1. |
Shut off the High Voltage circuit.
(Refer to Hybrid Control System - “High Voltage Shutoff Procedure”)
|
| 2. |
Remove the power relay assembly.
(Refer to High Voltage Battery System - "Power Relay Assembly (PRA)")
|
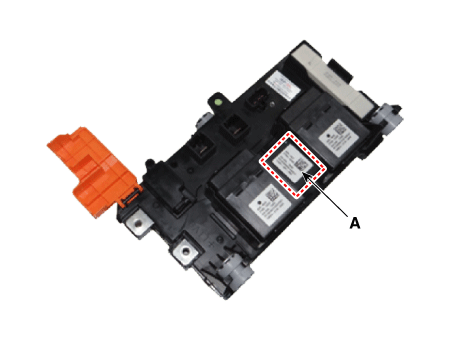
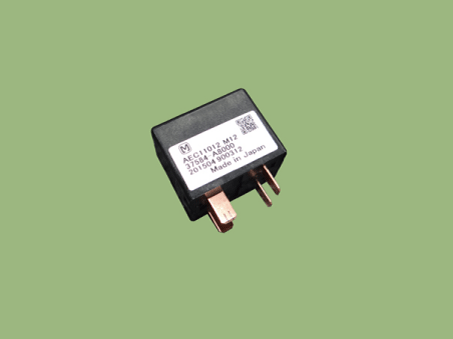
| 3. |
Remove the pre-charge relay (A).
|
| • |
Be sure to read and follow the “General Safety Information and
Caution” before doing any work related with the high voltage system.
Failure to follow the safety instructions may result in serious
electrical injuries.
|
|
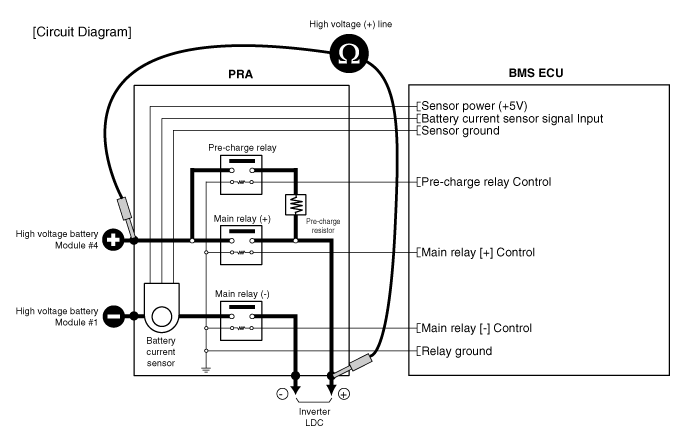
| High voltage pre-charge relay switch
resistance |
[Use multi-tester (relay OFF)]
|
This is the inspection procedure by using a multi tester while the high
voltage (-) relay is OFF.
|
| 1. |
Shut off the high voltage circuit.
(Refer to Hybrid Control System - “High Voltage Shutoff Procedure”)
|
| 2. |
Remove the rear seat cushion.
(Refer to Body - "Rear Seat Assembly")
|
| 3. |
Remove the rear door scuff trim.
(Refer to Body - "Door Scuff Trim")
|
| 4. |
Remove the inlet cooling duct.
(Refer to High Voltage Battery Cooling System - "Cooling Duct")
|
| 5. |
Measure the resistance between the high voltage power terminal (+) and
the inverter power terminal (+).
|
Specification : ∞Ω[20°C(68°F)]
|

|
| 6. |
If the measured resistance is not within the specification, replace the
main relay (-) by referring to repair procedures.
|
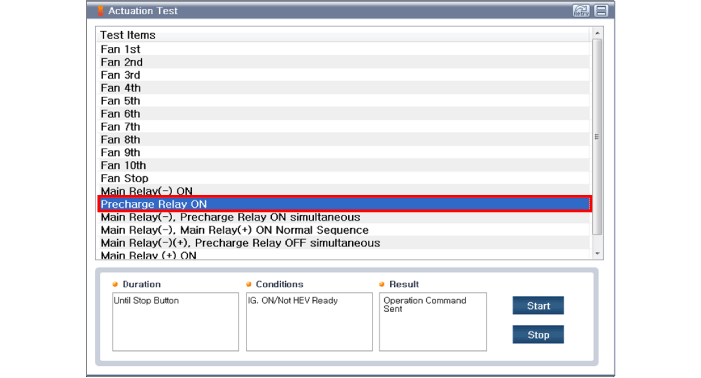
[KDS/GDS - relay ON]
| 1. |
Connect the KDS/GDS to the Data Link Connector (DLC).
|
| 2. |
Switch "ON" the ignition.
|
| 3. |
Activate the pre-charge relay by selecting "Actuation Test" on the KDS/GDS
as shown in the illustration below.
|
When the relay is ON, there is a relay operation sound.
|
|
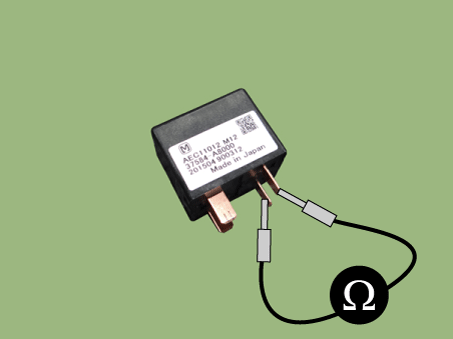
| High Voltage Per-Charge Relay Coil
Resistance |
| 1. |
Shut off the high voltage.
(Refer to "High Voltage Shut-off Procedures")
|
| 2. |
Remove the power relay assembly.
(High Battery System - "Power Relay Assembly")
|
| 3. |
Check for continuity between the terminals using an ohmmeter.
|
Specification : 57 - 63 Ω [20°C(68°F)]
|
|
| • |
Be sure to read and follow the “General Safety Information and
Caution” before doing any work related with the high voltage system.
Failure to follow the safety instructions may result in serious
electrical injuries.
|
| • |
Be sure to shut off the high voltage before doing any work related
with the high voltage system(Refer to "High Voltage Shut-off Procedure").
Failure to follow the safety instructions may result in serious
electrical injuries.
|
|
| 1. |
Install the main relay in the reverse order of removal.
|
Specification
Item
Specification
Resistance (Ω)
40 [20°C (68°F)]
Rated power (W)
40
...


 Pre-Charge Relay Schematic diagrams
 Pre-Charge Resistor Specifications