Kia Niro: High Voltage Battery System / Power Relay Assembly (PRA) Repair procedures
| Removal |
|
| 1. |
Shut off the high voltage circuit. (Refer to Hybrid Control System - “High Voltage Shutoff Procedure”) |
| 2. |
Remove the rear seat cushion. (Refer to Body - "Rear Seat Assembly") |
| 3. |
Remove the rear door scuff trim. (Refer to Body - "Door Scuff Trim") |
| 4. |
Remove the cooling duct. (Refer to High Voltage Battery Cooling System - "Cooling Duct") |
| 5. |
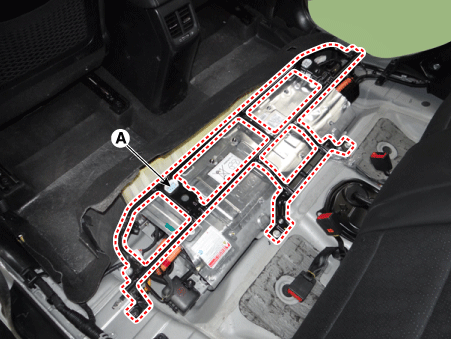
Remove the upper frame (A) after loosening the mounting bolts and nuts.
|
| 6. |
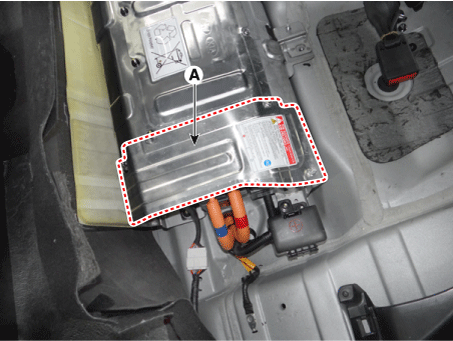
Remove the high voltage battery rear cover (A) after loosening the mounting bolts and nuts.
|
| 7. |
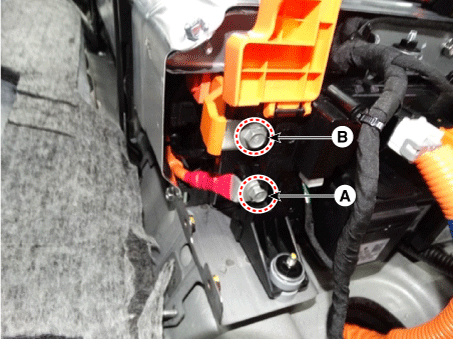
Disconnect the high voltage power cable [+] (A) and high voltage cable [-] (B) after loosening the mounting bolts.
|
| 8. |
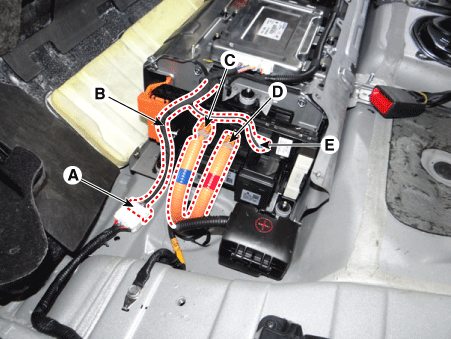
Disconnect the BMS ECU extension connector (A), battery current sensor connector (B), inverter power connector [-] (C), inverter power connector [+] (D) and , PRA connector (E).
|
| 9. |
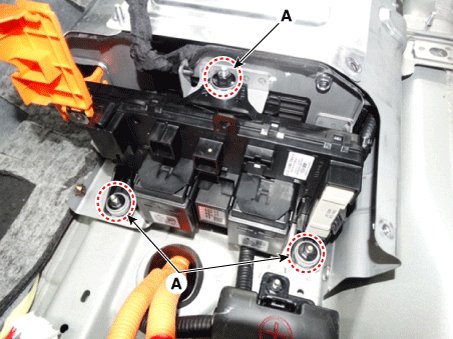
Remove the power relay connector after loosening the mounting nuts (A).
|
| Installation |
|
| 1. |
Install the power relay assembly in the reverse order of removal. |
 Power Relay Assembly (PRA) Description and operation
Description
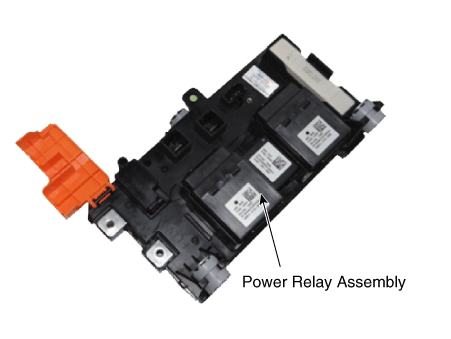
The Power Relay Assembly (PRA) consists of the positive and negative main relays,
pre-charge relay, pre-charge resistor and battery current sensor. It is located
inside th ...
Other information:
Kia Niro 2017 (DE HEV) Service Manual: General safety information and caution
Safety Precaution
Precautions to take before servicing
high voltage system
Hybrid vehicles have high voltage batteries. Incorrect handling
of high voltage sy ...
Kia Niro 2017 (DE HEV) Service Manual: Air Ventilation Seat Repair procedures
Removal
[Ventilation Blower]
1.
Disconnect the negative (-) battery terminal.
2.
Remove the front seat assembly.
(Refer to Body - "Front Seat Assembly")
3.
Disconnect the ventilation blower connector (A). ...


