Kia Niro: AVN System / Multimedia Jack Repair procedures
| Removal |
Multimedia Jack
Put on gloves to protect your hands. |

|

| 1. |
Disconnect the negative (-) battery terminal. |
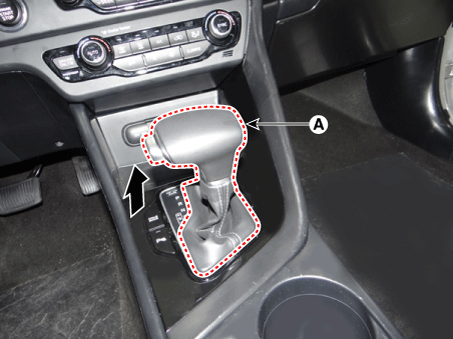
| 2. |
Remove the gear knob & boots (A) pull both of it up.
|
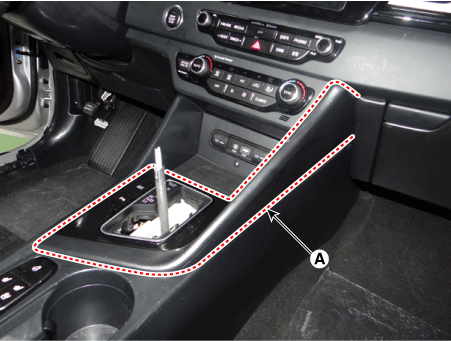
| 3. |
Remove the console upper cover (A) by using a remover.
|
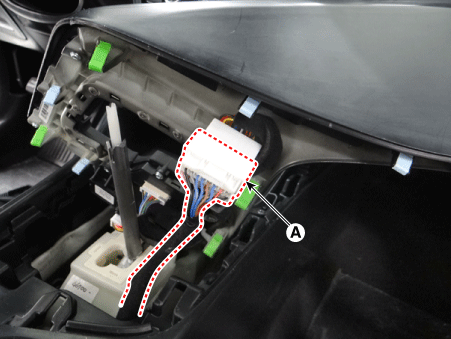
| 4. |
Disconnect the console upper cover connector (A).
|
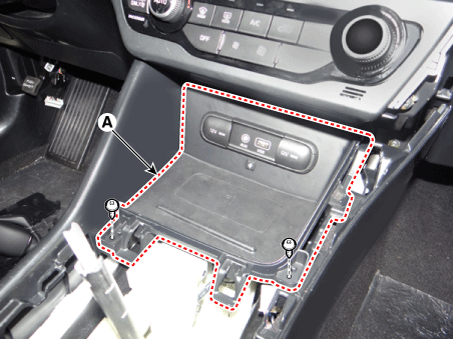
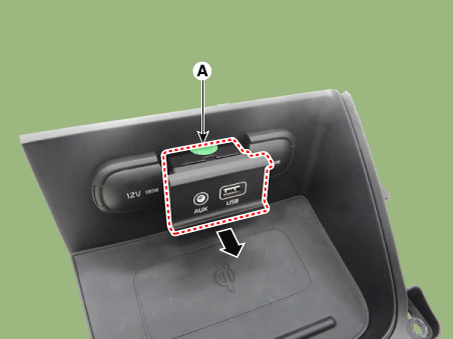
| 5. |
Remove the console tray (A) after loosening the mounting screws.
|
| 6. |
Disconnect the console tray connectors (A).
|
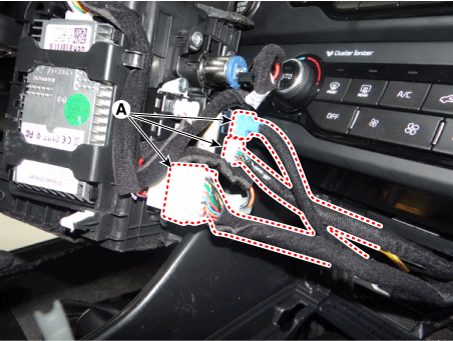
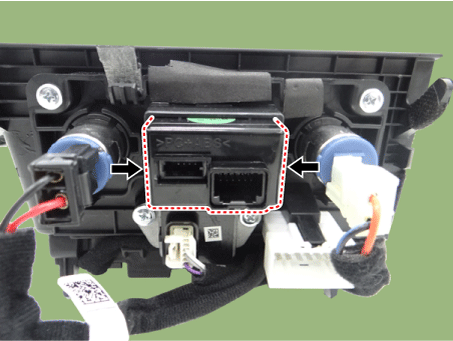
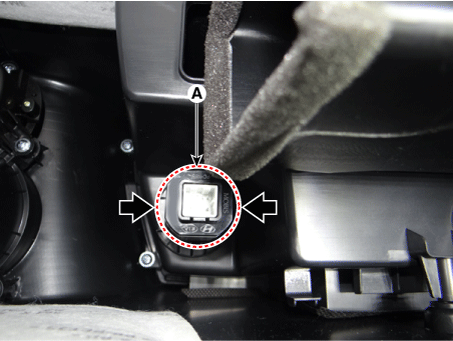
| 7. |
Remove the multimedia jack (A) after releasing the fixed hooks.
|
USB Charger (Console Armrest)
Put on gloves to protect your hands. |
|
| 1. |
Disconnect the negative (-) battery terminal. |
| 2. |
Remove the floor console assembly. (Refer to Body - "Floor Console Assembly") |
| 3. |
Disconnect the USB charger connector (A).
|
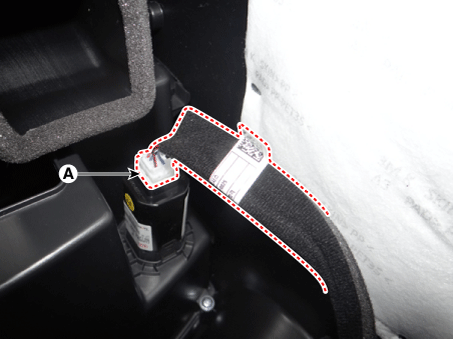
| 4. |
Remove the USB charger (A) after releasing the fixed hooks.
|
| Installation |
Multimedia Jack
| 1. |
Install the multimedia jack. |
| 2. |
Connect the console tray connectors. |
| 3. |
Install the console tray. |
| 4. |
Connect the console upper cover connectors. |
| 5. |
Install the console upper cover. |
| 6. |
Install the gear knob & boots. |
| 7. |
Connect the negative (-) battery terminal.
|
USB Charger (Console Armrest)
| 1. |
Install the USB charger. |
| 2. |
Connect the USB charger connector. |
| 3. |
Install the floor console assembly. |
| 4. |
Connect the negative (-) battery terminal.
|
 Multimedia Jack Description and operation
Description
The multimedia jack on the console upper cover is for customers who like to listen
to external portable music players like the MP3 etc., through the vehicle's sound
sy ...
 Mic Repair procedures
Inspection
1.
Disconnector the negative (-) battery terminal.
2.
Remove the overhead console lamp.
(Refer to Lighting System - "Overhead ...
Other information:
Kia Niro (DE HEV) Owners Manual: Interior general precautions
Prevent chemicals such as perfume, cosmetic oil, sun cream, hand cleaner, and
air freshener from contacting the interior parts because they may cause damage or
discoloration. If they do contact the interior parts, wipe them off immediately.
If necessary, use a vinyle cleaner, see instructions ...
Kia Niro (DE HEV) Owners Manual: Selecting a Child Restraint System (CRS)
When selecting a Child Restraint System for your child, always:
Make sure the Child Restraint System has a label certifying that it meets
applicable Safety Standards of your country. A Child Restraint System may only
be installed if it was approved in accordance with the requirements of EC ...
