Kia Niro: Interior Trim / Luggage Side Trim Repair procedures
| Replacement |
Put on gloves to protect your hands. |

|

| 1. |
Remove the rear seat assembly. (Refer to Rear Seat - "Rear Seat Assembly") |
| 2. |
Remove the rear door scuff trim. (Refer to Interior Trim - "Door Scuff Trim") |
| 3. |
Remove the rear transverse trim. (Refer to Interior Trim - "Rear Transverse Trim") |
| 4. |
Carefully remove the rear door body side weatherstrip and tailgate weatherstrip. |
| 5. |
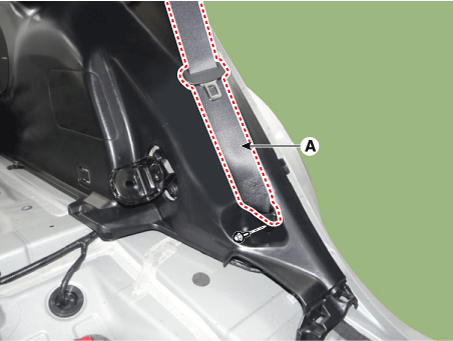
Separate the rear seat belt lower anchor (A) after loosening the mounting bolt.
|
| 6. |
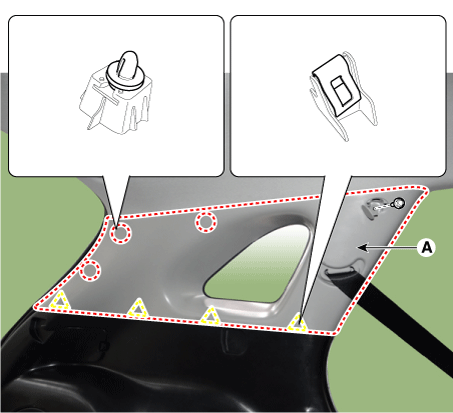
Remove the rear pillar trim (A) after loosening the bolt.
|
| 7. |
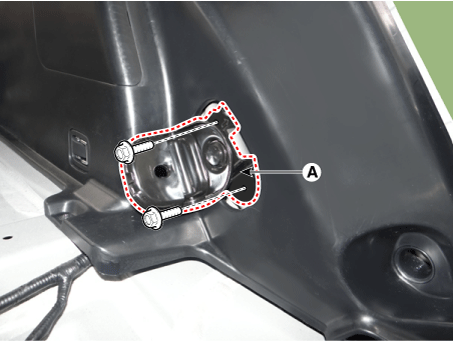
Remove the rear seat folding bracket (A) after loosening the bolts.
|
| 8. |
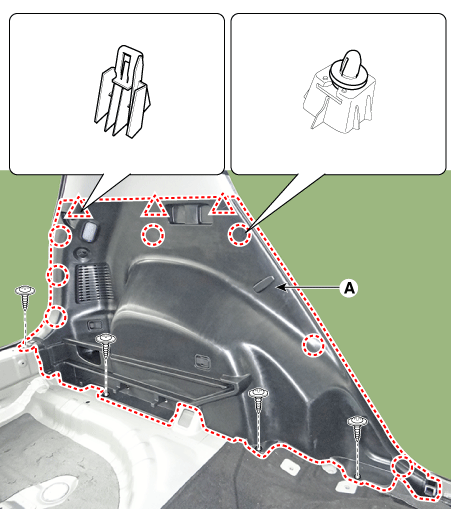
Remove the luggage side trim (A) after loosening the mounting screws.
|
| 9. |
Install in the reverse order of removal.
|
 Luggage Side Trim Components and components location
Component Location
1. Luggage side trim
...
 Rear Pillar Trim Components and components location
Component Location
1. Rear pillar trim
...
Other information:
Kia Niro 2017 (DE HEV) Service Manual: Camshaft Position Sensor (CMPS) Schematic diagrams
Circuit Diagram
Harness Connector
CMPS [Bank 1 / Intake]
CMPS [Bank 1 / Exhaust]
...
Kia Niro 2017 (DE HEV) Service Manual: Power Relay Assembly (PRA) Specifications
Specification
Power Relay Assembly
(PRA)
Item
Specification
Rated Voltage (V)
240
Rated Current (A)
80
...
