Kia Niro: Dual Clutch Transmission Control System / Gear Actuator Assembly Repair procedures
| Removal |
|

| 1. |
Shut off the high voltage circuit. (Refer to Automatic Transaxle System - "High Voltage Shut-off Procedure") |
| 2. |
Drain the coolant of hybrid cooling system. (Refer to Hybrid Motor System - "Coolant") |
| 3. |
Remove the hybrid power control unit (HPCU) assembly. (Refer to Hybrid Control System - "Hybrid Power Control Unit") |
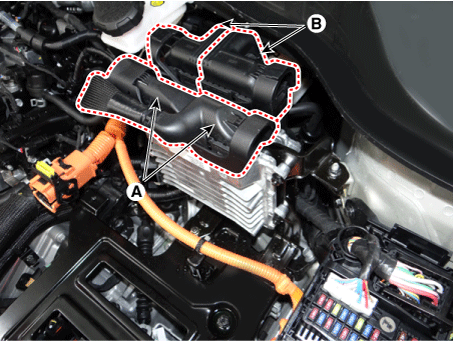
| 4. |
Disconnect the TCM connector (A) and ECM connector (B).
|
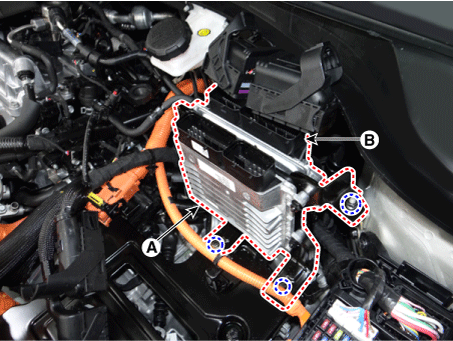
| 5. |
Remove the TCM (A) and ECM (B).
|
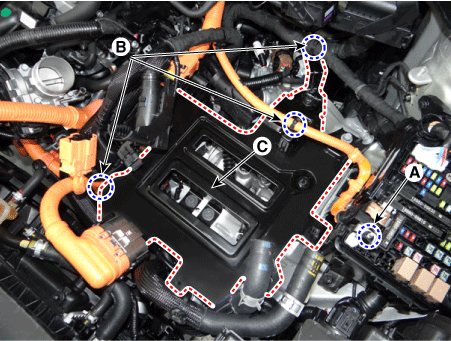
| 6. |
Remove the HPCU tray (C) after removing the nut (A) and wiring mounting clips (B).
|
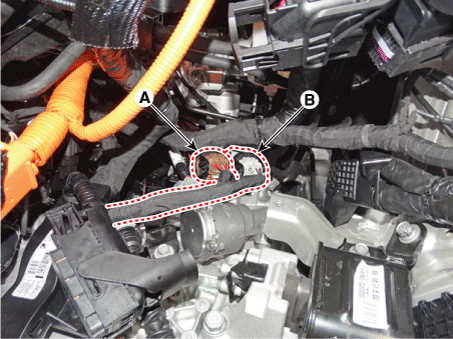
| 7. |
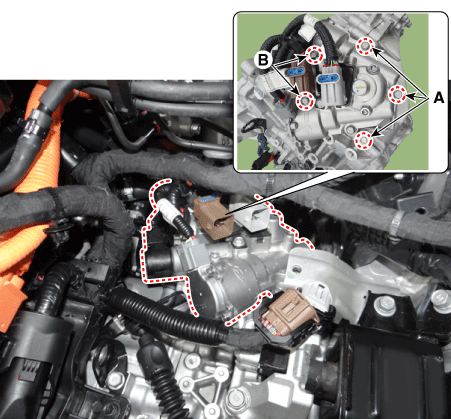
Disconnect the gear actuator motor connector (A) and gear actuator solenoid connector (B).
|
| 8. |
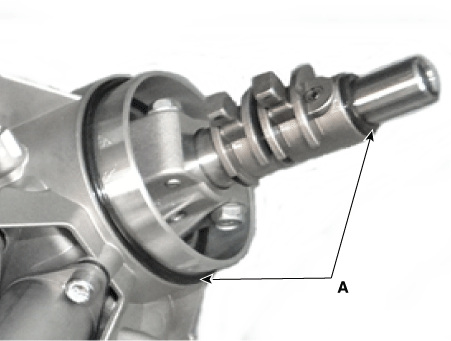
Remove the gear actuator assembly after loosening bolts (A, B).
|
| Installation |
| 1. |
Install in the reverse order of removal. |
|

 Gear Actuator Assembly Schematic diagrams
Schematic Diagrams
...
 Input Speed Sensor Components and components location
Component Location
1. Input speed sensor
...
Other information:
Kia Niro 2017 (DE HEV) Service Manual: Repair procedures
Adjustment
Glass Adjustment
Check the glass run channel for damage or deterioration, and replace
it if necessary.
1.
Remove the rear door trim.
(Refer to Rear Door - "Rear Door ...
Kia Niro 2017 (DE HEV) Service Manual: Front Driveshaft Components and components location
Component location
1. Inner shaft bearing bracket
2. Drive shaft (RH)
3. Drive shasft (LH)
...
