Kia Niro: Engine And Transaxle Assembly / Engine Mounting Repair procedures
| Removal and Installation |
Engine Mounting Bracket
| 1. |
Remove the engine room under cover. (Refer to Engine and Transaxle Assembly - "Engine Room Under Cover") |
| 2. |
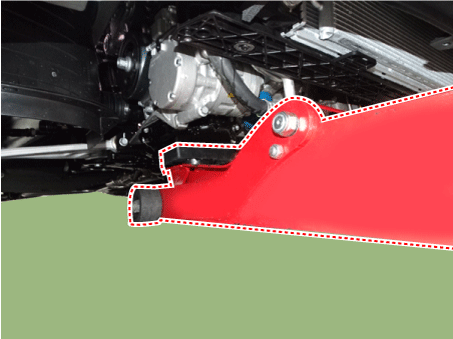
Install the jack to the edge of upper oil pan to support the engine.
|
| 3. |
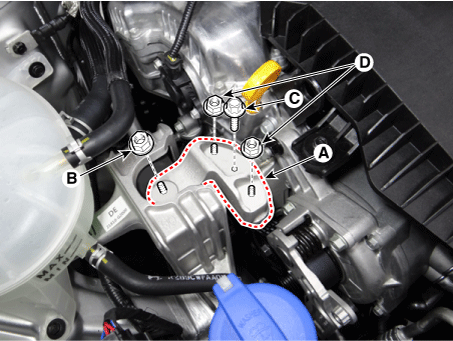
Remove the engine mounting support bracket (A).
|
| 4. |
Remove the reservoir tank. (Refer to Cooling System - "Reservoir Tank") |
| 5. |
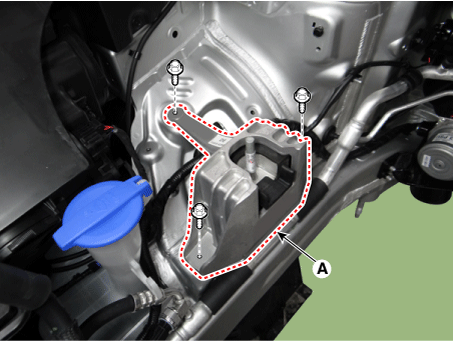
Remove the engine mounting bracket (A).
|
| 6. |
Install in the reverse order of removal. |
Roll Rod Bracket
| 1. |
Remove the engine room under cover. (Refer to Engine and Transaxle Assembly - "Engine Room Under Cover") |
| 2. |
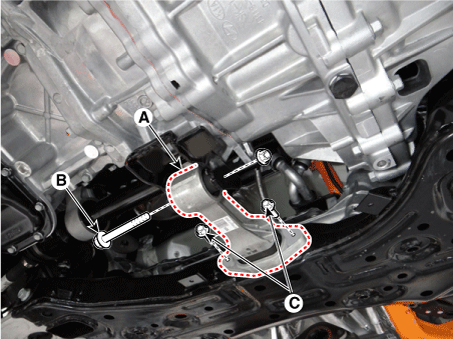
Remove the roll rod bracket (A).
|
| 3. |
Install in the reverse order of removal. |
Transaxle Mounting Bracket
|
| 1. |
Shut off the high voltage circuit. (Refer to Engine Mechanical System - “High Voltage Shut off Procedure”) |
| 2. |
Remove the engine room under cover. (Refer to Engine and Transaxle Assembly - "Engine Room Under Cover") |
| 3. |
Drain the inverter coolant. (Refer to Hybrid Motor System - "Coolant") |
| 4. |
Remove the air cleaner assembly. (Refer to Intake and Exhaust System - "Air Cleaner") |
| 5. |
Remove the hybrid power control unit (HPCU) and tray. (Refer to Hybrid Control System - "Hybrid Power Control Unit (HPCU)") |
| 6. |
Remove the Engine Control Module (ECM). (Refer to Engine Control/Fuel System - "Engine Control Module (ECM)") |
| 7. |
Install the jack to the edge of transaxle. |
| 8. |
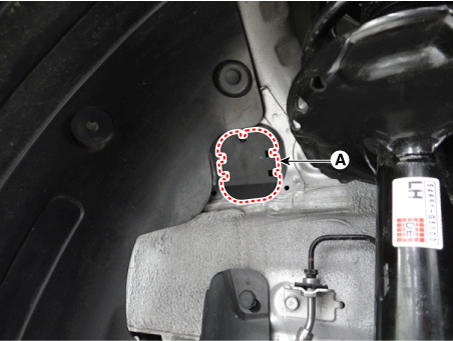
Remove the transaxle mounting side panel packing (A).
|
| 9. |
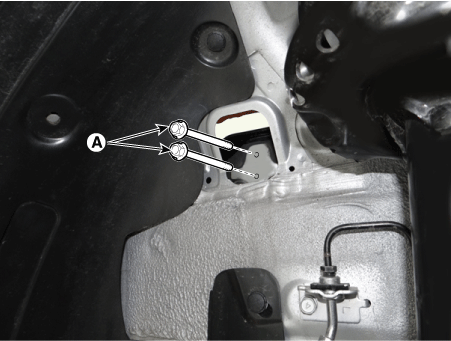
Remove the transaxle mounting bolt (A).
|
| 10. |
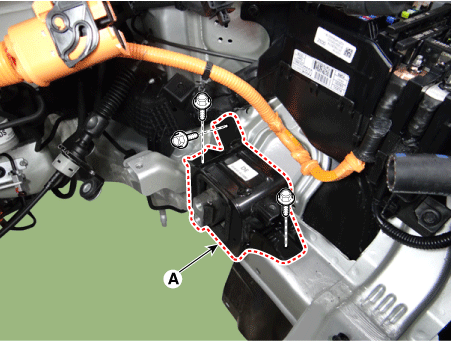
Remove the transaxle mounting bracket (B).
|
| 11. |
Install in the reverse order of removal. |
 Engine Mounting Components and components location
Components
1. Transaxle mounting bracket
2. Roll rod bracket
3. Engine mounting bracket
4. Engine mounting support bracket
...
 Engine And Transaxle Assembly Repair procedures
Removal
•
Be sure to read and follow the “General Safety Information and
Caution” ...
Other information:
Kia Niro 2017 (DE HEV) Service Manual: Case Repair procedures
Removal
•
Be sure to read and follow the “General Safety Information and
Caution” before doing any work related with the high voltage system.
Failure to follow the safety instr ...
Kia Niro 2017 (DE HEV) Service Manual: Cluster Fascia Panel Repair procedures
Replacement
Put on gloves to protect your hands.
•
Use a plastic panel removal tool to remove interior trim pie ...

