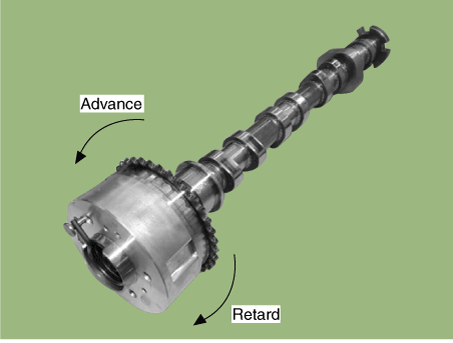
Kia Niro: Cylinder Head Assembly / CVVT & Camshaft Repair procedures
| Removal |
|
Mark all wiring and hoses to avoid misconnection. |
|
| 1. |
Shut off the High Voltage circuit. (Refer to General Information - "High Voltage Shutoff Procedure") |
| 2. |
Remove the cylinder head cover. (Refer to Cylinder Head Assembly - "Cylinder Head Cover") |
| 3. |
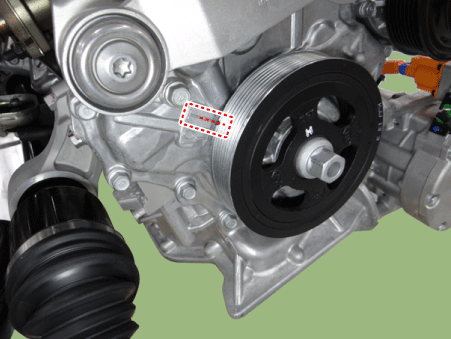
Set No.1 cylinder to TDC (Top dead center) on compression stroke.
|
| 4. |
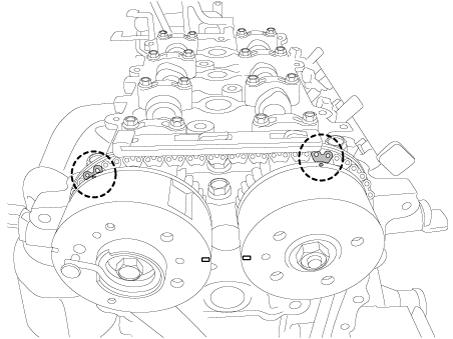
Remove the timing. (Refer to Timing System - "Timing Chain") |
| 5. |
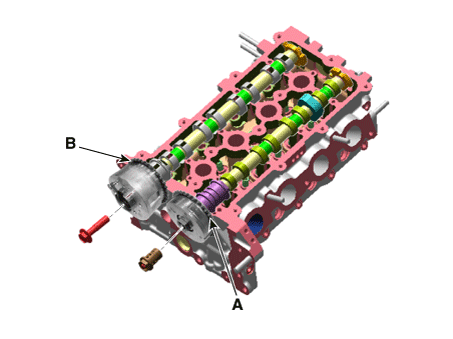
Remove the intake CVVT assembly (A) and exhaust CVVT assembly (B).
|
| 6. |
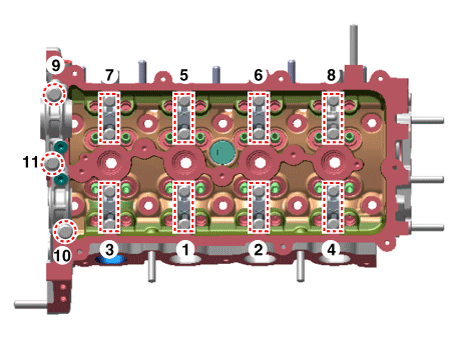
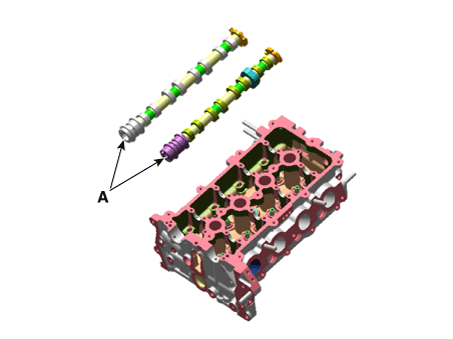
Remove the camshaft.
|
| Inspection |
Camshaft
| 1. |
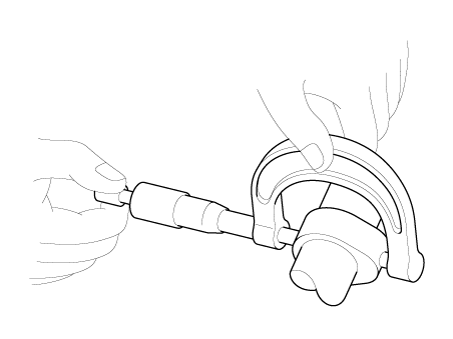
Inspect the cam lobes. Using a micrometer, measure the cam lobe height. If the cam lobe height is less than specification, replace the camshaft.
|
| 2. |
Check the surface of the camshaft journal for wear. If the journal is worn excessively, replace the camshaft. |
| 3. |
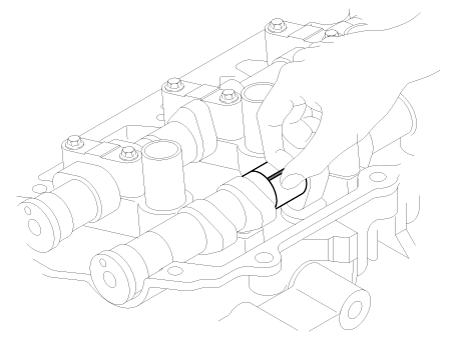
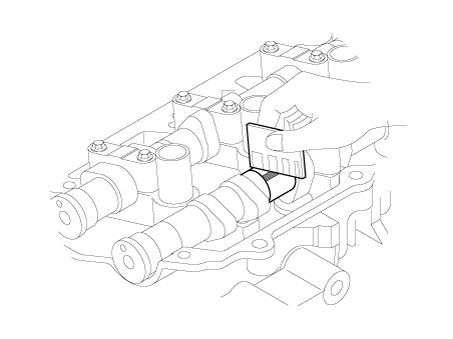
Inspect the camshaft journal clearance.
|
| 4. |
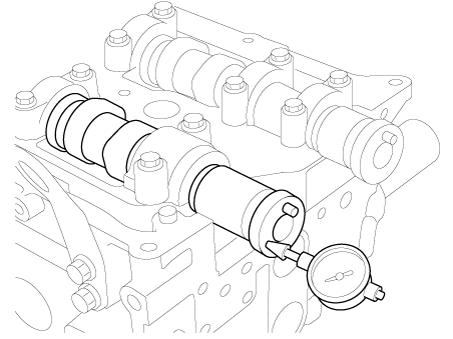
Inspect the camshaft end play.
|
Continuous variable valve timing (CVVT) Assembly
| 1. |
Clamp the camshaft using a vise. Be careful not to damage the cam lobes and journals in the vise. |
| 2. |
Rotate the CVVT clockwise and counterclockwise to make sure that it is locked. It must not rotate. |
| 3. |
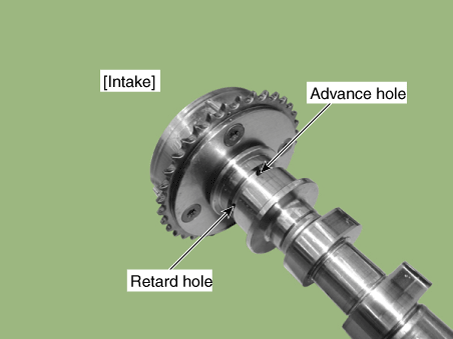
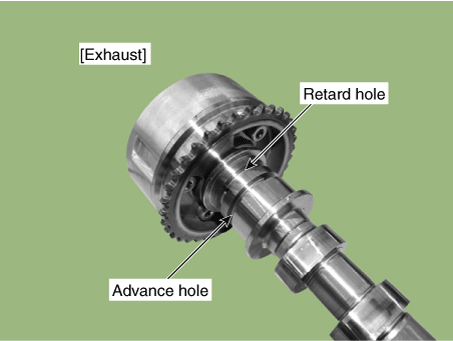
Intake CVVT : Seal one of the two advance holes in the camshaft journal with tape. Exhaust CVVT : Seal one of the two retard holes in the camshaft journal with tape.
|
| 4. |
Intake CVVT : Apply approx. 150 kPa (1.5 kgf/cm², 21 psi) of compressed air into the unsealed advance hole to release the lock. Exhaust CVVT : Apply approx. 150 kPa (1.5 kgf/cm², 21 psi) of compressed air into the unsealed retard hole to release the lock.
|
| 5. |
Intake CVVT : With compressed air applied, rotate the CVVT in the advance direction (counterclockwise) within its phasing range and check that the CVVT turns smoothly. Exhaust CVVT : With compressed air applied, rotate the CVVT in the retard direction (clockwise) and check that the CVVT turns smoothly.
|
| 6. |
Intake CVVT : Rotate the CVVT into the most retarded position (clockwise) and then check that the CVVT is locked. Exhaust CVVT : Rotate the CVVT into the most advanced position (counterclockwise) and then check that the CVVT is locked. |
| Installation |
| 1. |
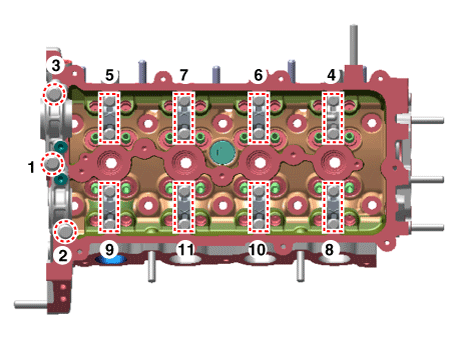
Install the camshaft.
|
| 2. |
Install the intake CVVT assembly (A) and exhaust CVVT assembly (B).
|
| 3. |
Install in the reverse order of removal. |
 CVVT & Camshaft Description and operation
Description
Continuous Variable Valve Timing (CVVT) system advances or retards the valve
timing of the intake and exhaust valve in accordance with the ECM control signal
which is calc ...
 Cylinder Head Repair procedures
Removal
Engine removal is not required for this procedure.
•
Be sure to read and follow th ...
Other information:
Kia Niro 2017 (DE HEV) Service Manual: Hybrid Power Control Unit (HPCU) Repair procedures
Removal
•
Be sure to read and follow the “General Safety Information and
Caution” before doing any work related with the high voltage system.
Failure to follow the safety instr ...
Kia Niro 2017 (DE HEV) Service Manual: Heated Steering wheel Schematic diagrams
System Circuit Diagram
Terminal Function
Housing
Pin
Function
Wire color
Pad
A
GND
Black
B
HEATER
Yellow
C
...


