Kia Niro: AVN System / AVN(Audio Video Navigation) head unit Repair procedures
| Removal |
|
| 1. |
Disconnect the negative (-) battery terminal. |
| 2. |
Remove the center fascia upper panel. (Refer to Body - "Center Fascia Panel") |
| 3. |
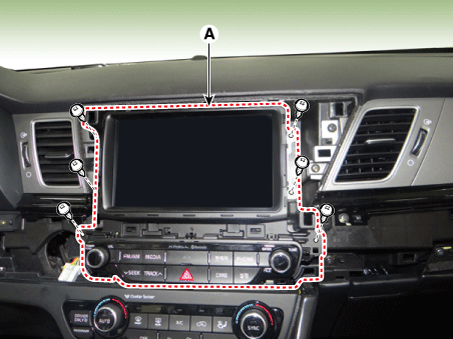
Remove the AVN head unit (A) after loosening the mounting screws.
|
| 4. |
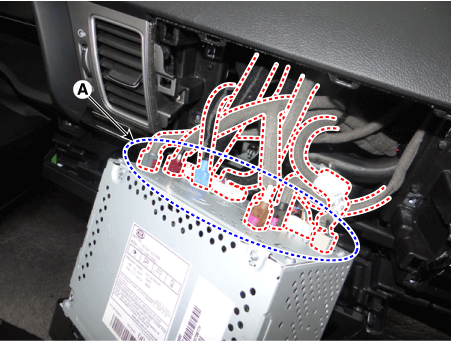
Remove the AVN head unit after disconnecting the connectors and antenna cable (A).
|
| 5. |
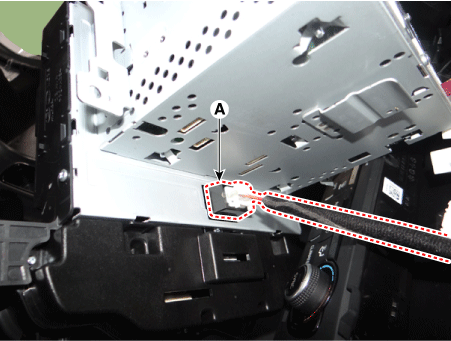
Disconnect the hazard switch connector (A).
|
| Installation |
| 1. |
Install the AVN head unit after connecting the AVN head unit connectors and cable. |
| 2. |
Install the center fascia upper panel. |
| 3. |
Connect the negative (-) battery terminal. |
|
 AVN(Audio Video Navigation) head unit Components and components location
Components
Connector Pin Information
No.
Connector A
Connector B
Connector C
1
Rear left speaker (+ ...
 Speaker Repair procedures
Inspection
Troubleshooting of the speakers
When handling the speakers :
•
D ...
Other information:
Kia Niro 2017 (DE HEV) Service Manual: Compressor Schematic diagrams
Schematic Diagrams
Connector Pin
Connector Pin Function
Connector
Pin No.
Function
A
1
12V Power Ground
2
Climate CAN Low
3
...
Kia Niro (DE HEV) Owners Manual: Folding the rear seat
The rear seatbacks can be folded to facilitate carrying long items or to increase
the luggage capacity of the vehicle.
WARNING
The purpose of the fold-down rear seatbacks is to allow you to carry longer
objects that could not be accommodated in the cargo area.
Never allow passengers to sit on ...


