Kia Niro: Heater & A/C Control Unit / Repair procedures
| Self Diagnosis |
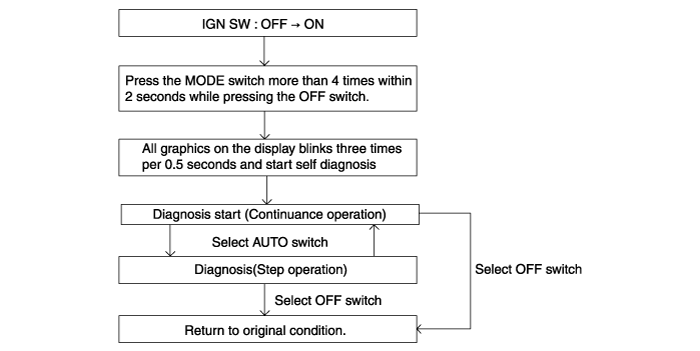
| 1. |
Self-diagnosis process.
|

| 2. |
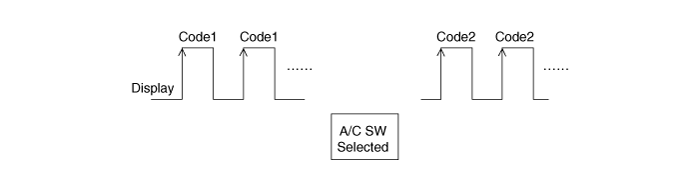
Fault code display
|


| 3. |
If fault codes are displayed during the check, inspect malfunction causes by referring to fault codes.
|
| 4. |
Fail safe
|
| Replacement |
| 1. |
Disconnect the negative (-) battery terminal. |
| 2. |
Using a screwdriver or remover, remove the front console garnish (A).
|

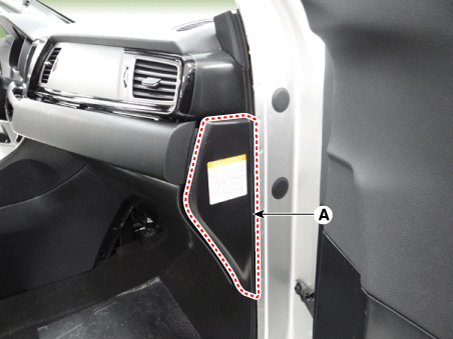
| 3. |
Using a remover, remove the crash pad side cover [RH] (A).
|
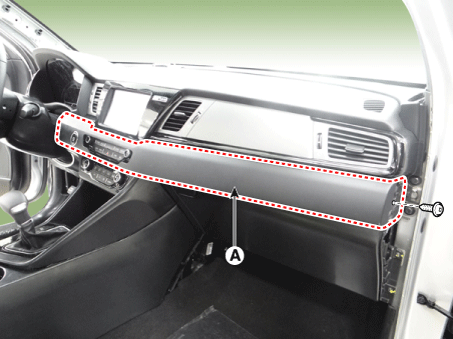
| 4. |
Loosen the screw and remove the crash pad plate [RH] (A).
|
| 5. |
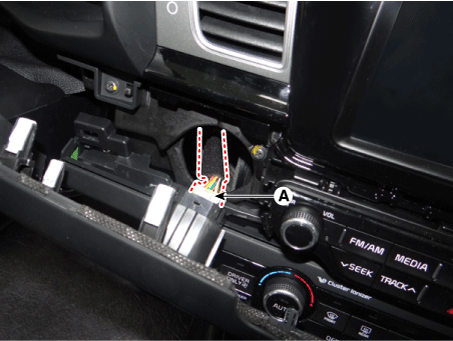
Remove the engine start button connector (A).
|
| 6. |
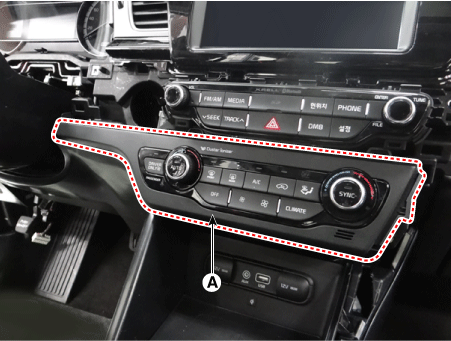
Remove the center fascia panel (A).
|
| 7. |
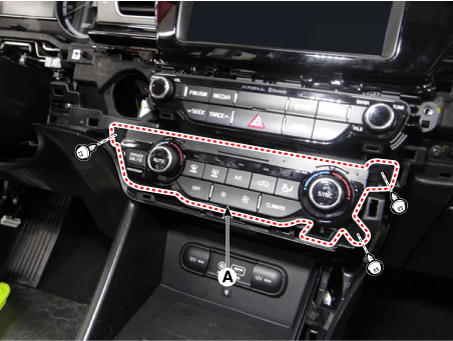
Loosen the screw and remove the heater and air conditioner control unit (A).
|
| 8. |
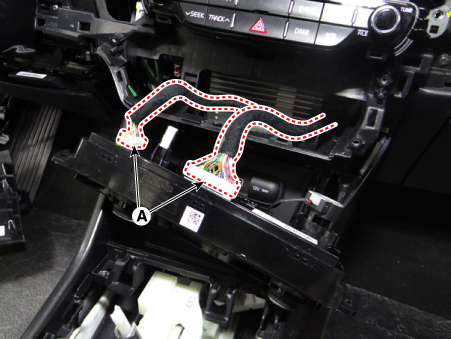
Remove the heater and the air conditioning control unit connector (A).
|
| 9. |
Install in the reverse order of removal. |
 Components and components location
Components
[AUDIO Type]
Connector Pin Function
No.
Connector A
Connector B
1
Battery
...
 Heater
...
Other information:
Kia Niro 2017 (DE HEV) Service Manual: Components and components location
Component Location
1. Fuel filler door
...
Kia Niro 2017 (DE HEV) Service Manual: Safety Plug Repair procedures
Removal
•
Be sure to read and follow the “General Safety Information and
Caution” before doing any work related with the high voltage system.
Failure to follow the safety instr ...
