Kia Niro: Rear Wiper/Washer / Rear Wiper Motor Repair procedures
| Inspection |
Rear Wiper Motor
| 1. |
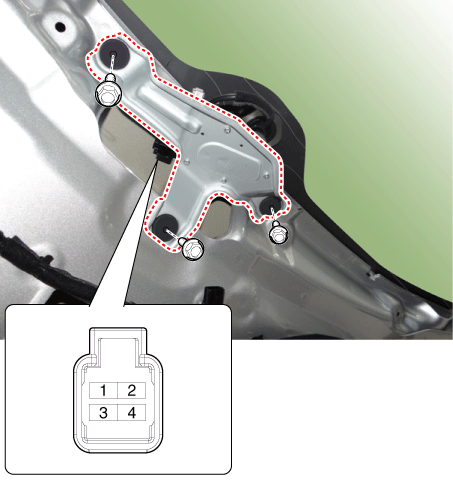
Remove the connector from the rear wiper motor. |
| 2. |
Connect positive (+) battery cables to terminal 4 and negative (-) battery cables to terminal 3 respectively. |
| 3. |
Check that the motor operates normally. If they are abnormal, replace the washer motor.
|
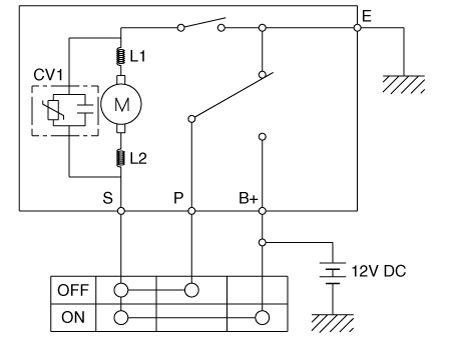
Automatic Stop Operation Check
| 1. |
Operate the motor at low speed using the stalk control. |
| 2. |
Stop the motor operation anywhere except at the off position by disconnecting the motor connector. |
| 3. |
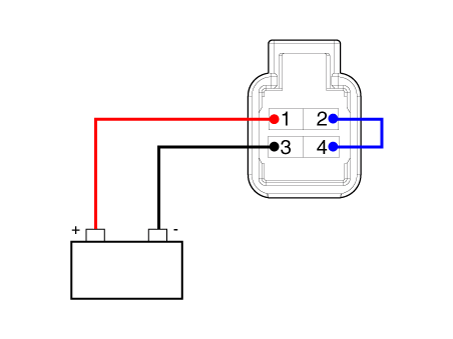
Connect the positive (+) lead from the battery to terminal 1 and the negative (-) lead to terminal 3. |
| 4. |
Connect the motor terminal 2 and terminal 4. |
| 5. |
Check that the motor stops running at the off position.
|
| Inspection (With KDS/GDS) |
| 1. |
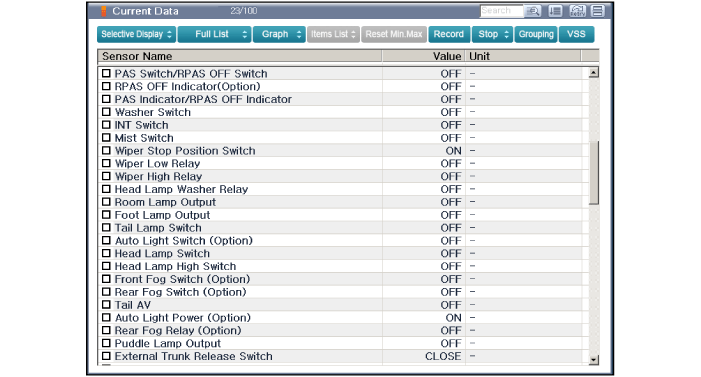
In the body electrical system, failure can be quickly diagnosed by using the vehicle diagnostic system (KDS/GDS). The diagnostic system(KDS/GDS) provides the following information.
|
| 2. |
Select the 'Car model' and the 'Body Control Module (BCM)' to be checked in order to check the vehicle with the tester. |
| 3. |
Select the 'Current Data' menu to search the current state of the input/output data.
|
| Removal |
Set up to automatically operate wipers of rear window glass when reverse gear shift is engaged while the wipers of windshield glass are in operation in 'Instrument Panel - User Setting Menu (USM). |
| 1. |
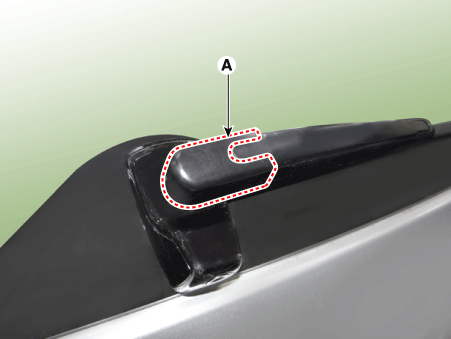
Remove the rear wiper cap (A).
|
| 2. |
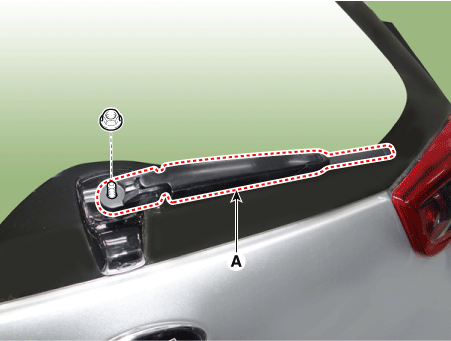
Remove the rear wiper arm & blade (A) after loosening the mounting nut.
|
| 3. |
Remove the tailgate trim after opening the tailgate. (Refer to Body - "Tailgate Trim) |
| 4. |
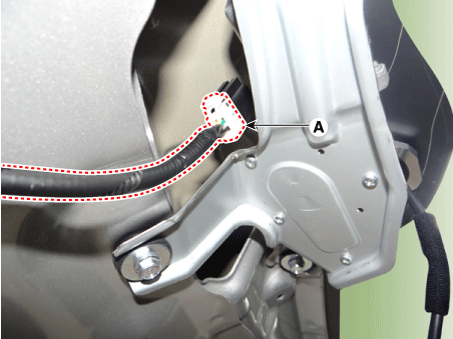
Disconnect the rear wiper motor connector (A).
|
| 5. |
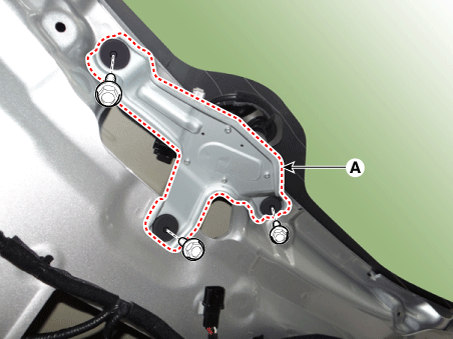
Remove the rear wiper motor assembly (A) after loosening the mounting bolts.
|
| Installation |
| 1. |
Install the rear wiper motor assembly.
|
| 2. |
Install the tailgate trim. |
| 3. |
Install the rear wiper arm and rear wiper cap.
|
| 4. |
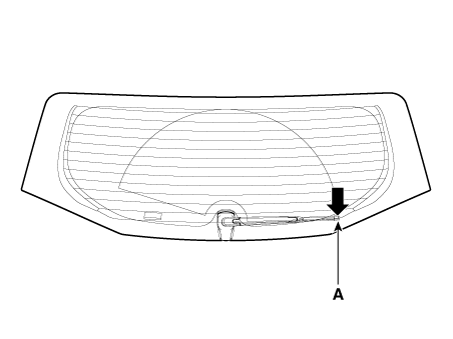
Set the rear wiper blade and to the lowest defogger heat line and tailgate glass.
|
 Components and components location
Component Location
1 . Rear wiper arm & blade
2 . Rear wiper arm nut
3 . Back view camera
4 . Rear wiper motor assembly
5 . Rear wiper motor b ...
 Rear Washer Switch Repair procedures
Inspection
Multifunction Switch
Inspection
1.
Check for continuity between the terminals in each switch position as
shown below.
[Left Handle
Drive]
...
Other information:
Kia Niro (DE HEV) Owners Manual: Front fog light
Fog lights are used to provide improved visibility when visibility is poor due
to fog, rain or snow, etc. The fog lights will turn on when the fog light switch
(1) is turned on after the parklight is turned on.
To turn off the fog lights, turn the fog light switch (1) to the OFF position.
CA ...
Kia Niro 2017 (DE HEV) Service Manual: Multimedia Jack Description and operation
Description
The multimedia jack on the console upper cover is for customers who like to listen
to external portable music players like the MP3 etc., through the vehicle's sound
system when it is linked to this jack. The customer has this added option.
In case of distorted soun ...

