Kia Niro: AVN System / Multimedia Jack Repair procedures
| Removal |
Multimedia Jack
Put on gloves to protect your hands. |

|

| 1. |
Disconnect the negative (-) battery terminal. |
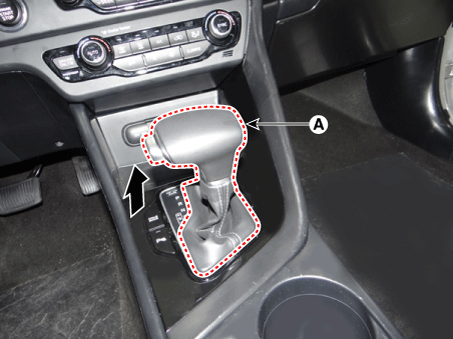
| 2. |
Remove the gear knob & boots (A) pull both of it up.
|
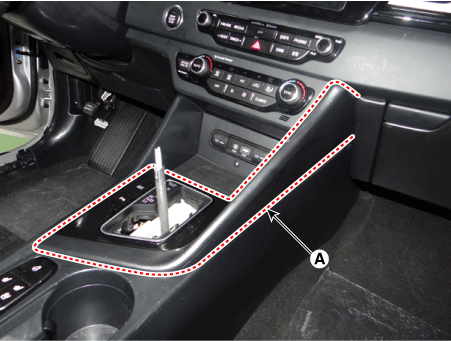
| 3. |
Remove the console upper cover (A) by using a remover.
|
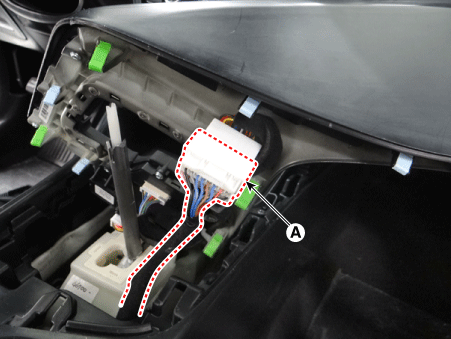
| 4. |
Disconnect the console upper cover connector (A).
|
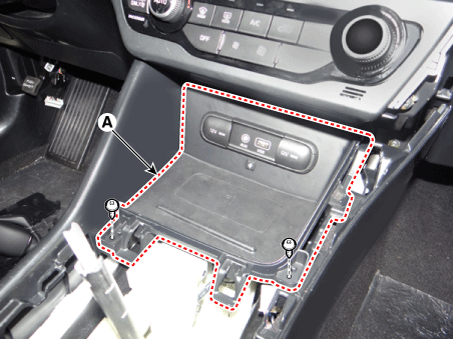
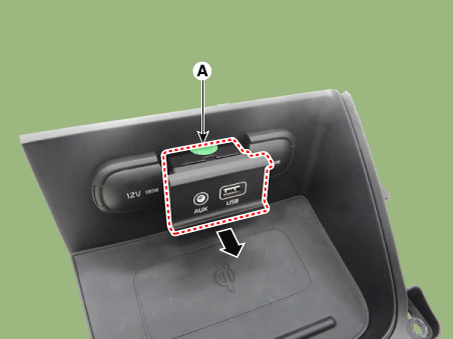
| 5. |
Remove the console tray (A) after loosening the mounting screws.
|
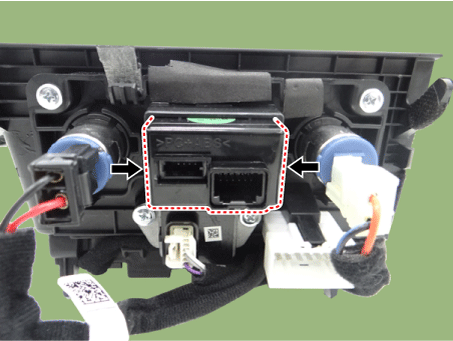
| 6. |
Disconnect the console tray connectors (A).
|
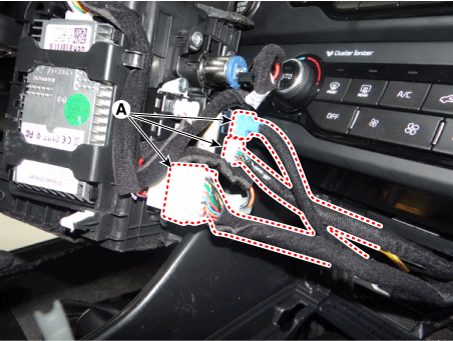
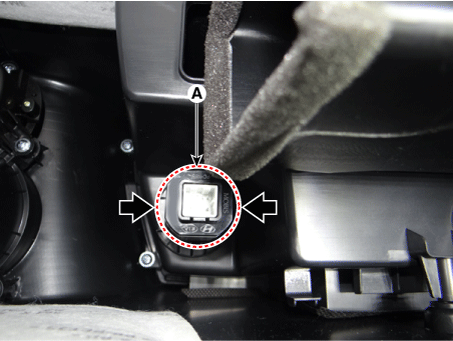
| 7. |
Remove the multimedia jack (A) after releasing the fixed hooks.
|
USB Charger (Console Armrest)
Put on gloves to protect your hands. |
|
| 1. |
Disconnect the negative (-) battery terminal. |
| 2. |
Remove the floor console assembly. (Refer to Body - "Floor Console Assembly") |
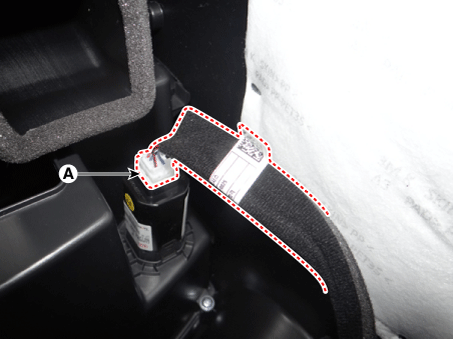
| 3. |
Disconnect the USB charger connector (A).
|
| 4. |
Remove the USB charger (A) after releasing the fixed hooks.
|
| Installation |
Multimedia Jack
| 1. |
Install the multimedia jack. |
| 2. |
Connect the console tray connectors. |
| 3. |
Install the console tray. |
| 4. |
Connect the console upper cover connectors. |
| 5. |
Install the console upper cover. |
| 6. |
Install the gear knob & boots. |
| 7. |
Connect the negative (-) battery terminal.
|
USB Charger (Console Armrest)
| 1. |
Install the USB charger. |
| 2. |
Connect the USB charger connector. |
| 3. |
Install the floor console assembly. |
| 4. |
Connect the negative (-) battery terminal.
|
 Multimedia Jack Description and operation
Description
The multimedia jack on the console upper cover is for customers who like to listen
to external portable music players like the MP3 etc., through the vehicle's sound
sy ...
 Mic Repair procedures
Inspection
1.
Disconnector the negative (-) battery terminal.
2.
Remove the overhead console lamp.
(Refer to Lighting System - "Overhead ...
Other information:
Kia Niro (DE HEV) Owners Manual: Distributing the sealant
11. Immediately drive approximately 7~10km (4~6miles or, about 10min) to evenly
distribute the sealant in the tire.
CAUTION
Do not exceed a speed of 60 km/h (35 mph). If possible, do not fall below
a speed of 20 km/h (12 mph).
While driving, if you experience any unusual vibration, ride distu ...
Kia Niro 2017 (DE HEV) Service Manual: Rear Door Belt Outside Weatherstrip Repair procedures
Replacement
1.
Pull down the rear door window glass to the lowest level by pressing
the power window glass switch.
2.
Remove the rear door belt outside weatherstrip (A) after loosening the
mounting screw.
3.
...
