Kia Niro: Audio / Multimedia Jack Repair procedures
| Removal |
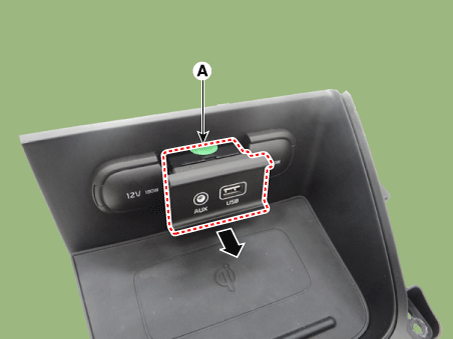
Multimedia Jack
Put on gloves to protect your hands. |

|

| 1. |
Disconnect the negative (-) battery terminal. |
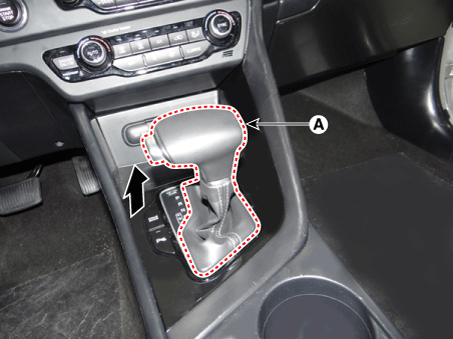
| 2. |
Remove the gear knob & boots (A) pull both of it up.
|
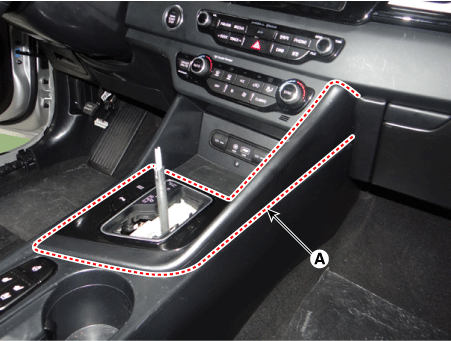
| 3. |
Remove the console upper cover (A) by using a remover.
|
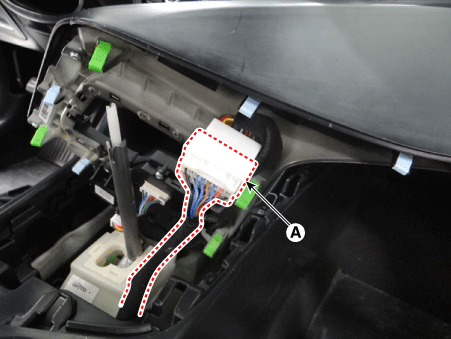
| 4. |
Disconnect the console upper cover connector (A).
|
| 5. |
Remove the console tray (A) after loosening the mounting screws.
|

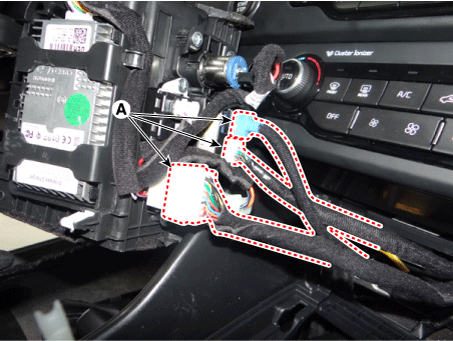
| 6. |
Disconnect the console tray connectors (A).
|
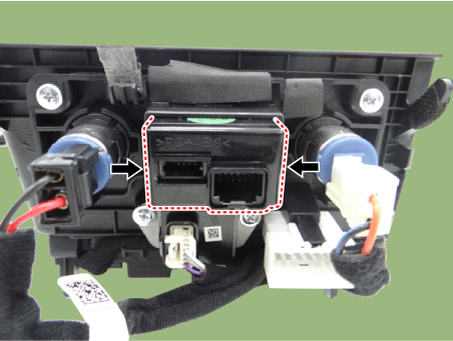
| 7. |
Remove the multimedia jack (A) after releasing the fixed hooks.
|
USB Charger (Console Armrest)
Put on gloves to protect your hands. |
|
| 1. |
Disconnect the negative (-) battery terminal. |
| 2. |
Remove the floor console assembly. (Refer to Body - "Floor Console Assembly") |
| 3. |
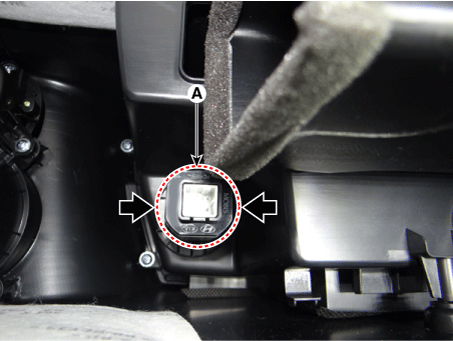
Disconnect the USB charger connector (A).
|

| 4. |
Remove the USB charger (A) after releasing the fixed hooks.
|
| Installation |
Multimedia Jack
| 1. |
Install the multimedia jack. |
| 2. |
Connect the console tray connectors. |
| 3. |
Install the console tray. |
| 4. |
Connect the console upper cover connectors. |
| 5. |
Install the console upper cover. |
| 6. |
Install the gear knob & boots. |
| 7. |
Connect the negative (-) battery terminal.
|
USB Charger (Console Armrest)
| 1. |
Install the USB charger. |
| 2. |
Connect the USB charger connector. |
| 3. |
Install the floor console assembly. |
| 4. |
Connect the negative (-) battery terminal.
|
 Multimedia Jack Description and operation
Description
The multimedia jack on the console upper cover is for customers who like to listen
to external portable music players like the MP3 etc., through the vehicle's sound
sy ...

Other information:
Kia Niro (DE HEV) Owners Manual: Good driving practices
Never move the shift lever from P (Park) or N (Neutral) to any other position
with the accelerator pedal depressed.
Never move the shift lever into P (Park) when the vehicle is in motion.
Be sure the car is completely stopped before you attempt to shift into R
(Reverse) or D (Drive).
...
Kia Niro 2017 (DE HEV) Service Manual: Components and components location
Component Location
1. Windshield wiper arm & blade
2. Wiper & washer switch
3. Windshield washer hose & nozzle
4. Wiper motor & linkage assembly
5. Washer motor
6. Washer fluid level sensor
7. Washer reservoir tank
8. ...
