Kia Niro: Intake And Exhaust System / Intake Manifold Repair procedures
| Removal and Installation |
|

| 1. |
Shut off the high voltage circuit. (Refer to Engine Mechanical System - “High Voltage Shut off Procedure”) |
| 2. |
Remove the air cleaner assembly. (Refer to Intake and Exhaust System - "Air Cleaner") |
| 3. |
Remove the engine room under cover. (Refer to Engine and Transaxle Assembly - "Engine Room Under Cover") |
| 4. |
Disconnect the wiring connectors and harness clamps and remove the wiring protector around the intake manifold.
|
| 5. |
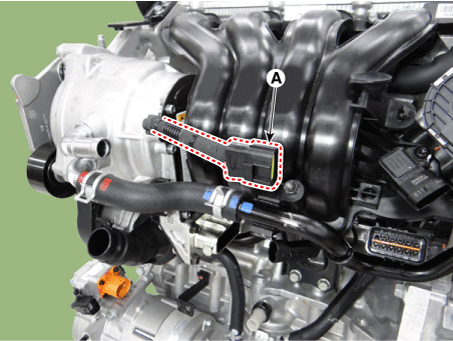
Remove the hybrid starter generator (HSG) connector (A).
|
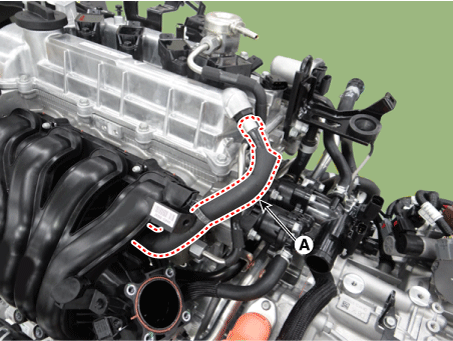
| 6. |
Separate the hybrid starter generator (HSG) coolant hose & pipe (A).
|
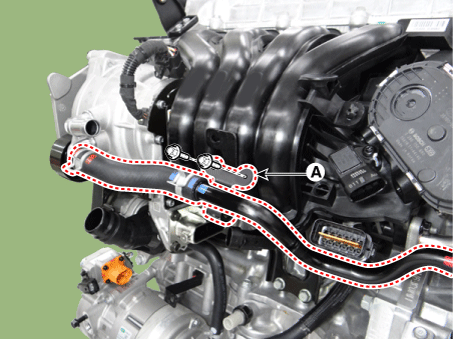
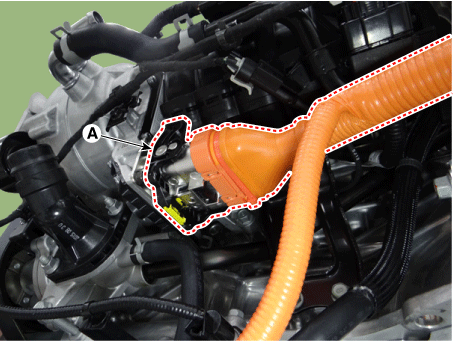
| 7. |
Disconnect the positive crankcase ventilation (PCV) hose (A).
|
| 8. |
Unfasten the electric throttle body control (ETC) module bolts. (Refer to Engine Control / Fuel System - "Electric Throttle Body Control System (ETC)") |
| 9. |
Unfasten the EGR cooler pipe C mounting nuts (A).
|
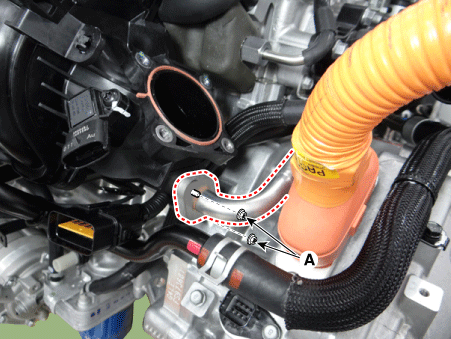
| 10. |
Disconnect the hybrid starter generator (HSG) high voltage cable connector (A).
|
| 11. |
Remove the intake manifold stay (A).
|
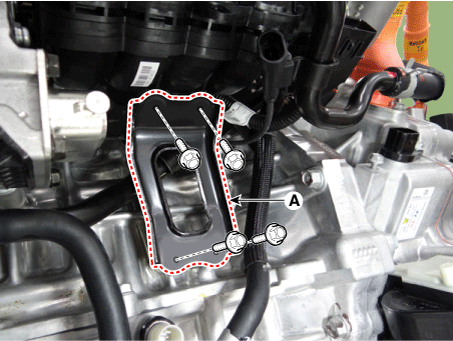
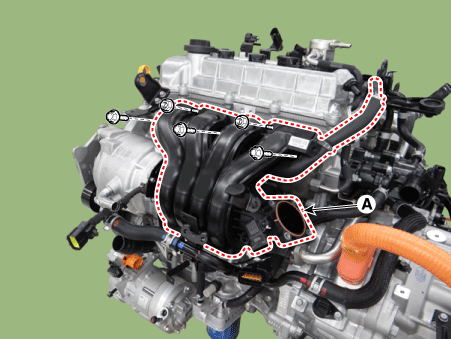
| 12. |
Remove the intake manifold (A) with the gasket.
|

| 13. |
Install in the reverse order of removal.
|
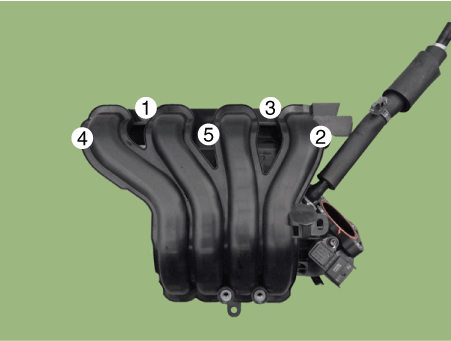
 Intake Manifold Components and components location
Components
1. Intake manifold gasket
2. Intake manifold
3. Intake manifold stay
4. EGR cooler pipe C gasket
5. Electronic throttle control (ETC)
...
 Exhaust Manifold Components and components location
Components
1. Exhaust manifold gasket
2. Exhaust manifold
3. Exhaust manifold stay
4. Heat protector
...
Other information:
Kia Niro 2017 (DE HEV) Service Manual: Repair procedures
Adjustment
Inspect Glass Alignment
1.
Inspect the step height between the roof panel (A) and the glass weatherstrip
(B) and then adjust it if necessary.
Alignment adjustment
Standard value [mm(in.)]
(1) Front edge : 0 mm (0 in.)
...
Kia Niro (DE HEV) Owners Manual: Front windshield wiper blade
Type A
1. Raise the wiper arm and turn the wiper blade assembly to expose the plastic
locking clip.
CAUTION
Do not allow the wiper arm to fall against the windshield, since it may chip
or crack the windshield.
2. Compress the clip and slide the blade assembly downward.
3. Lift it off ...
