Kia Niro: Hood / Hood Latch Repair procedures
| Replacement |
| 1. |
Remove the front bumper cover. (Refer to Front Bumper - "Front Bumper Cover") |
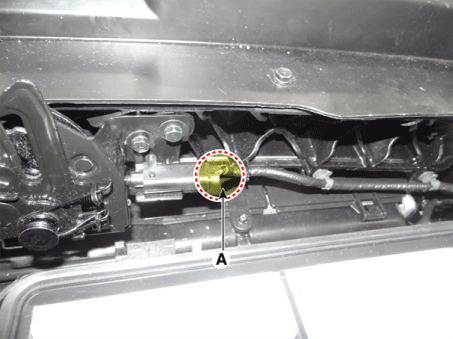
| 2. |
Disconnect the hood lower latch connector (A).
|
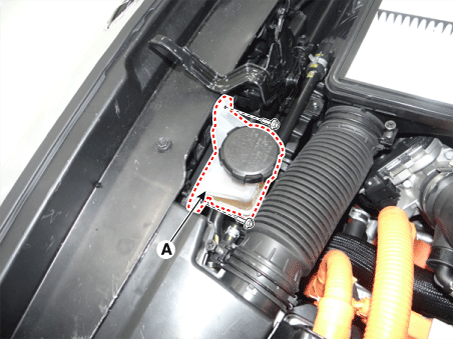
| 3. |
Remove the engine clutch reservoir (A) after loosening the bolts.
|
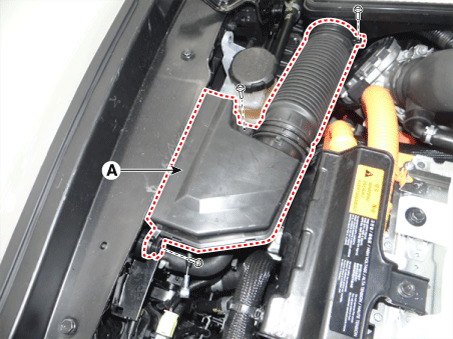
| 4. |
Remove the air duct (A).
|
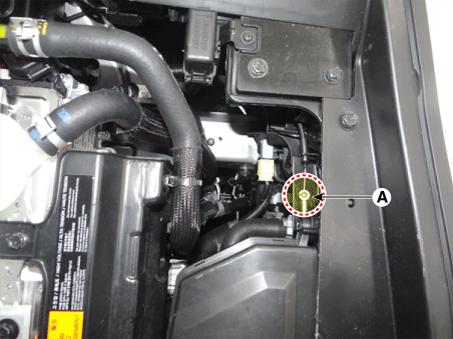
| 5. |
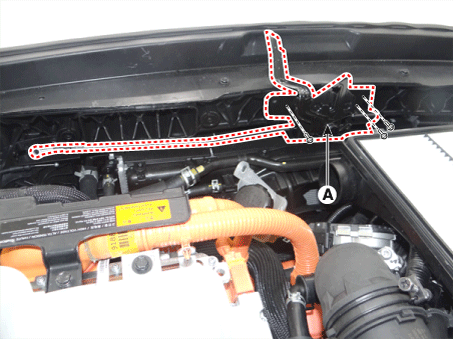
Disconnect the hood latch connector (A).
|
| 6. |
Remove the hood lower latch assembly (A) after loosening the bolts.
|
| 7. |
Install in the reverse order of removal.
|

 Hood Latch Components and components location
Component Location
1. Hood lower latch assembly
...
 Interior Trim
...
Other information:
Kia Niro (DE HEV) Owners Manual: Forward and backward adjustment
The headrest may be adjusted forward to 3 different positions by pulling the
headrest forward to the desired detent.
To adjust the headrest to it’s furthest backwards position, Pull the headrest
fully forward to the farthest position and release it.
Adjust the headrest so that it properly ...
Kia Niro 2017 (DE HEV) Service Manual: Front Strut Assembly Repair procedures
Removal
1.
Remove the wheel and tire.
Tightening torque:
107.9 - 127.5 N·m (11.0 - 13.0 kgf·m, 79.6 - 94.0 lb·ft)
Be care ...
