Kia Niro: Driveshaft Assembly / Dynamic Damper Repair procedures
| Replacement |
| 1. |
Remove the front driveshaft. (Refer to Driveshaft Assembly - “Front Driveshaft”) |
| 2. |
Remove the TJ joint assembly. (Refer to Driveshaft Assembly - “TJ joint”) |
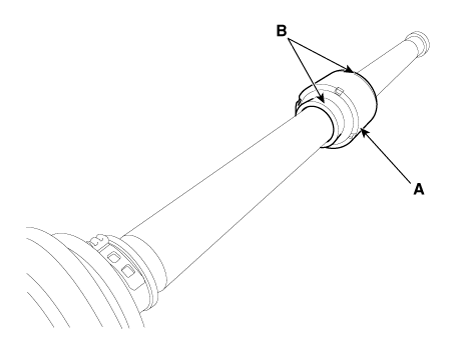
| 3. |
Remove the remove the both side of band (B) of the dynamic damper (A).
|
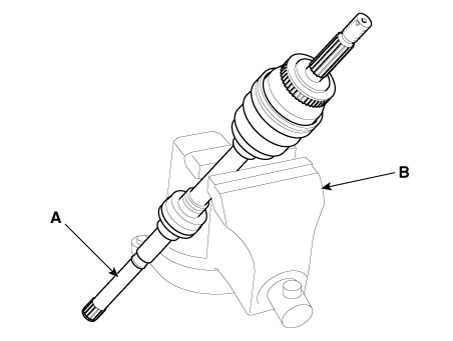
| 4. |
Fix the driveshaft (A) with a vice (B) as illustrated.
|
| 5. |
Apply soap powder on the shaft to prevent being damaged between the shaft spline and the dynamic damper when the dynamic damper is removed. |
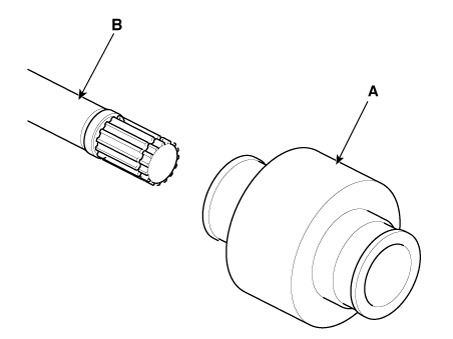
| 6. |
Seperate the dynamic damper (A) from the shaft (B) carefully.
|
| Installation |
| 1. |
Apply soap powder on the shaft to prevent being damaged between the shaft spline and the dynamic damper. |
| 2. |
Install the dynamic damper. |
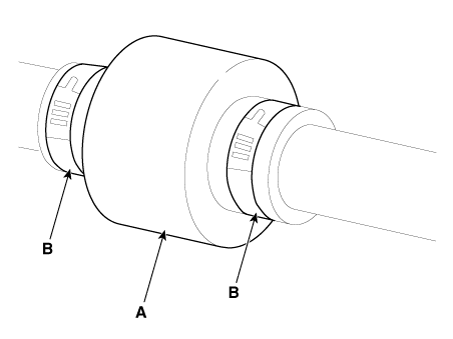
| 3. |
Install the dynamic damper band (A). |
| 4. |
Using the SST(09495-3K000), secure the TJ boot bands (B).
|
| 5. |
Install the TJ joint assembly. (Refer to Driveshaft Assembly - “TJ Joint”) |
| 6. |
Install the front driveshaft. (Refer to Driveshaft Assembly - “Front Driveshaft”) |
| 7. |
Check the front alignment. (Refer to Suspension System - "Front Alignment") |
 Dynamic Damper Components and components location
Components
1. BJ assembly
2. BJ circlip
3. BJ boot band
4. BJ boot
5. Dynamic damper band
6. Dynamic damper
7. Shaft
8. TJ boot band
...
 BJ Boot Components and components location
Components
1. BJ assembly
2. BJ circlip
3. BJ boot band
4. BJ boot
5. Dynamic damper band
6. Dynamic damper
7. Shaft
8. TJ boot band
...
Other information:
Kia Niro 2017 (DE HEV) Service Manual: TPMS Receiver Repair procedures
Removal
1.
Disconnect the battery negative cable.
2.
Remove the glove box.
(Refer to Body - "Glove Box Housing")
3.
Disconnect the blower motor connector (A).
4.
Disconnect ...
Kia Niro 2017 (DE HEV) Service Manual: Quarter Garnish Repair procedures
Replacement
Put on gloves to protect your hands.
•
Use a plastic panel removal tool to remove interior trim pie ...
