Kia Niro: Audio / Antenna Repair procedures
| Removal |
Roof antenna
| 1. |
Disconnect the negative (-) battery terminal. |
| 2. |
Remove the roof trim assembly. (Refer to Body - "Roof Trim Assembly") |
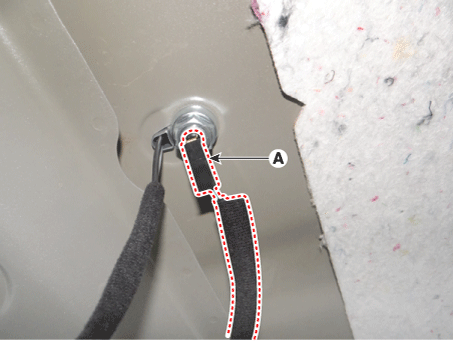
| 3. |
Disconnect the roof antenna cable and connector (A).
|
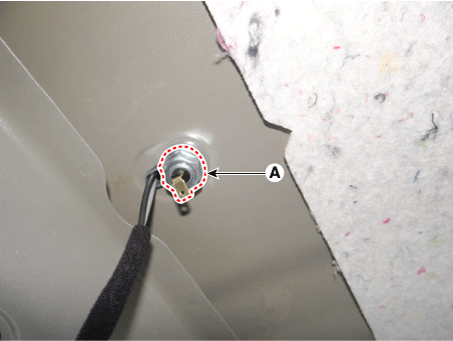
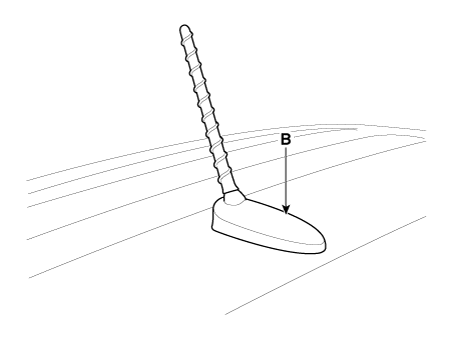
| 4. |
Remove the roof antenna (B) after loosening a nut (A).
|
| Installation |
Roof anenna
| 1. |
Install the roof antenna. |
| 2. |
Connect the roof antenna cable and connector. |
| 3. |
Install the roof trim assembly. |
| 4. |
Connect the negative (-) battery terminal.
|

| Inspection |
Antenna Cable
| 1. |
Check for continuity between the center poles of antenna cable.
|
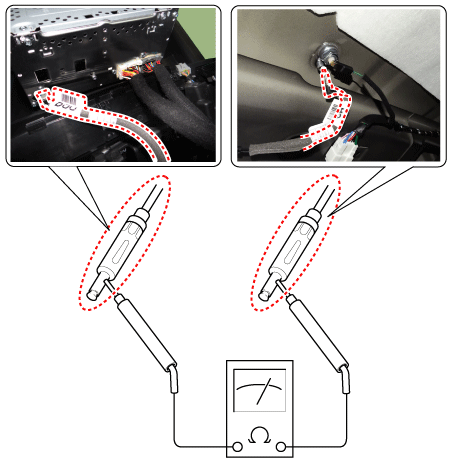
| 2. |
Check for continuity between the outer poles of antenna cable. There should be continuity.
|
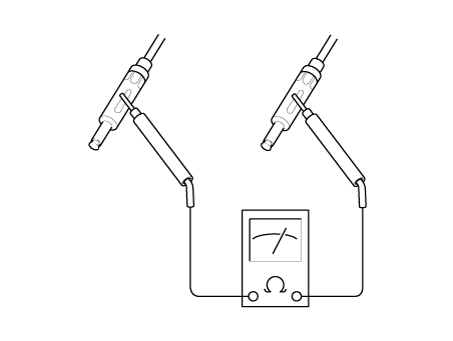
| 3. |
If there is no continuity, replace the antenna cable. |
| 4. |
Check for continuity between the center pole (A) and outer pole (B) of antenna cable. There should be no continuity.
|
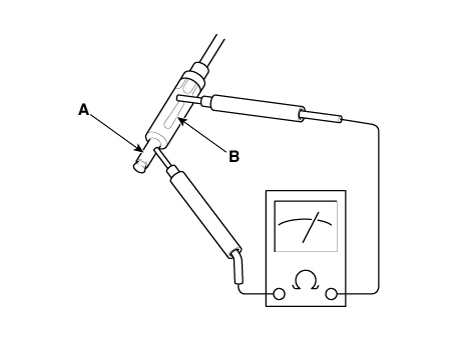
| 5. |
If there is continuity, replace the antenna cable. |
 Antenna Components and components location
Components
[AM/FM Antenna]
...
 Audio Remote Control Components and components location
Components
1. Left Remote Control Switch
(Audio + Hands free + Voice)
2. Right Remote Control Switch
(Cruise+Trip Computer)
...
Other information:
Kia Niro 2017 (DE HEV) Service Manual: Cylinder Head Cover Components and components location
Components
1. Cylinder head cover
2. High pressure fuel pump gasket
3. Cylinder head cover gasket
...
Kia Niro 2017 (DE HEV) Service Manual: Components and components location
Components Location
1. PCV Valve
2. Canister
3. Purge control solenoid valve (PCSV)
4. Fuel Tank Air Filter
5. Catalytic converter (WCC+UCC)
1. PCV Valve
2. Canister
...
